With this setup, the remote students can view their classmates and vice versa, presentations are visible to all students, and all parties can be heard. As a best practice, the in-person student should present before the remote ones. This order will simplify the number of technological steps.
In order to conduct hybrid presentations, a webcam should be checked out. Request a webcam on a Tripod form. Steps should be taken prior to the day of presentations. On the day of presentations, both the cynap device and the professor's personal laptop should be utilized.
Prior to presentations
1a. Request a webcam on a tripod. Request a webcam on a Tripod form
2a. Have each student (especially those in-person) email you their presentations.
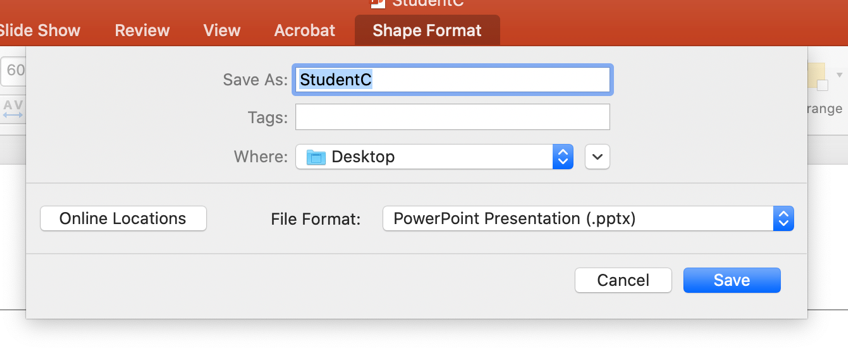
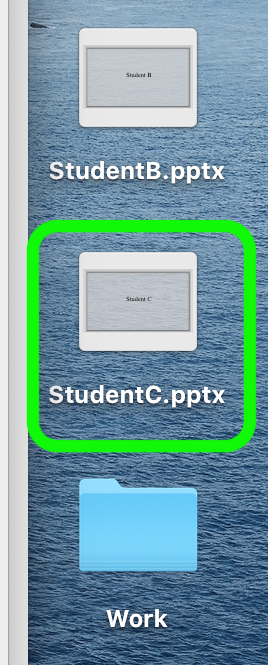
3a. Be sure that the students save their presentations with their name.
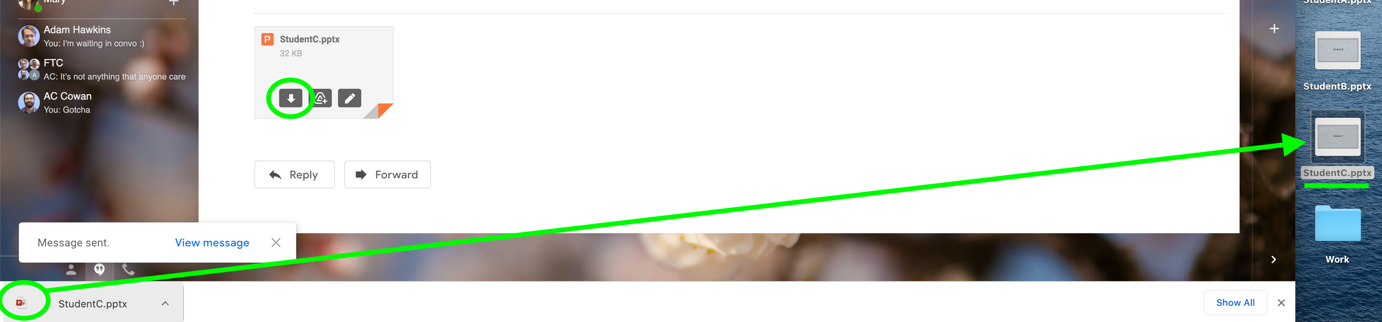
4a. Next, save each of the in-person students’ presentations to your personal laptop. In the email, click the download icon. Then drag the presentation from the download bar onto your laptop’s desktop.
5a. Next, on your personal laptop, go to: https://zoom.us/ and select sign in, which is located
in the top righthand corner.
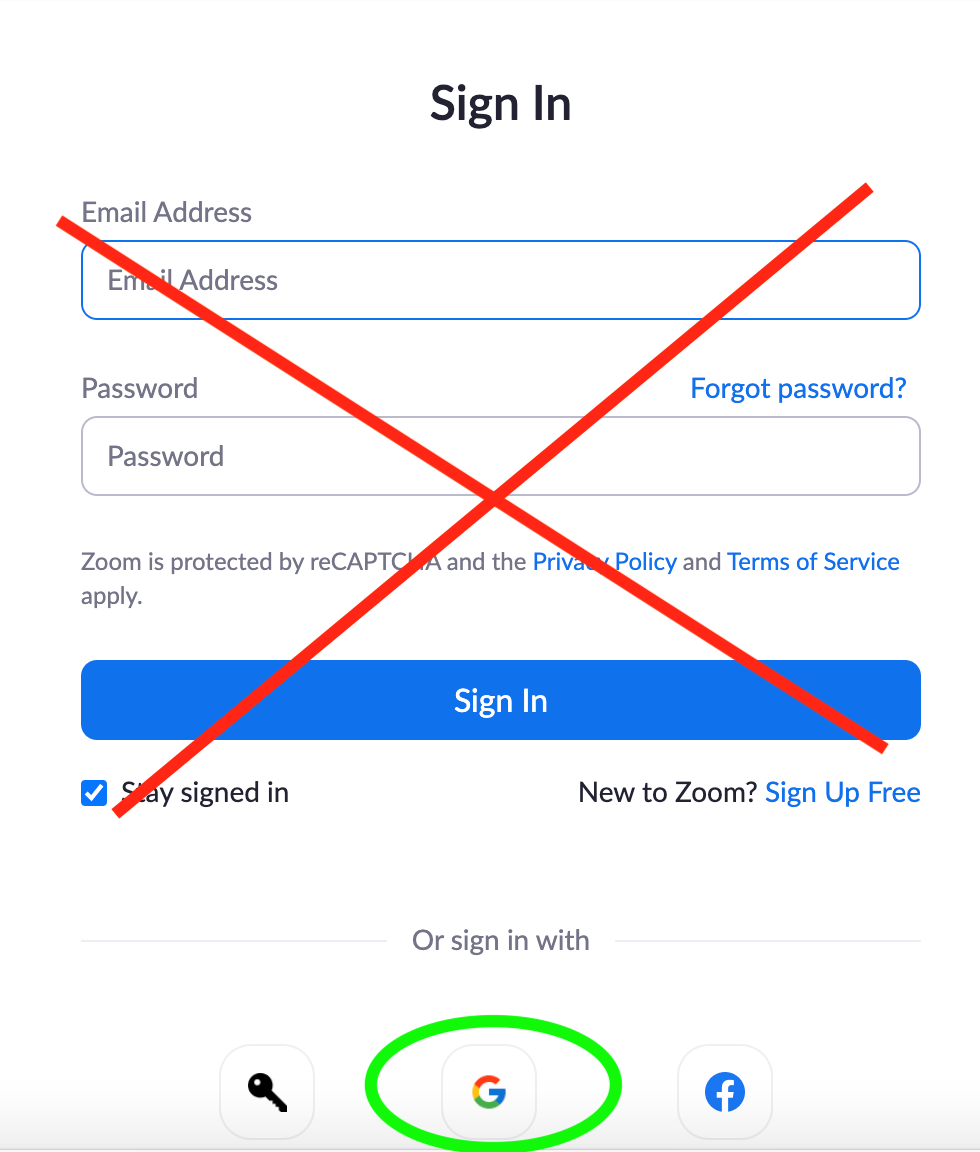
 6a. Sign in with Google. Do not use the initial sign in section.
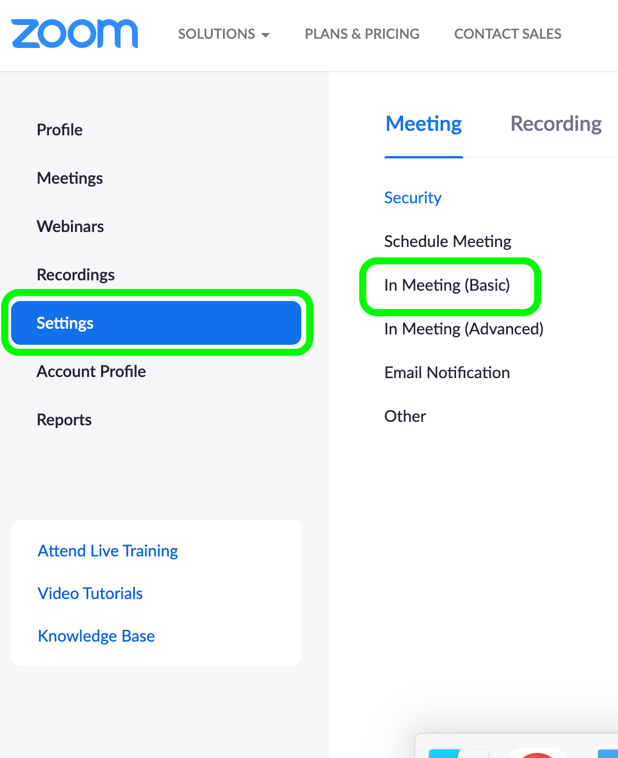
7a. Select “Settings” and click “In Meeting (Basic).”
8a. Under “Who can share,” select “All participants.” This allows for remote students to share their presentations.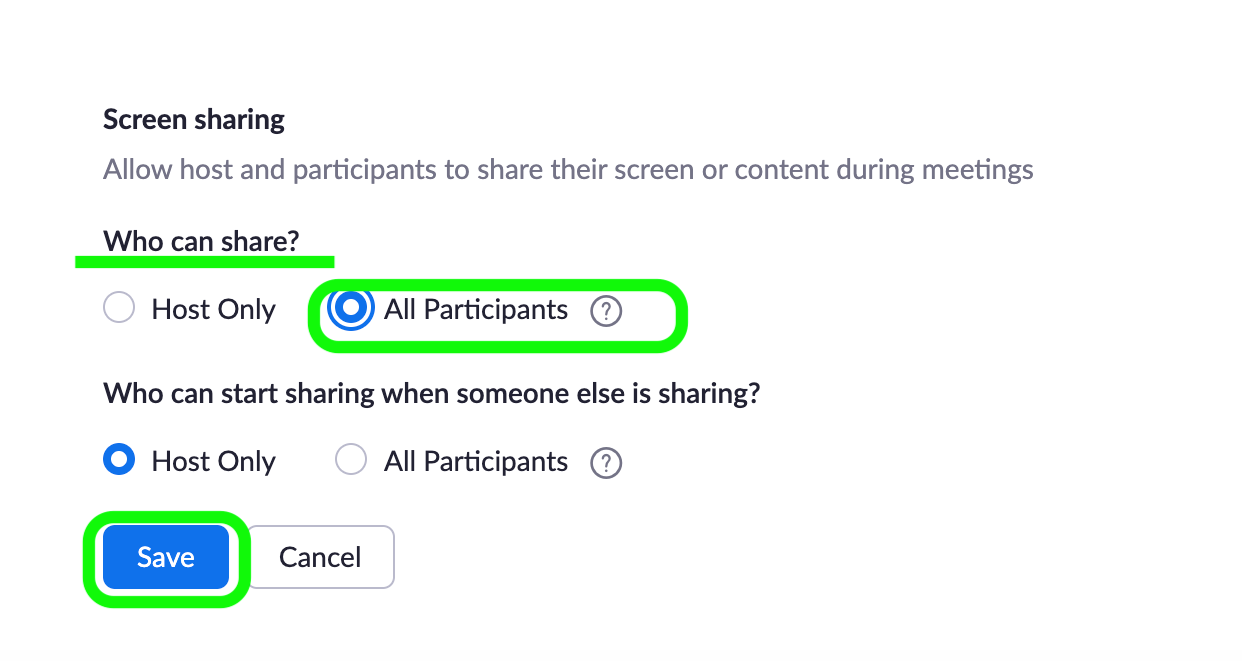
Presentation Day
CYNAP
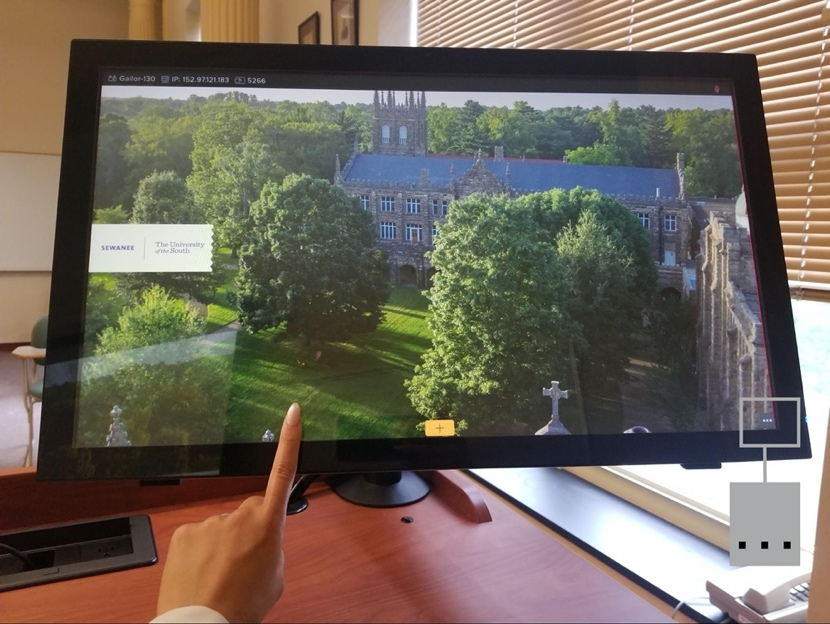
1b. Tap anywhere on the screen and “Three Dots” will appear in the bottom right corner of the screen. Select these “Three Dots” and a grey window will pop up at the base of the screen.
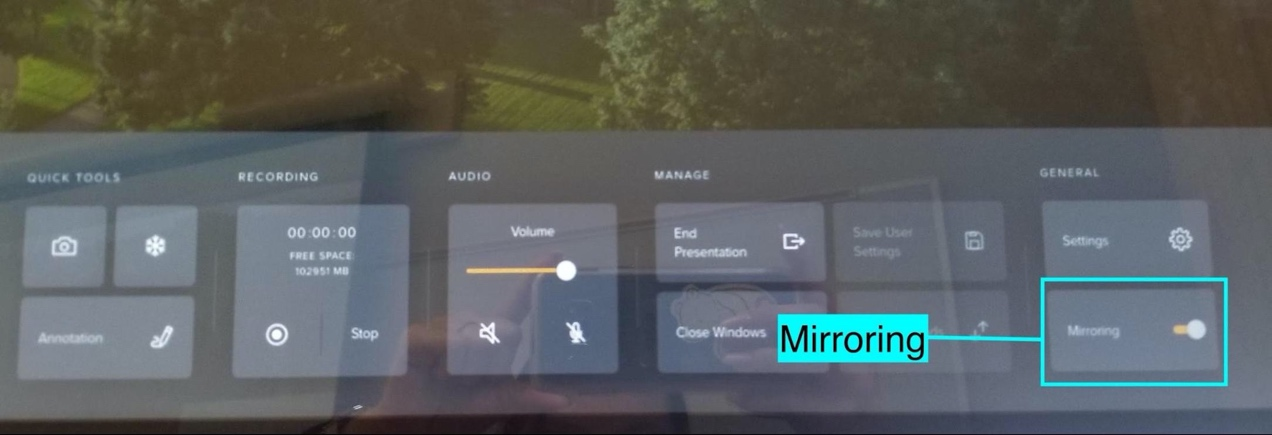
2b. To begin mirroring the CYNAP with the Projector, tap the “Three Dots,” locate the “Mirroring” section, and slide the “Circle” to the right.
3b. Now, tap anywhere on the CYNAP screen and a “Plus Sign” will appear at its base.
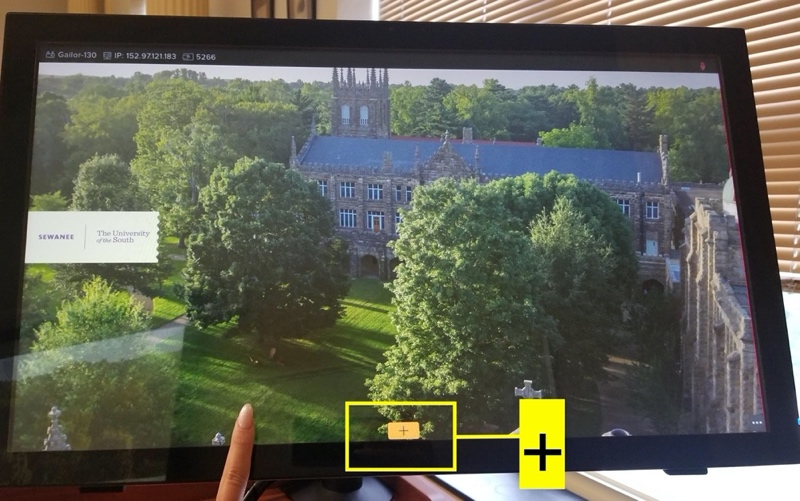
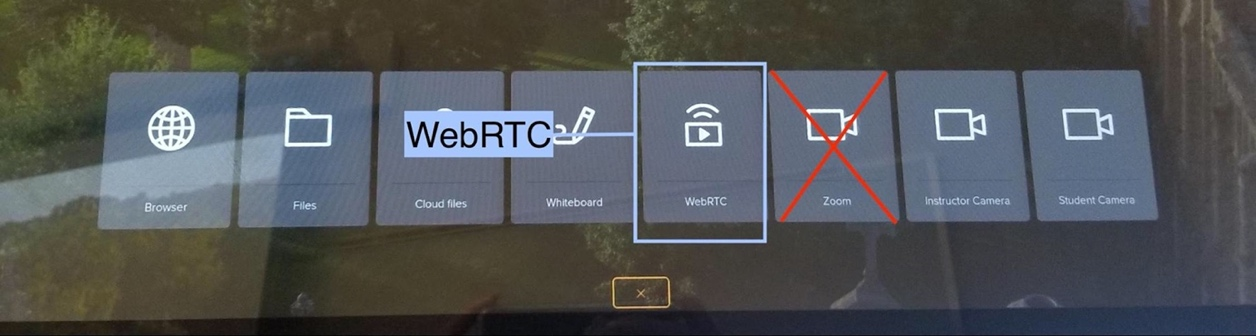
4b. Tap the “Plus Sign” and a grey window will pop up at the base of the screen. To open Zoom, select “WebRTC.” *Do not use the Zoom icon.
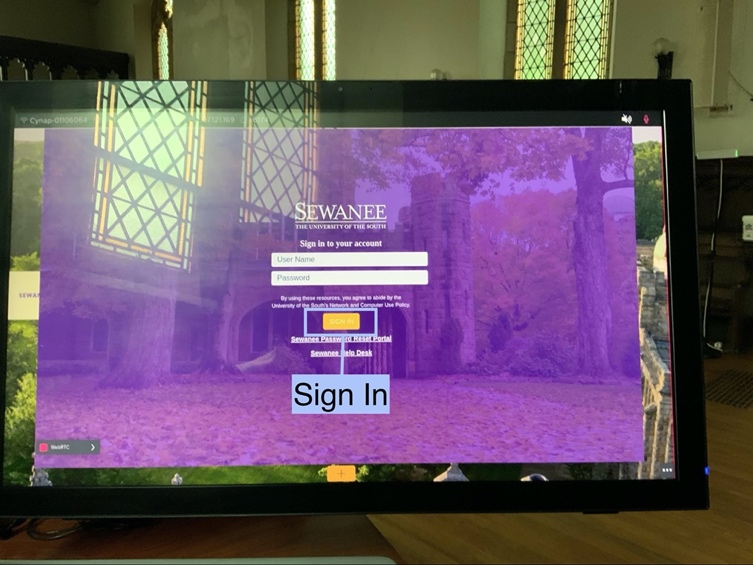
5b. Enter your banner credentials and tap “Sign In.”
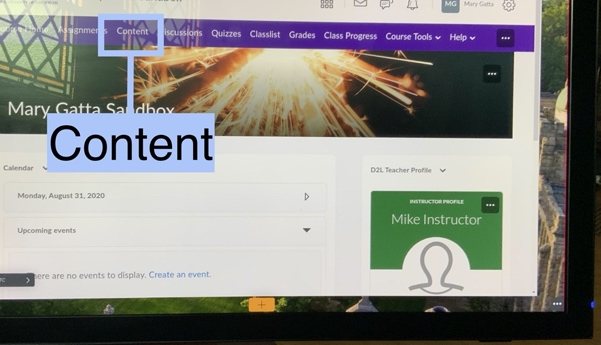
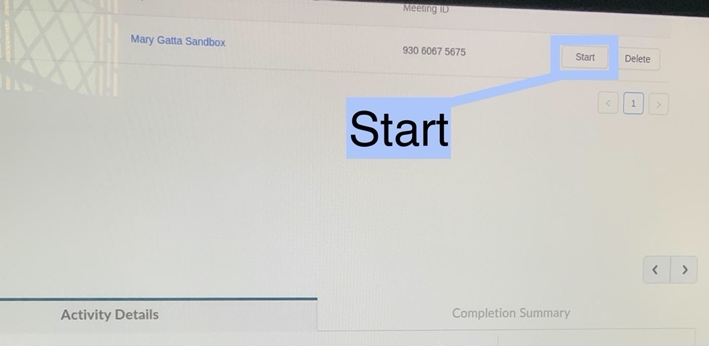
6b. From your course’s page, click the “Content” tab.
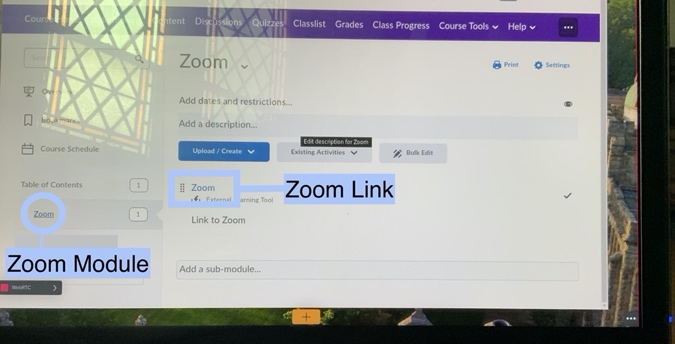
7b. Select the “Zoom Link.
8b. Press “Start.” *You may need to scroll up to find it.
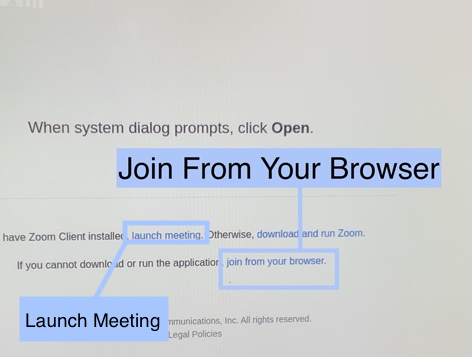
9b. Click “Launch Meeting” and choose “Join From Your Browser.”
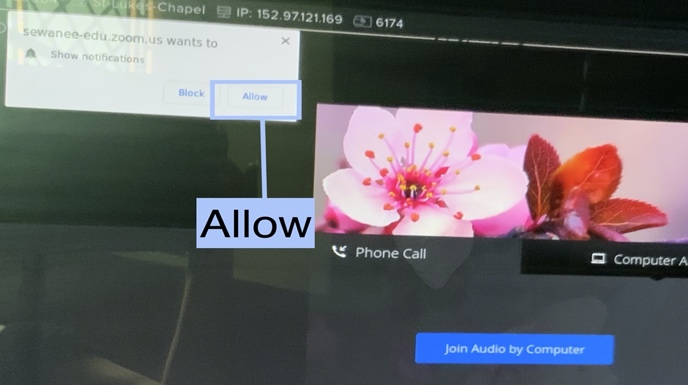
10b. When Zoom opens, a window concerning notifications will appear. Tap "Allow."
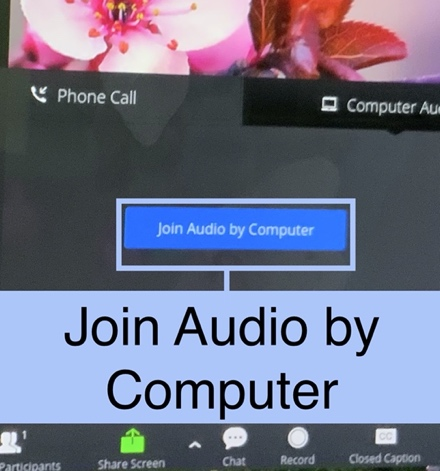
11b. Then tap "Join Audio by Computer."
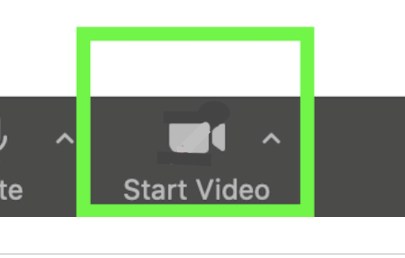
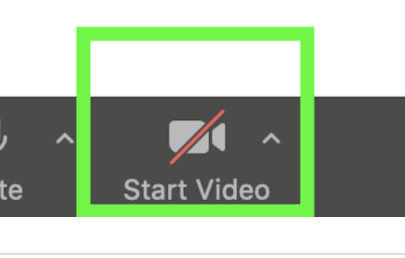
12b. Finally, turn on the camera.
Professor’s Personal Laptop In-Person Presentations
1c. Plug the Web Camera into your personal laptop.
Request a webcam on a Tripod form
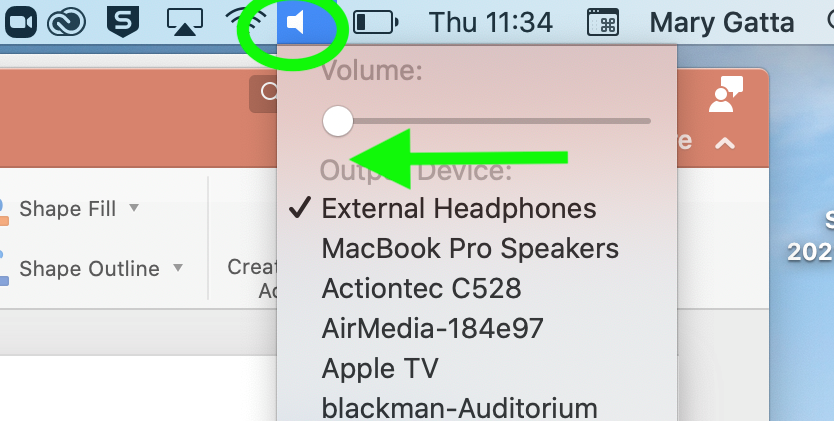
2c. Turn the volume on your laptop all the way down. Click the volume icon in the top
righthand corner of the screen and drag the circle all the way to the left.
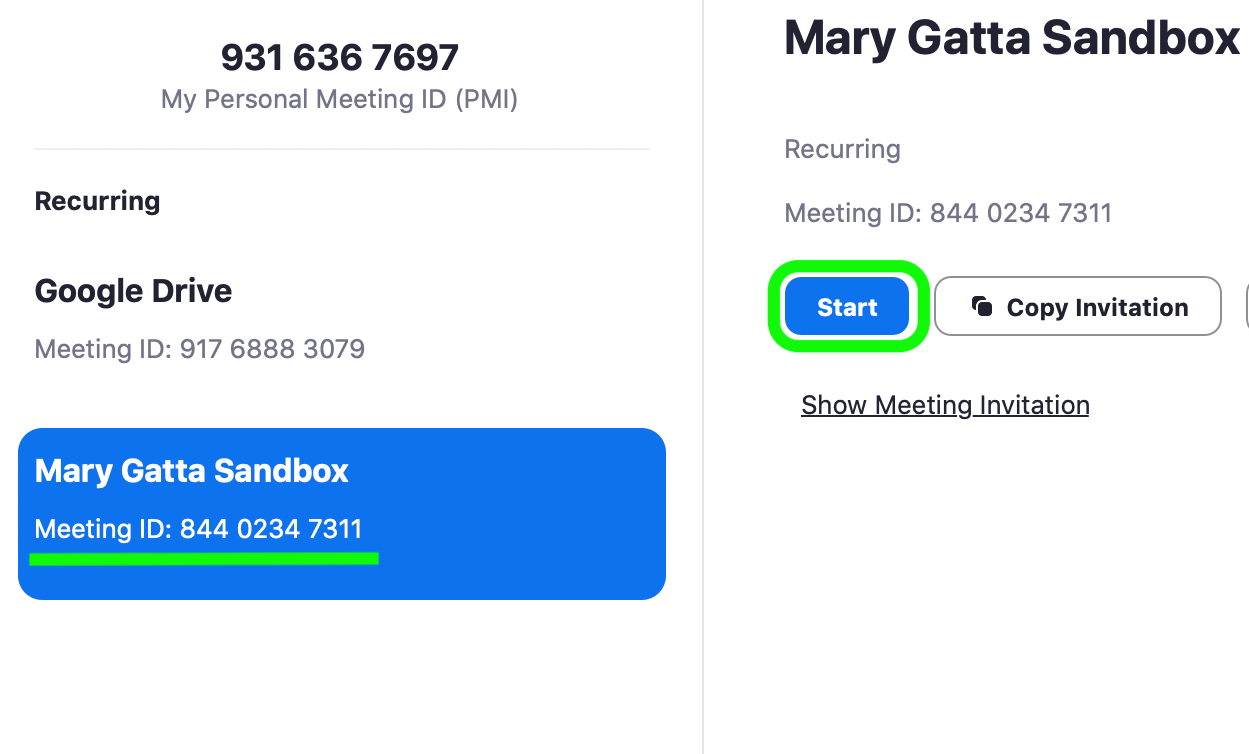
3c. Start/Join the class’s zoom meeting.
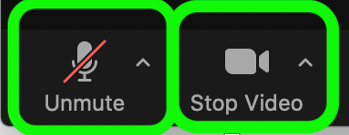
4c. In the zoom meeting, mute the audio. But make sure that the camera is not muted.
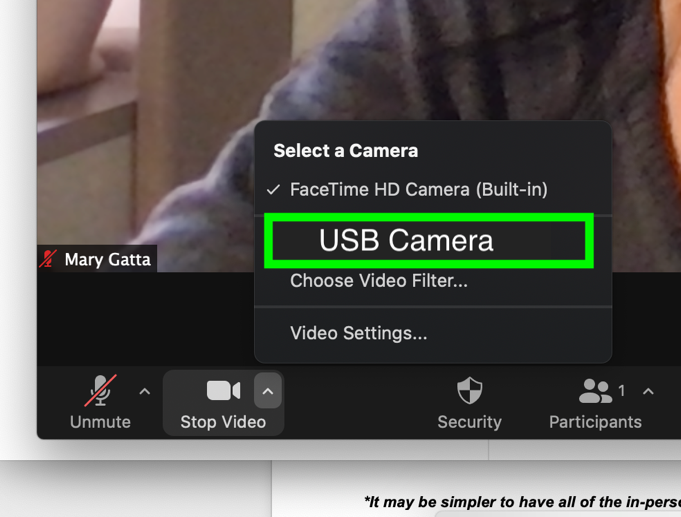
5c. Next, click the arrow beside “Stop Video” and select “USB Camera.”
6c. From your desktop, open the student’s presentation.
7c. In zoom, click “Share screen”, select the student’s presentation, and click “Share.”

Now the in-person student is ready to present!
Once the first student has completed their presentation, repeat steps 6c-7c for the next one.
Remote presentation
1d. On the CYNAP, turn off the zoom camera.
2d. The remote student opens their presentation and shares their screen.
For each remote presentation, repeat steps 1d-2d.
CYNAP GUIDES
If you have further questions, please reach out to a member of our faculty support staff for help, or send an email to: facultysupport@sewanee.edu.