Screen Sharing
A short guide on screen sharing in Zoom.
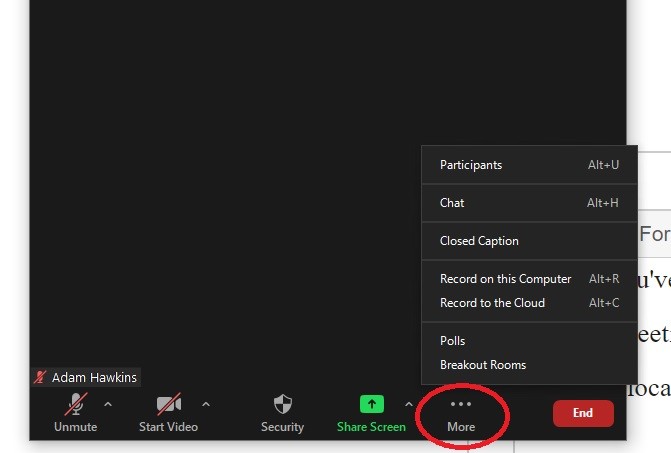
Once you've created your Zoom link in Brightspace, you're ready to teach your classes on Zoom. When entering a Zoom meeting, you have a variety of controls available to you as the host of the meeting. These controls are by default located on the bottom of the Zoom application:

If you don't see all of these controls, or if you have a small screen, some of them may be located in a "...MORE" button off to the side:
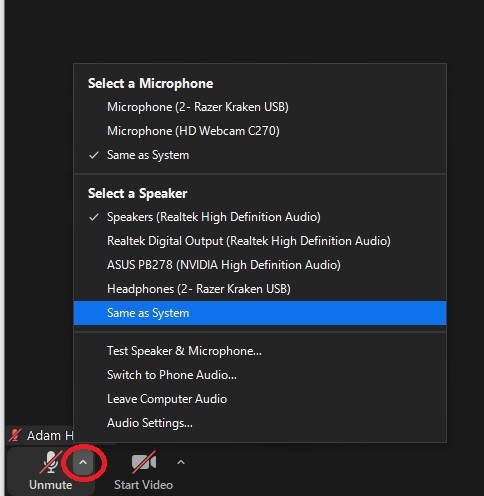
The Microphone Icon
A tool for muting/unmuting your own microphone and for choosing both your sound input and output to use during the meeting:
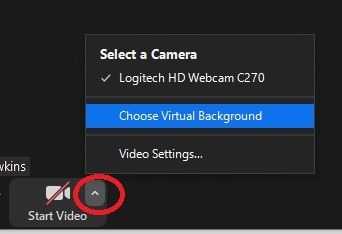
The Camera Icon
A tool for showing or hiding your own video within zoom and for choosing your virtual backgrounds and/or other video settings:
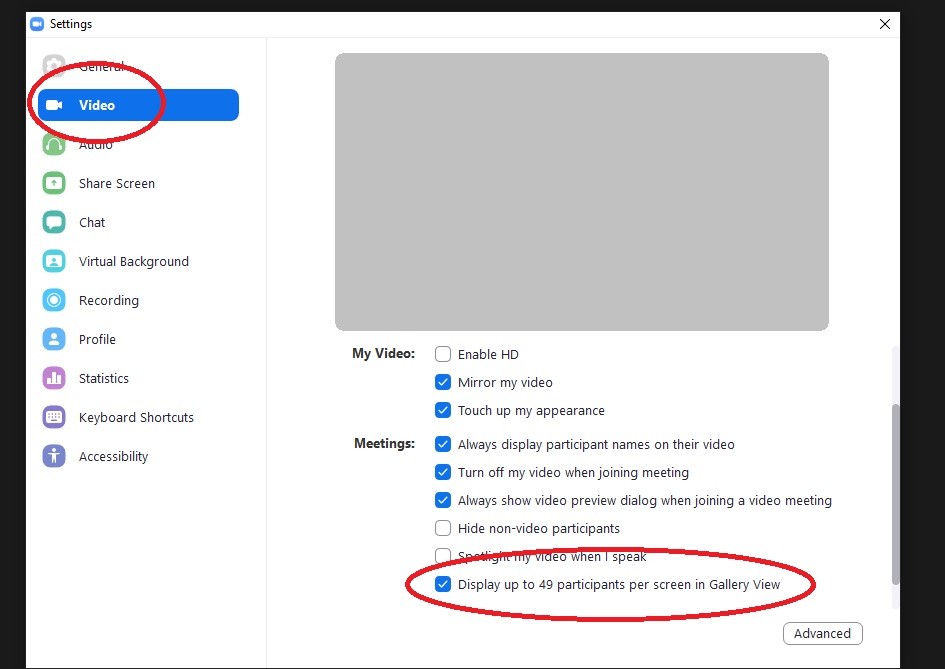
If your computer can support it, it is recommended to click the box to display "up to 49 participants" in gallery view. This will show more of your students on your screen while you're teaching:
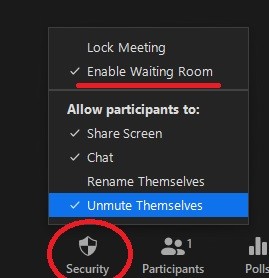
Security Button
The "Security" tool is a great button to press each time you load up your Zoom room. From here you can control how accessible your Zoom Room is to both your students and the outside world. You can also control which options your "participants" (or students) have available to them while in your virtual class. The most recommended options are general coursework are below, including Enable Waiting Room once the class is in session:
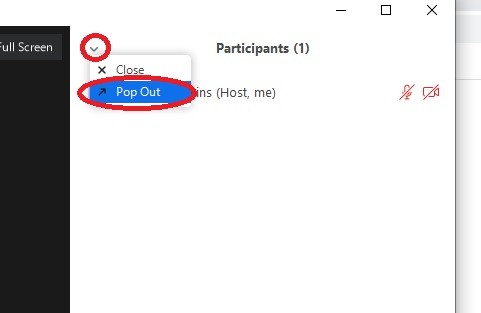
The Participants Window
One of the most important tools at your disposal when teaching a class in Zoom is the Participants button. Click on this button to view everyone who is currently in your Zoom room. If your participants window is merged with your meeting window, you may want to pop-out this window so you can drag it around on your screen to somewhere more comfortable (and more easily accessible while sharing your screen):
From the participants window you can:
(1) admit people from the waiting room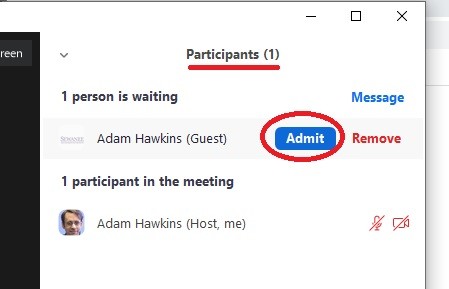
(2) mute a person: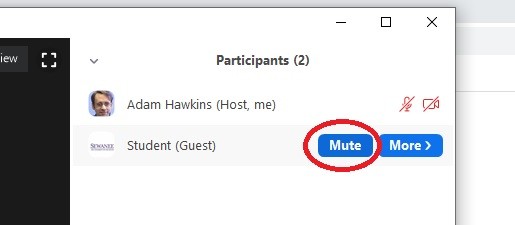
(3) or click on More to see a variety of options for one particular student: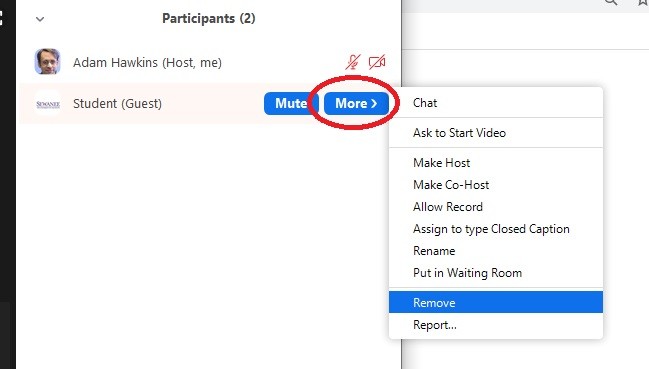
*Note: You can always mute the microphones or videos of your students, but you cannot unmute them (i.e.: turn on their mic or camera) without their consent first. They have to press the button to unmute.
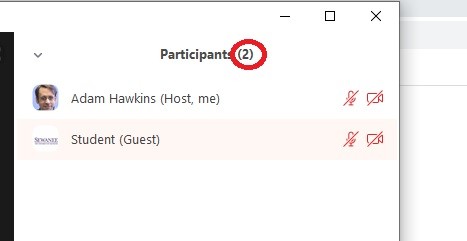
Make sure to keep an eye on your participants window throughout your virtual class to see who is currently in the meeting. At a glance, it helps to take a look at the number of participants displayed at the top of the window so you can see the current number of attendees:
The Chat Window
Every Zoom room also has a chat window. It is up to you whether or not you wish to use this function in class, and you should tell your students ahead of time if you plan to use it for discussion or questions.
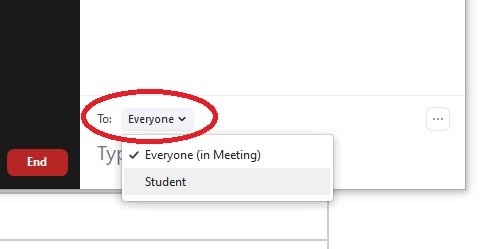
From the chat window you can either chat with the entire class, or send a private message to one particular student:
You can also change your students' chat options or save the chat using the three dots in the bottom right of this window:
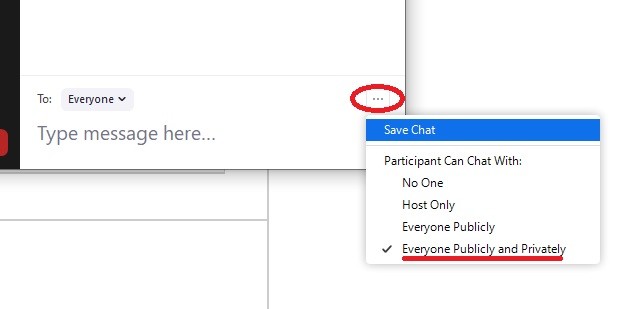
*Tip: If you don't want your students to "pass virtual notes" with one another during class, then you should choose Everyone Publicy so their messages will be seen by everyone in the room.
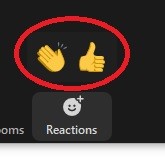
The Reactions Button
The "Reactions" button is simply a quick and easy way for both you and your students to provide some non-verbal feedback, or to indicate participation in the class:
Want some help hosting your Zoom Classroom?
Contact our Faculty Support Staff
A short guide on screen sharing in Zoom.
A short guide on using Breakout Groups in Zoom.