Hosting a Meeting with Zoom Only
Instructions from the Zoom platform on hosting video meetings outside of your courses.
In order to create your "Zoom Classroom" here at the University, you must first go through the University's Learning Management System Brightspace.
Begin by logging into the LMS with your University credentials:
Once inside, navigate to one of your courses, and then go to the Content in that course. You must Create a Module where the link to your Zoom Classroom will live:
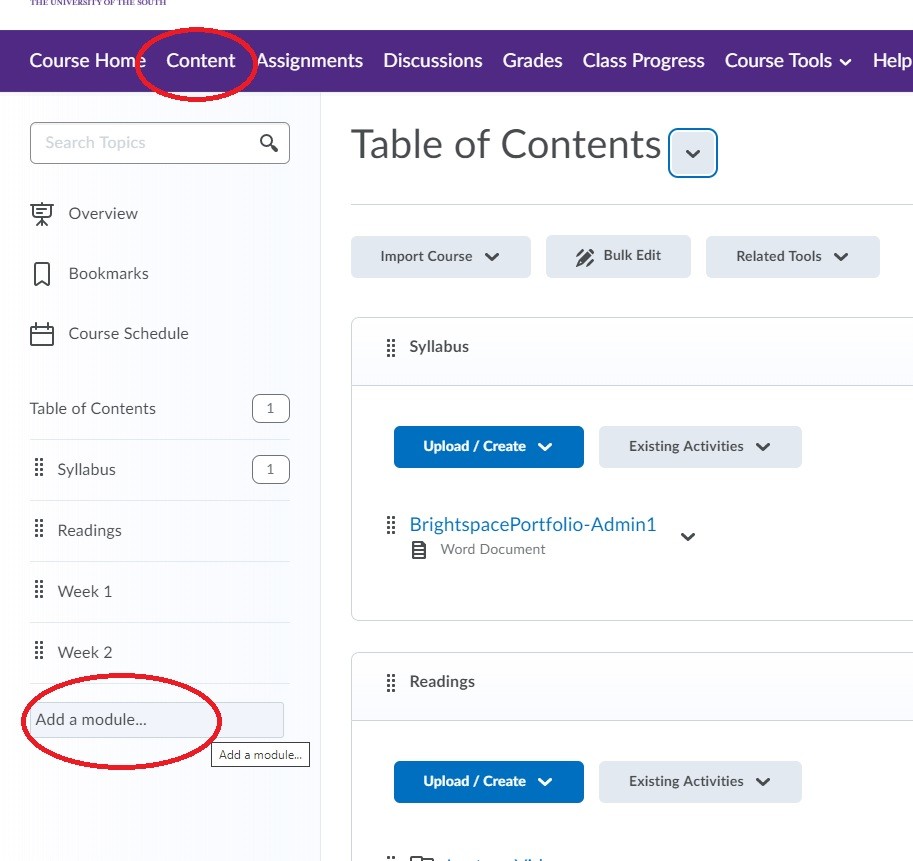
Title your module Zoom Classroom, or something similar to make it easily identifiable for students.
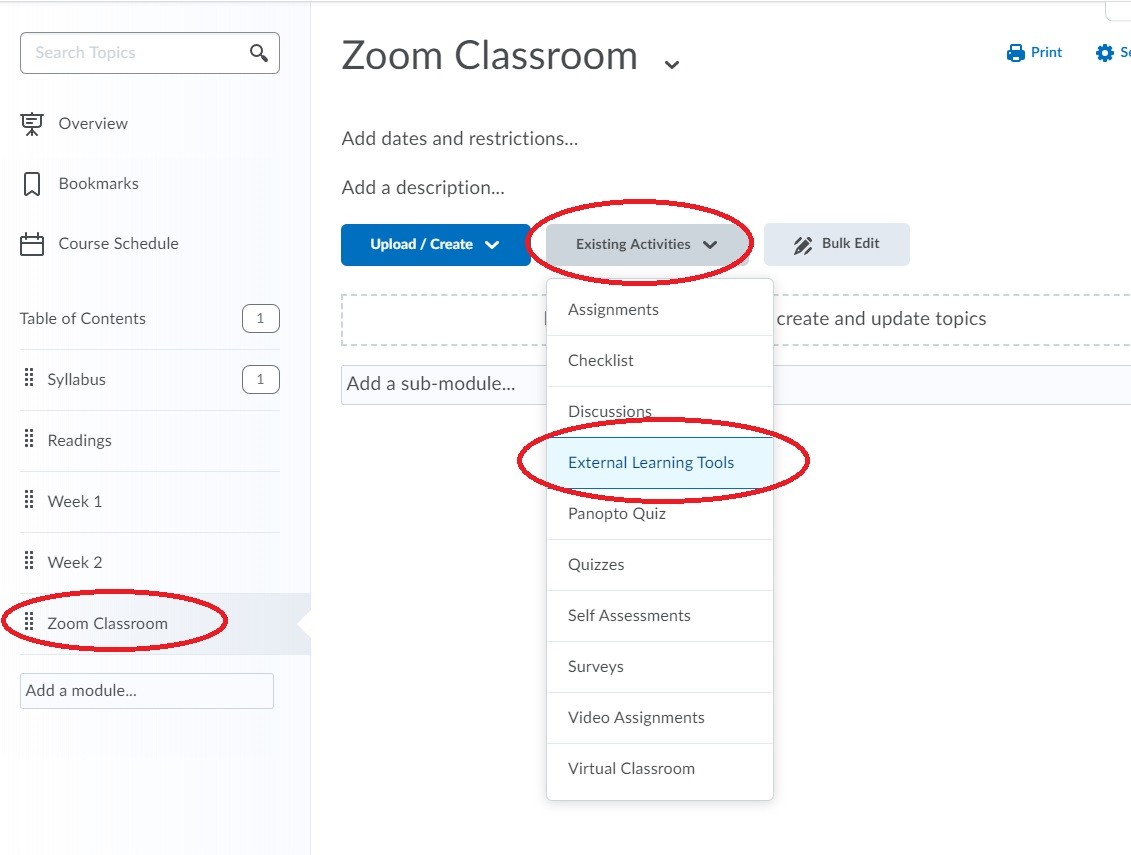
Once you've created the module, click on it, and then use the Existing Activities ---> External Learning Tools option to add Zoom to your course's content:
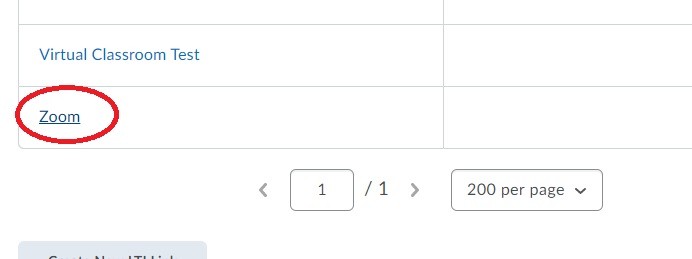
The External Learning Tool which you want to add to this module in the course is appropriately named Zoom. Merely click on that word itself to add a link to the Zoom platform within your course:
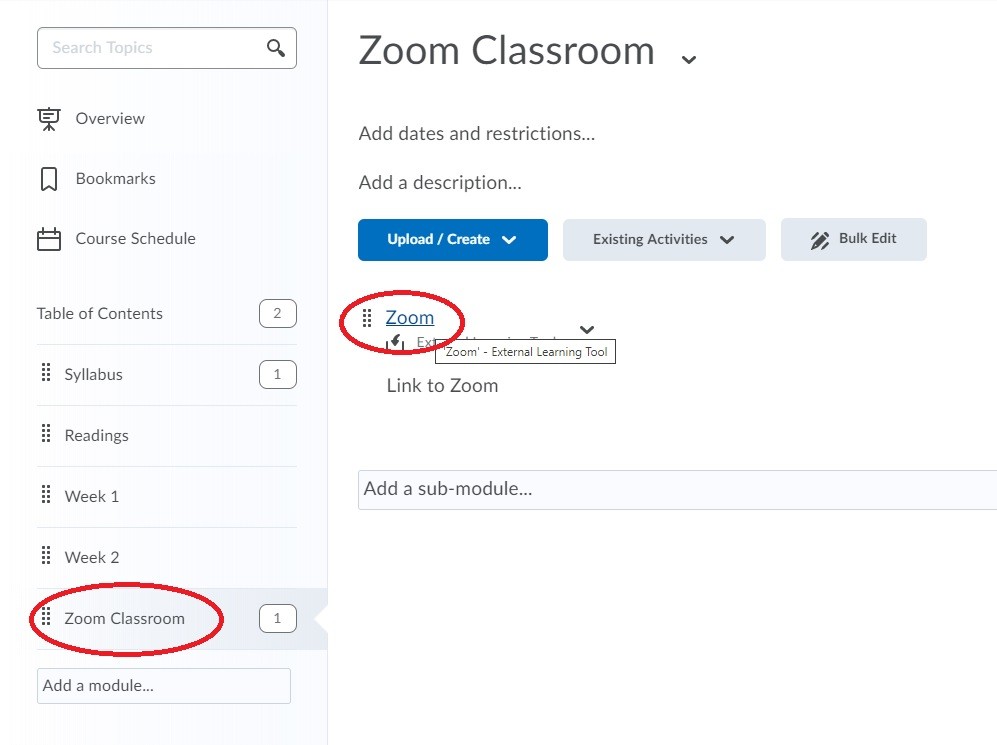
Once you've got the link in your course content, in an appropriate module, you can then click on the link itself to open up the Zoom interface embedded within your Brightspace course:
Upon clicking the link, you will be taken to the Zoom website within Brightspace (you'll notice the Brightspace navigation bar is still visible at the top). From this window, you'll want to simply Schedule a New Meeting:
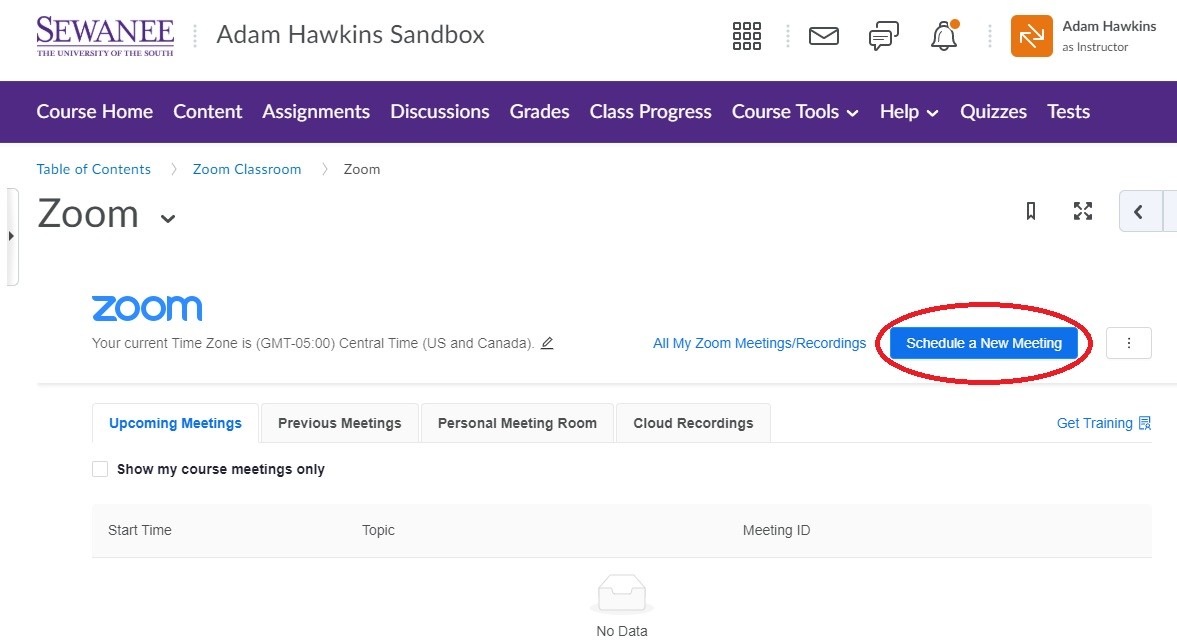 Make sure to title your meeting appropriately and provide a useful description for your students (and to help keep your different Zoom courses straight!)
For your virtual classroom, you will want a permanent meeting link that is not beholden to dates/times. To do this, you must choose the Recurring Meeting option and choose No Fixed Time as your recurrence.
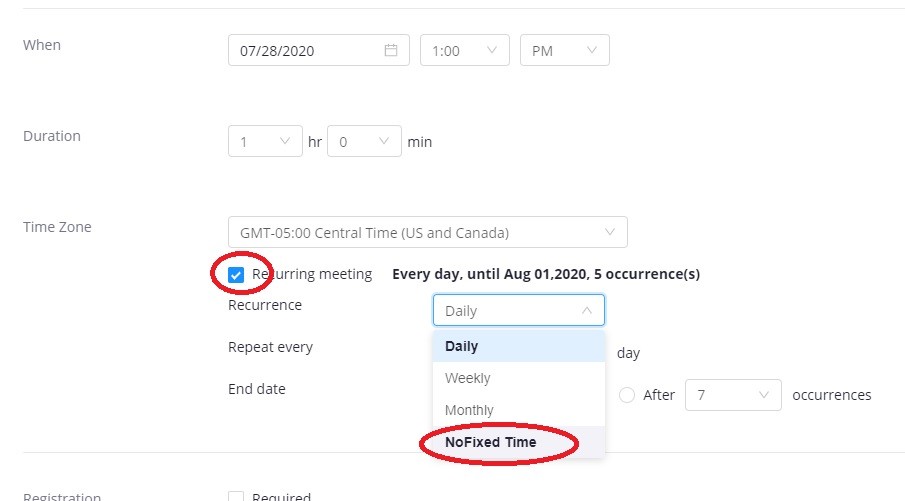
Creating your room in this way will ensure that the link stays the same throughout the semester.
As you finalize your room creation, most of the default options are fine, but you should look through them all carefully anyway. You can also revisit these options and change them around at anytime using this same interface. For now, you'll want to make to allow participant video, both audio connections, and enable join before host:
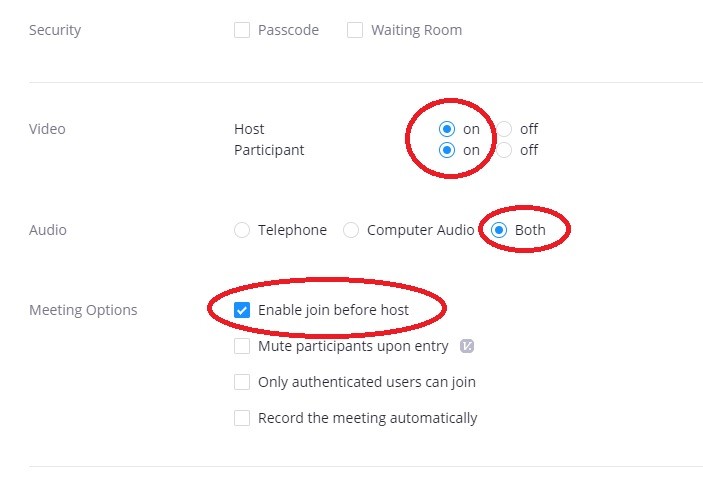 All of these options will be most conducive to your virtual classroom.
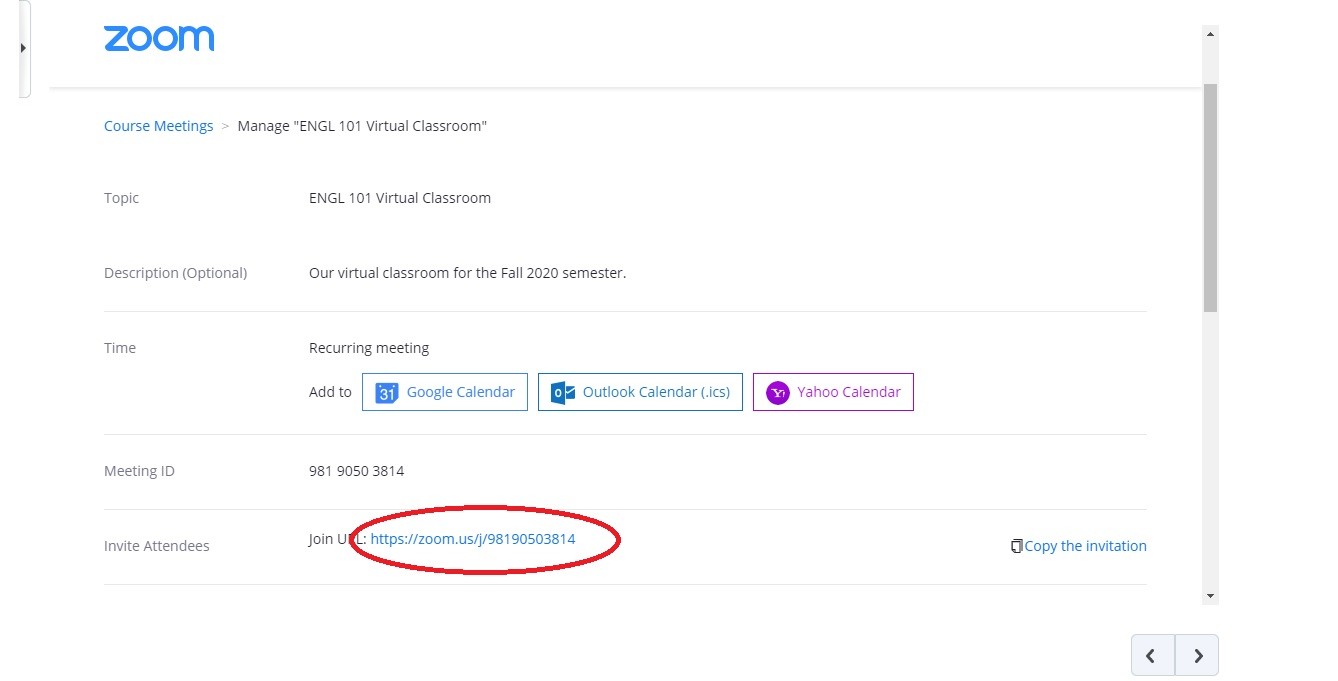
Once you've created your room, you'll be given a completing screen with your newly created meeting details. Import to note on this page is the Zoom Link to your class. You should copy this link and save it somewhere in case you need it later (and if you want to invite guest speakers to your synchronous class!):
After creating the meeting, you can navigate back to the content in your course and try it out! Click on your Zoom Classroom module followed by the link to the Zoom platform. You should see your scheduled meeting in there with a "start" button that you can use when you are ready to begin class:
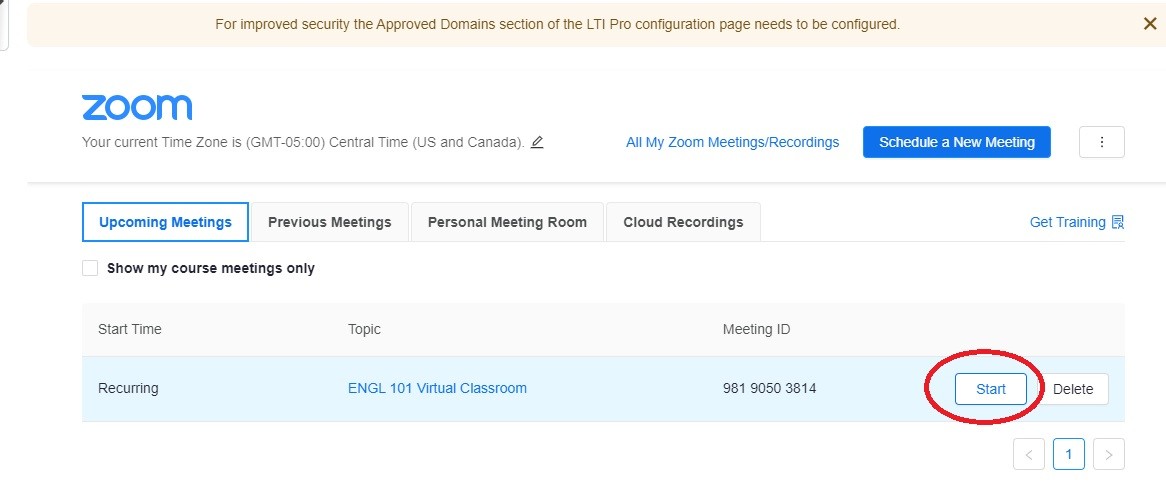 Your students will see a "join" button (where your "start" button appears) that they can use to attend class during each designated meeting time. You are now ready to Zoom! Both you and your students can pop in and out of this meeting at will as part of your course.
If you have any questions or concerns about this process, please feel free to reach out to your relevant faculty support staff member for assistance.
Instructions from the Zoom platform on hosting video meetings outside of your courses.
A portal for video tutorials from the Zoom platform on all of the software's functionality.