Brightspace Documentation on Discussions
A discussions tool reference guide from Brightspace.
For many of you, discussion topics on Brightspace will be a great place for both you and your students to engage with your course material asynchronously. To get started, click on the Discussions tool on the navigation bar of your course homepage:

*Note: If you lose this link, you can always bring it back by editing your navbar
To create a discussion board/topic, you must first create a forum. In Brightspace, forums are used to organized discussion topics. You need at least one forum, if you plan to use multiple discussion topics, then you make want to create extra forums to help organize them. To get started, make sure to create a forum first:
In the forum creation window, you'll want to:
(1) Name your Forum - remember this is a collection of discussion topics (or boards)
(2) Provide a description of the theme of these discussion topics for your students (if you feel it's necessary)
(3) Review the checkbox options at the bottom:
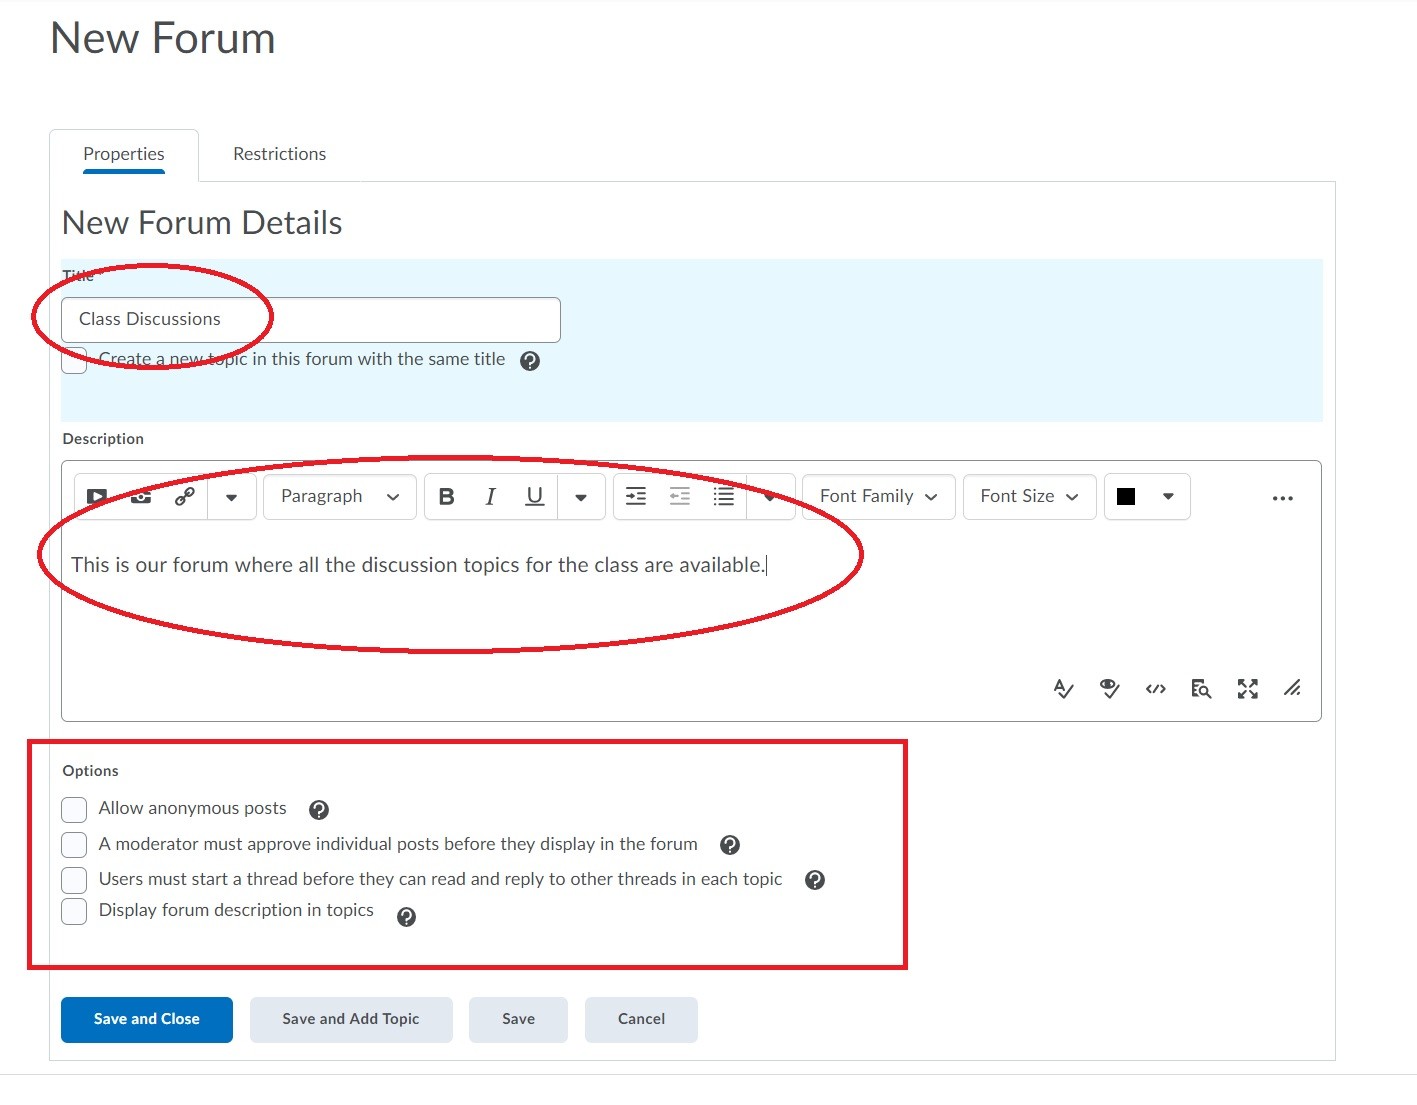
*Helpful hint: The checkbox marked "users must start a thread" is a great tool to use in discussion topics and forums if you find that your students discussion posts are too similar. This options forces a student to draft his/her own original post before they can read the posts of their classmates.
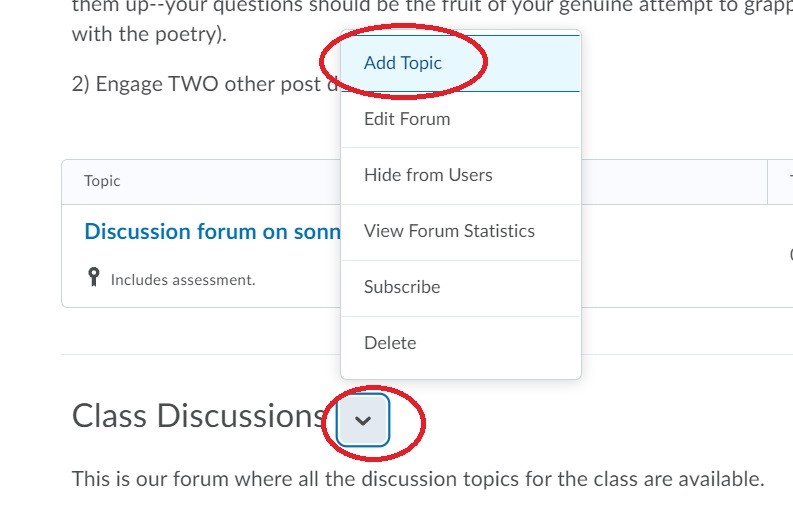
Once you've created for forum, make sure to hit the blue Save and Close button to finalize your options. From here, you're ready to create individual discussion topics (or "boards") within this forum. Click on Discussions in your navigation bar and navigate to your created forum. Click on the contextual options "down arrow" to Add a Topic to this forum:
The "topic" serves as the discussion board itself, and will be the container for the posts and replies for both you and your students. The same options appear here as the forum creation options above. Make sure to provide a title for the discussion topic, a brief description, and choose the contextual options for the topic (just as you did for the forum):
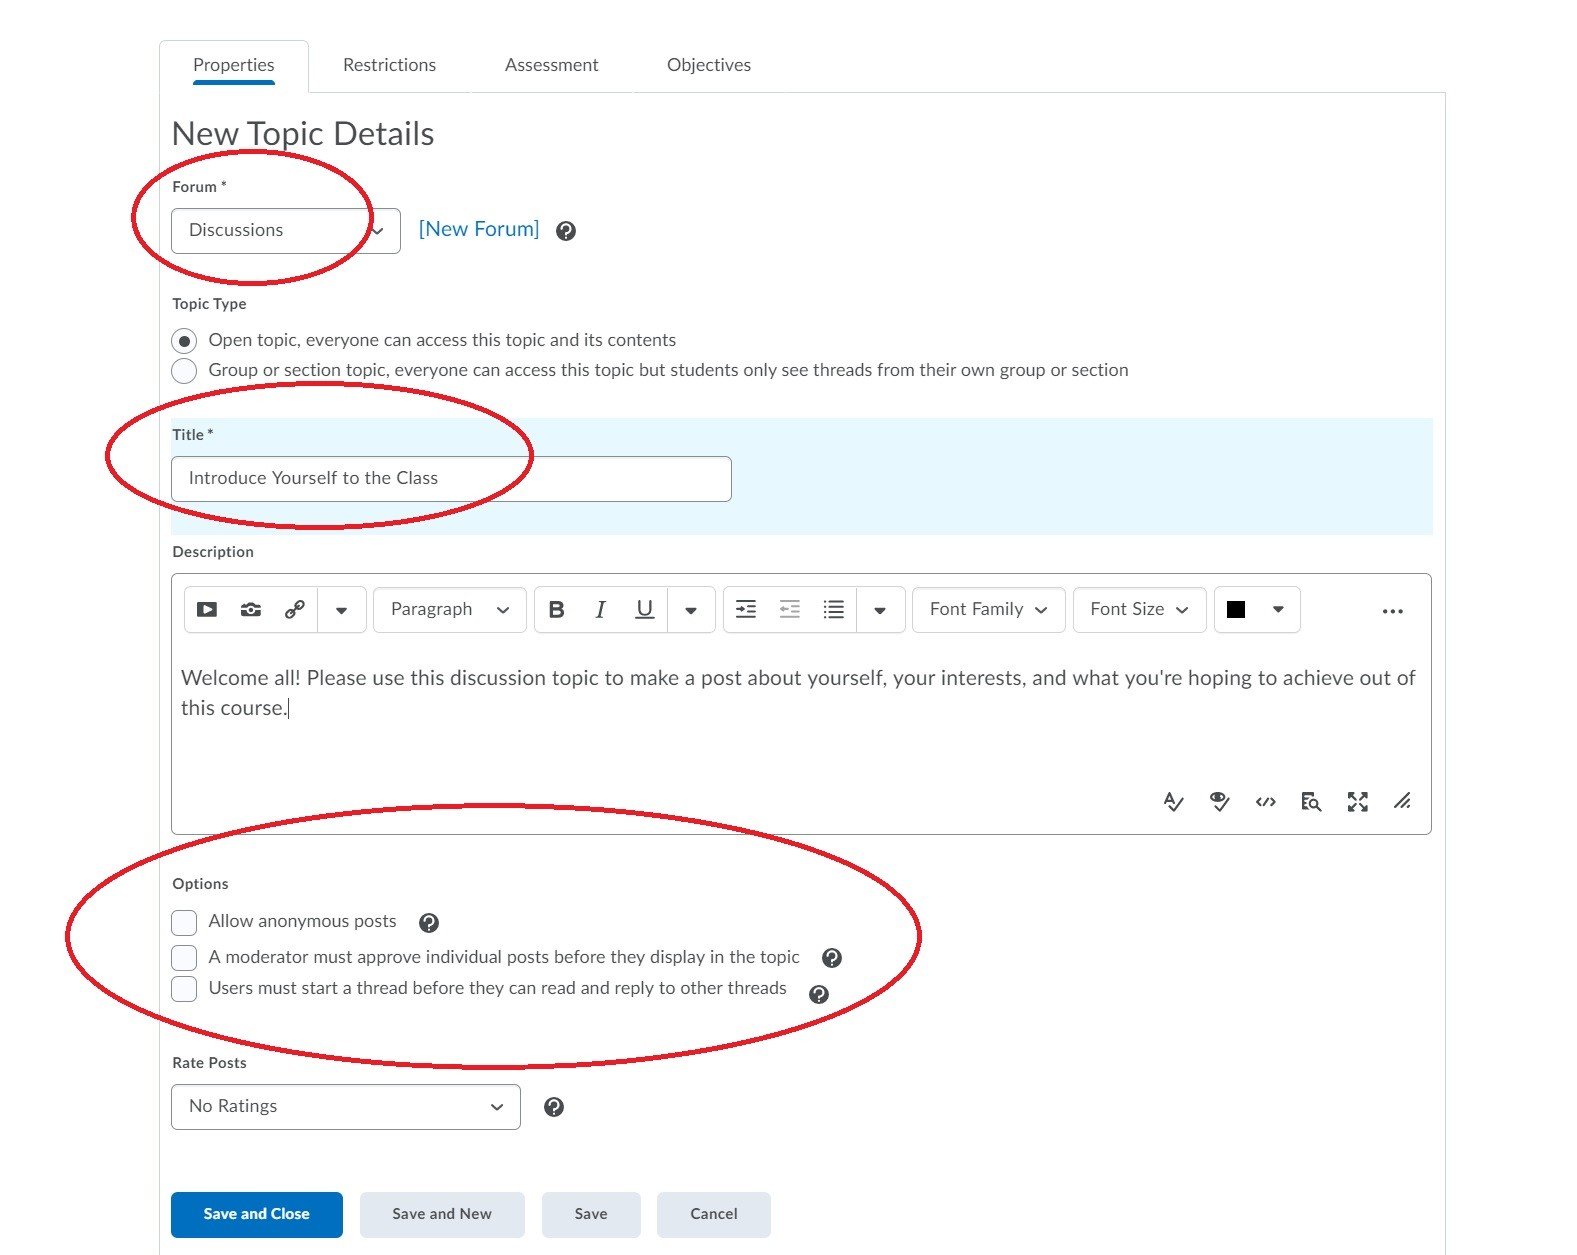
*Tip: Use the restrictions tab when creating a forum or topic to set availability dates (i.e.: when these appear in the course to your students) if you wish discussions to occur after specific material has been covered in the course.
Once you've created your discussion forum and topic, both you and your students can write posts. To write your own post, navigate to the appropriate discussion topic that you've created and click on Start a New Thread:
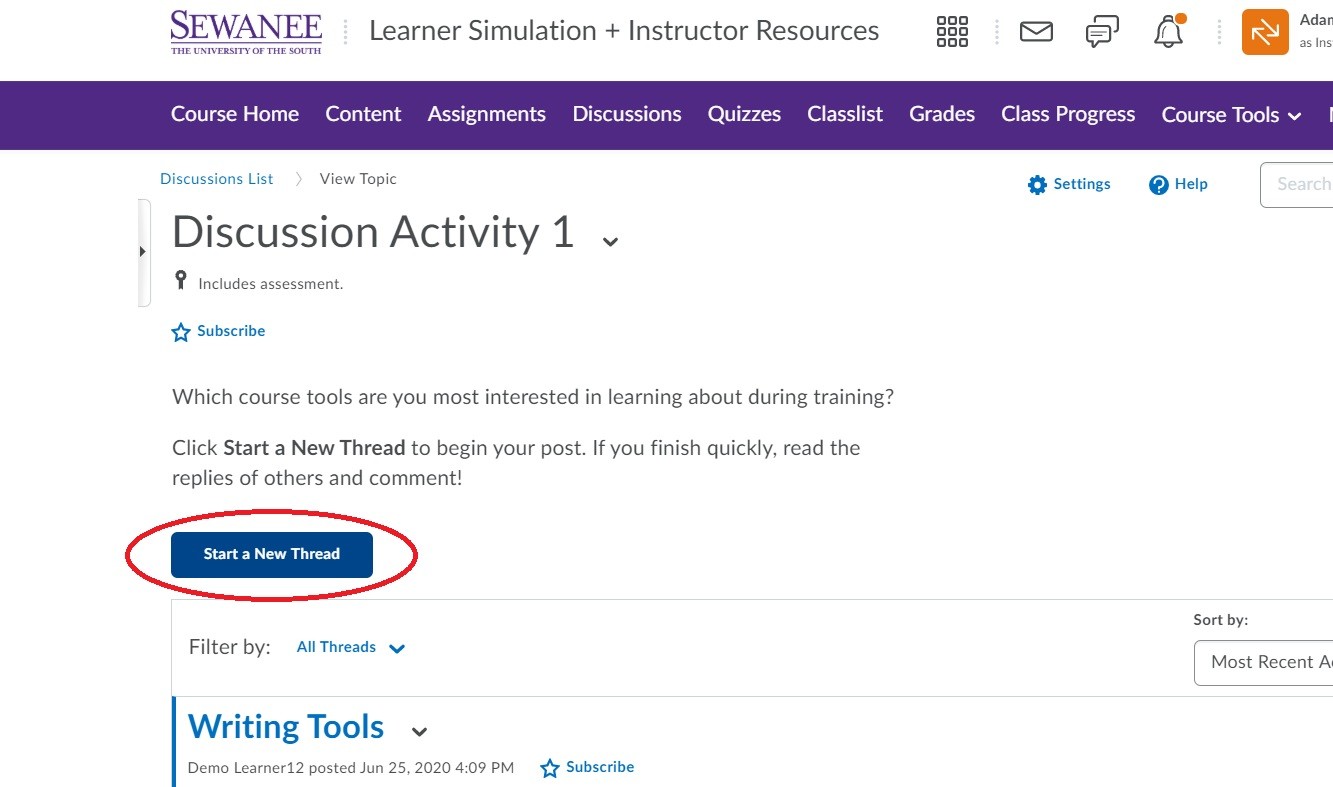
In the thread creation window, after writing an appropriate title, then type your post directly into the HTML editor/text box shown. A common tool that you'll may want to use in this HTML editor is the Insert Stuff button (looks like a youtube play icon) in the top left of the text editor:
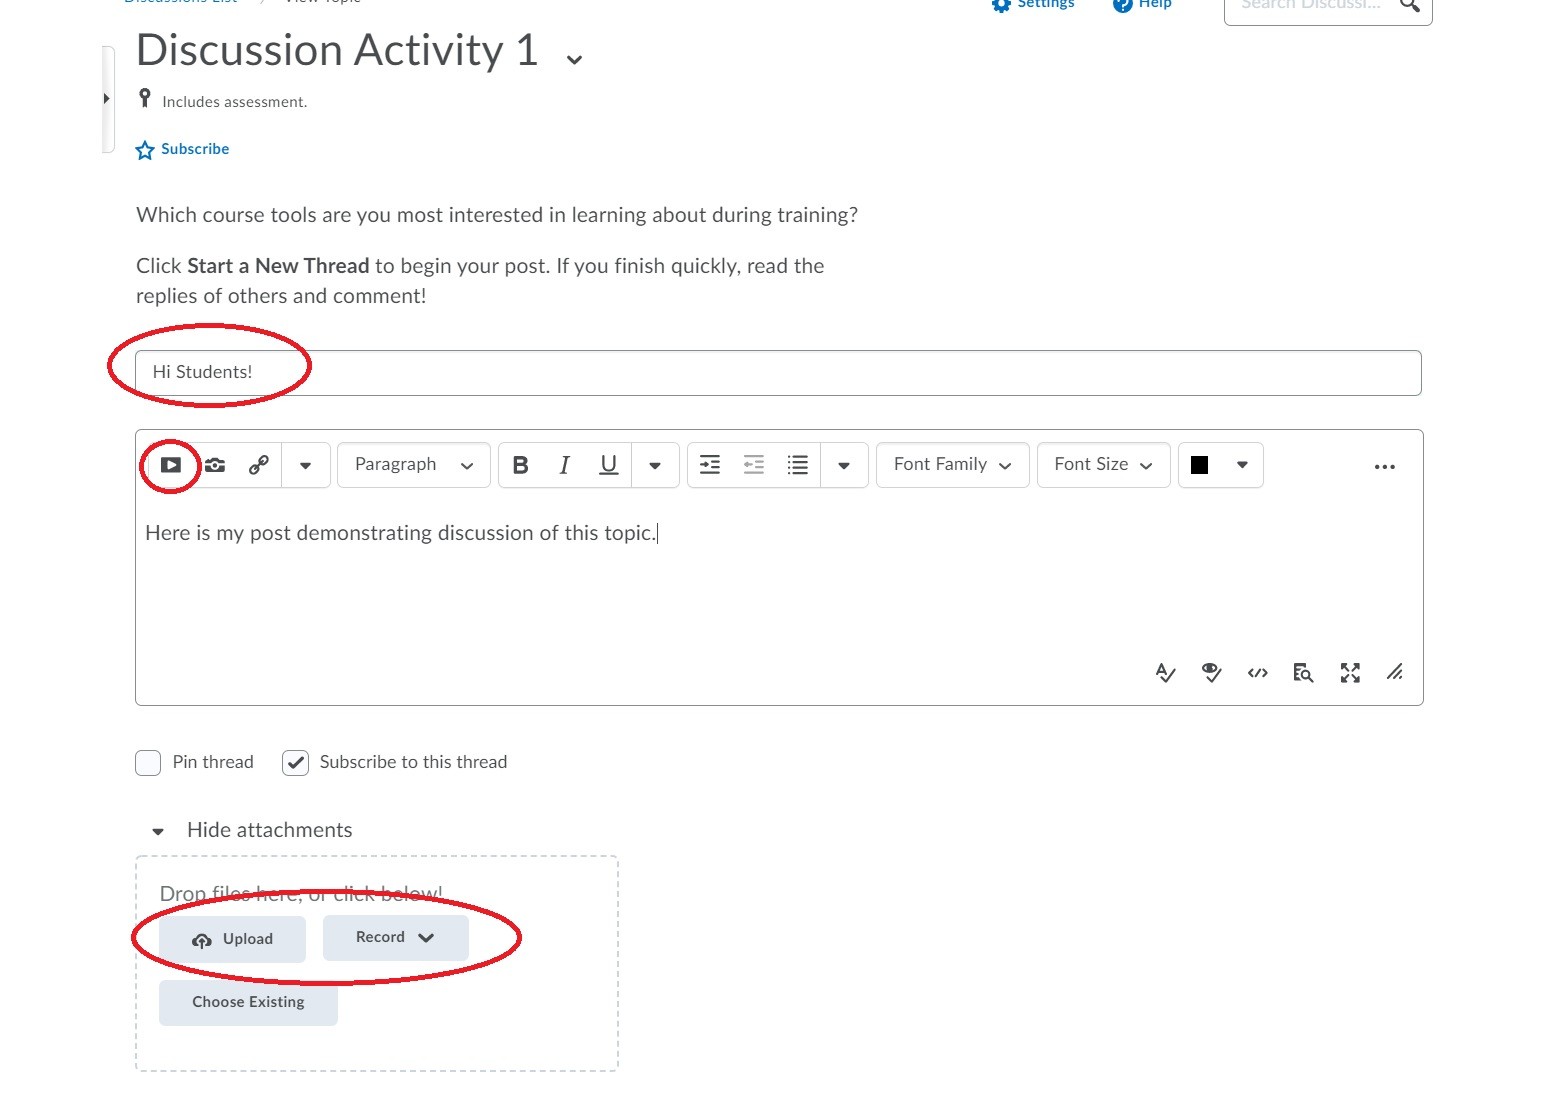 Finally, when posting, you can include file attachments from your computer and/or even record audio or video directly within Brightspace to share your thoughts on this discussion topic.
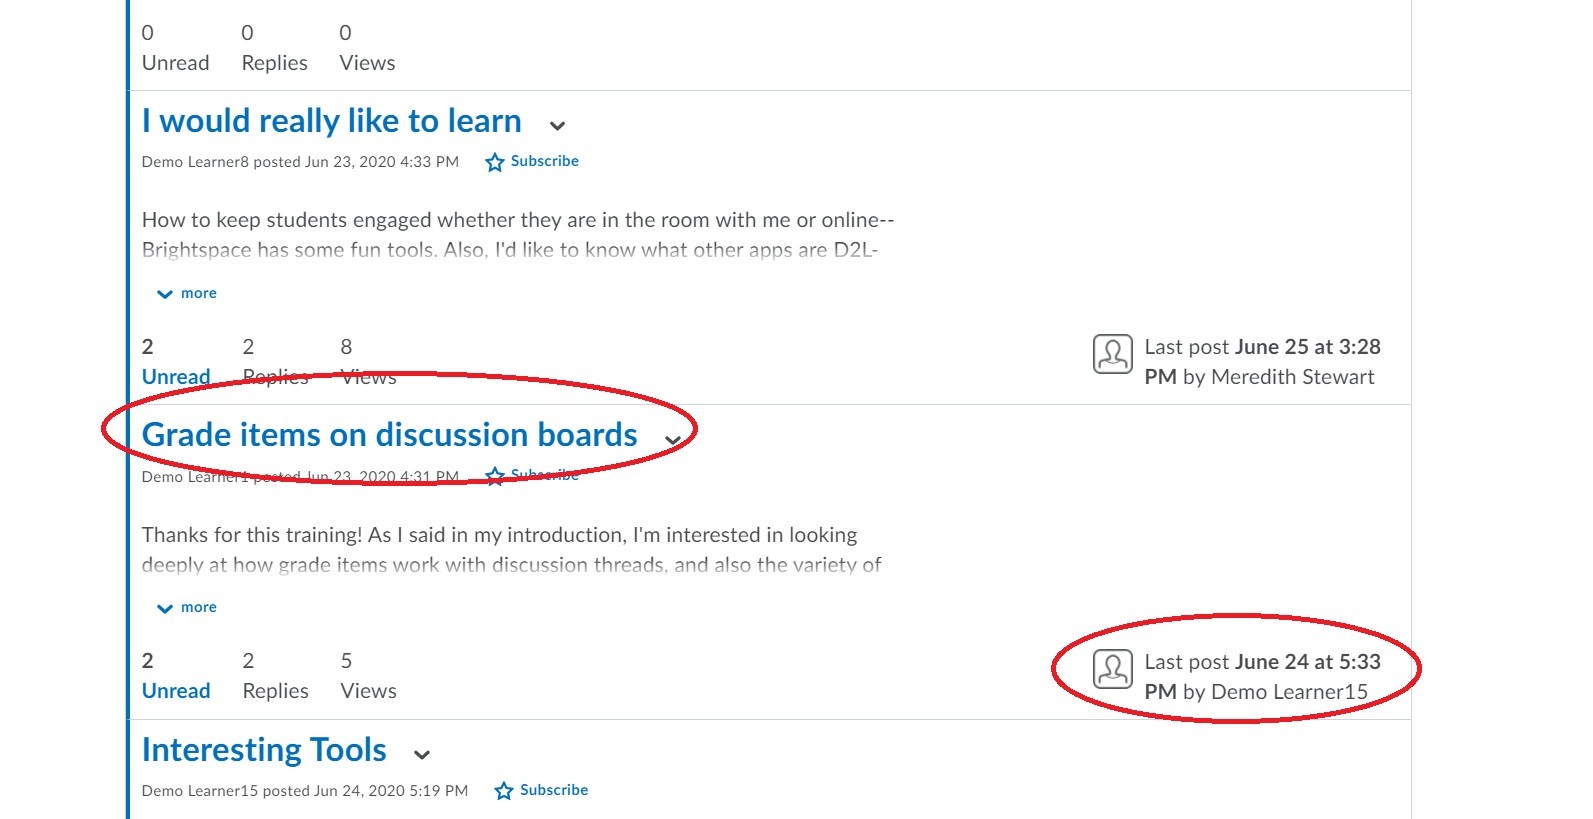
In addition to making your own post, you can of course view your students posts also. Simply navigate to the appropriate discussion topic and click on it. Within the topic, you'll see all of the original created posts, along with the name of the last user to reply to this post with a timestamp:
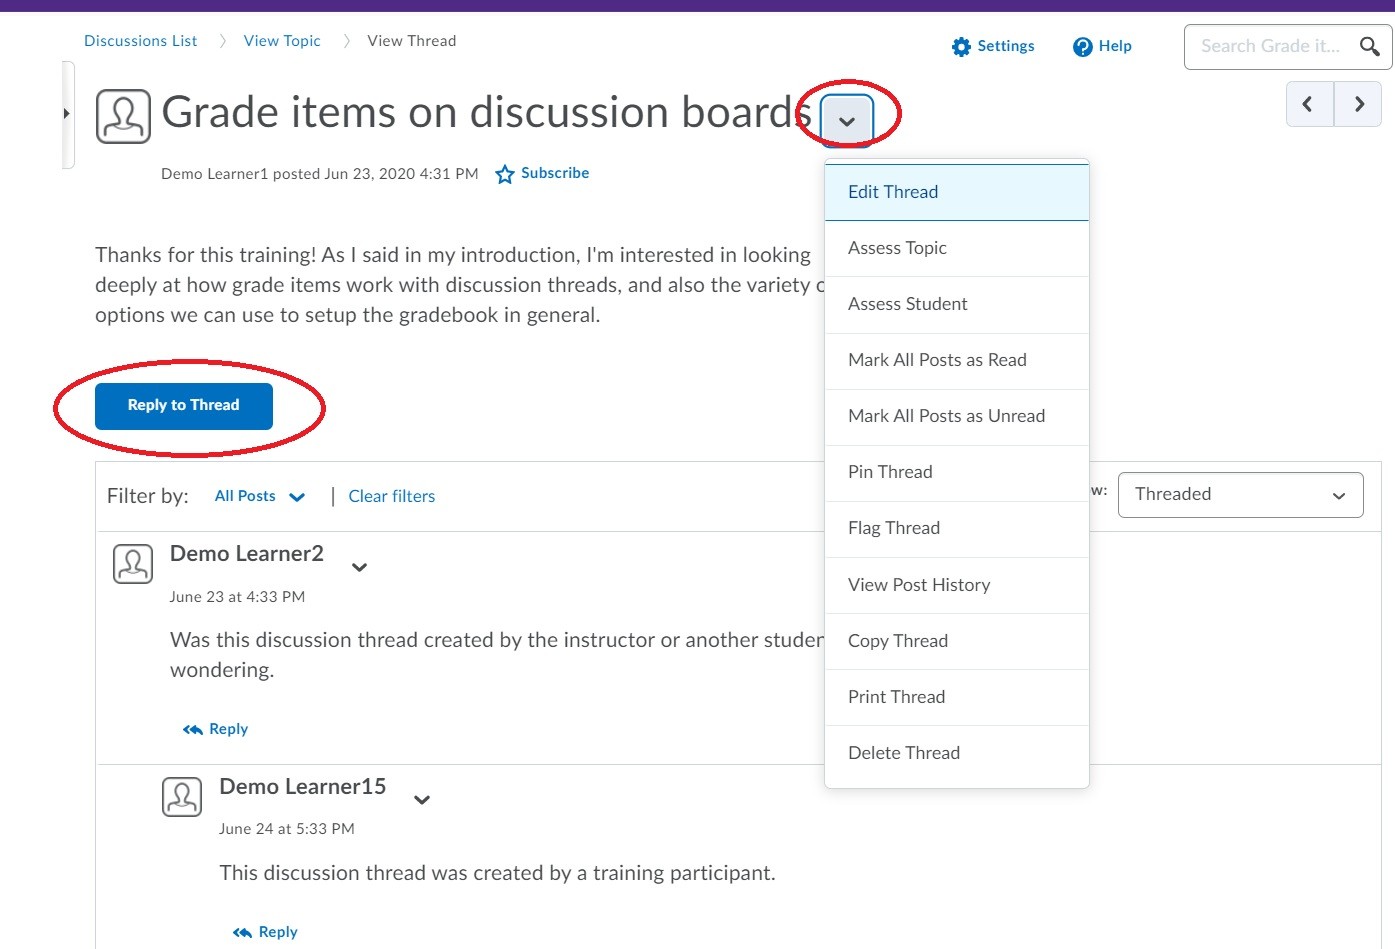
Click on a student post to read it. From this window, you can reply to the student yourself, or use the down arrow next to the title of the post to view contextual actions you can take with this particular post:
In order to grade discussion posts, you must attach a grade item to the topic or forum itself. Visit our section on Grades to learn more about grade items and how to manage them.
Questions about Discussion in Brightspace?
Contact a member of our faculty support staff.
A discussions tool reference guide from Brightspace.
Tutorials videos from Brightspace on using the Discussions tool as both a professor and student.