Sewanee's Brightspace Guides
Browse through Sewanee's Brightspace Guides to find some basic information and instructions on using some of the most common features (Login, Homepage, Student View, Content, Assignments, Grades, and more.)
Copying course material allows for you to take content (quizzes, assignments, etc.) from a previous course and to add it into a different one. This page offers instruction on copying material. Furthermore, it explains how to enter new due-dates/availability and addresses erasing/overwriting content and user privacy.
If you have any questions or concerns regarding Brightspace, Zoom, or Hybrid Classrooms, you can book a one-on-one Zoom or in-person meeting with a member of our faculty support staff.
SCHEDULE A FACULTY SUPPORT APPOINTMENT
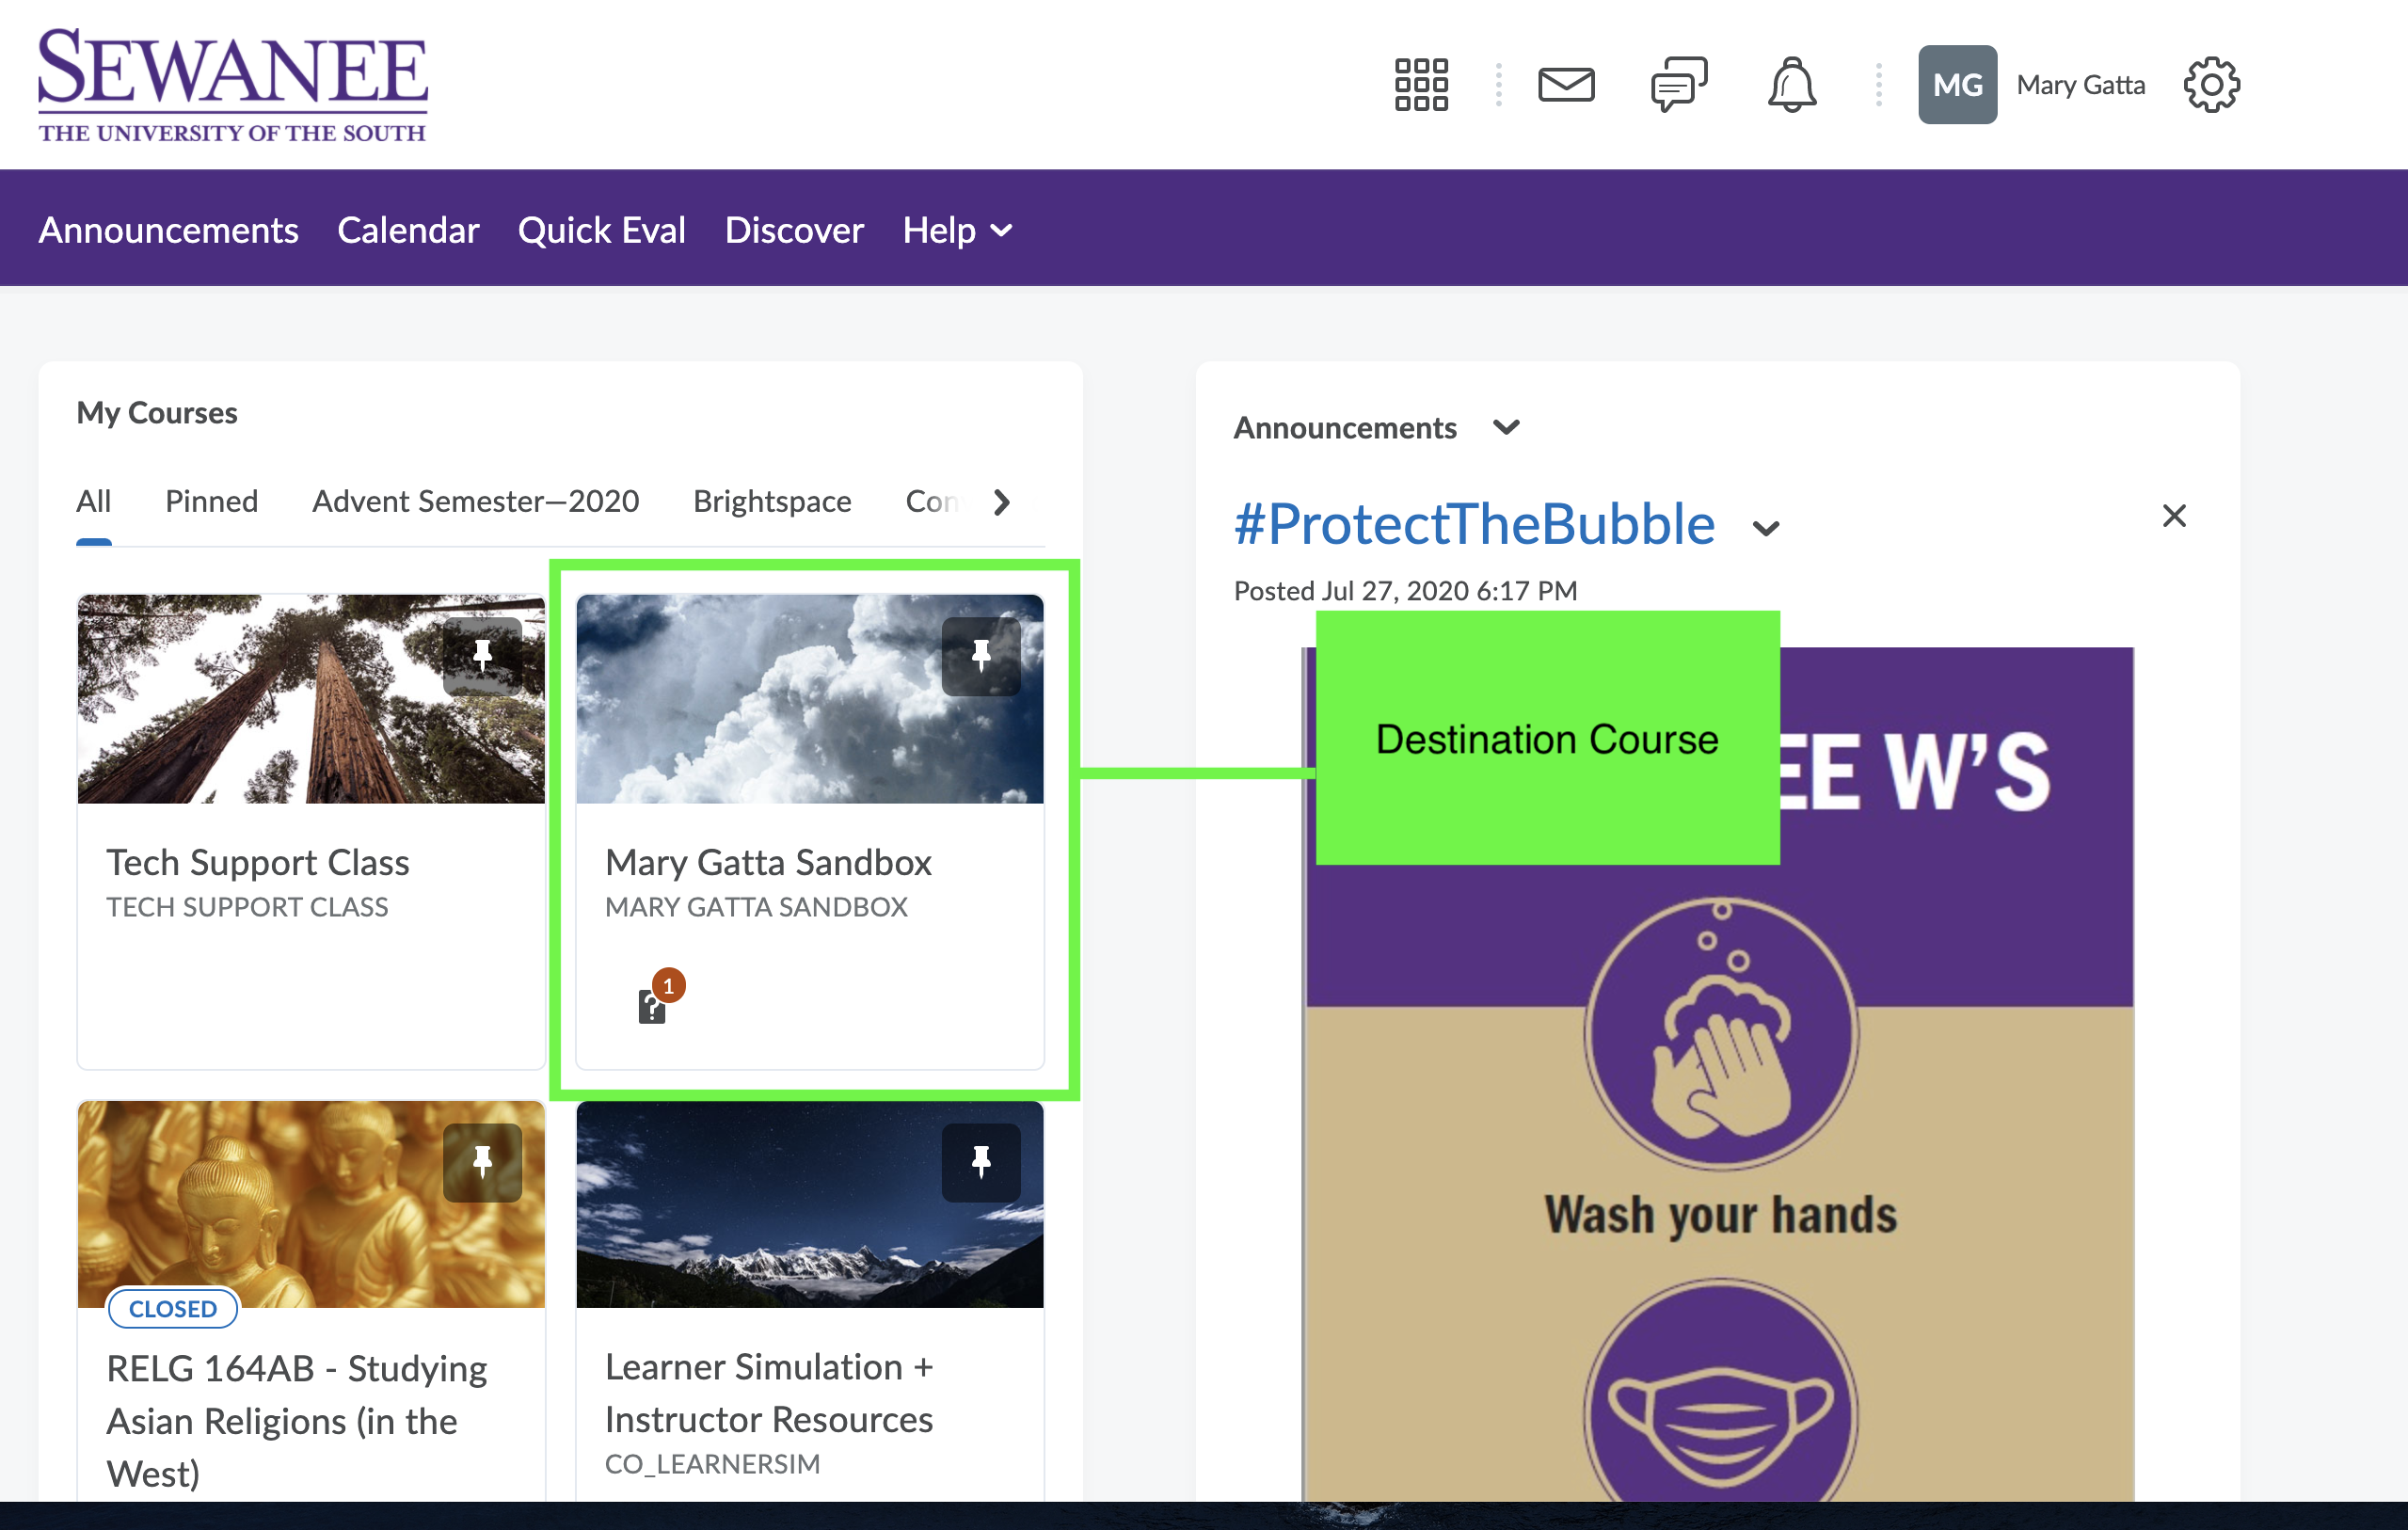
To begin copying course material, open Brightspace and select the "destination course." That is to say, select the course which you plan to use for the upcoming semester.
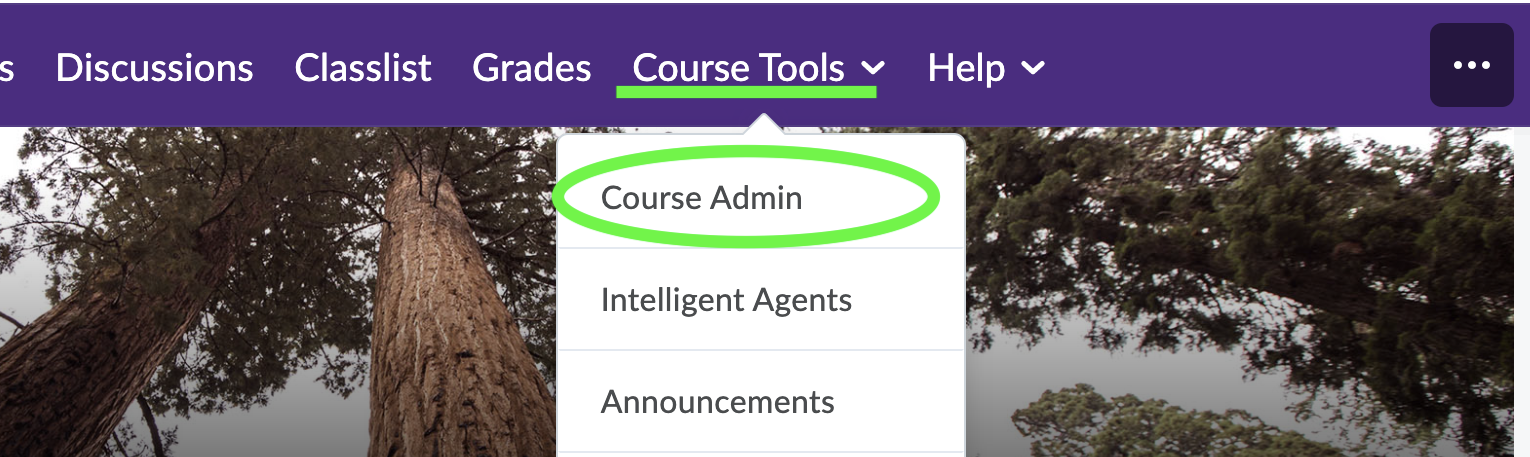
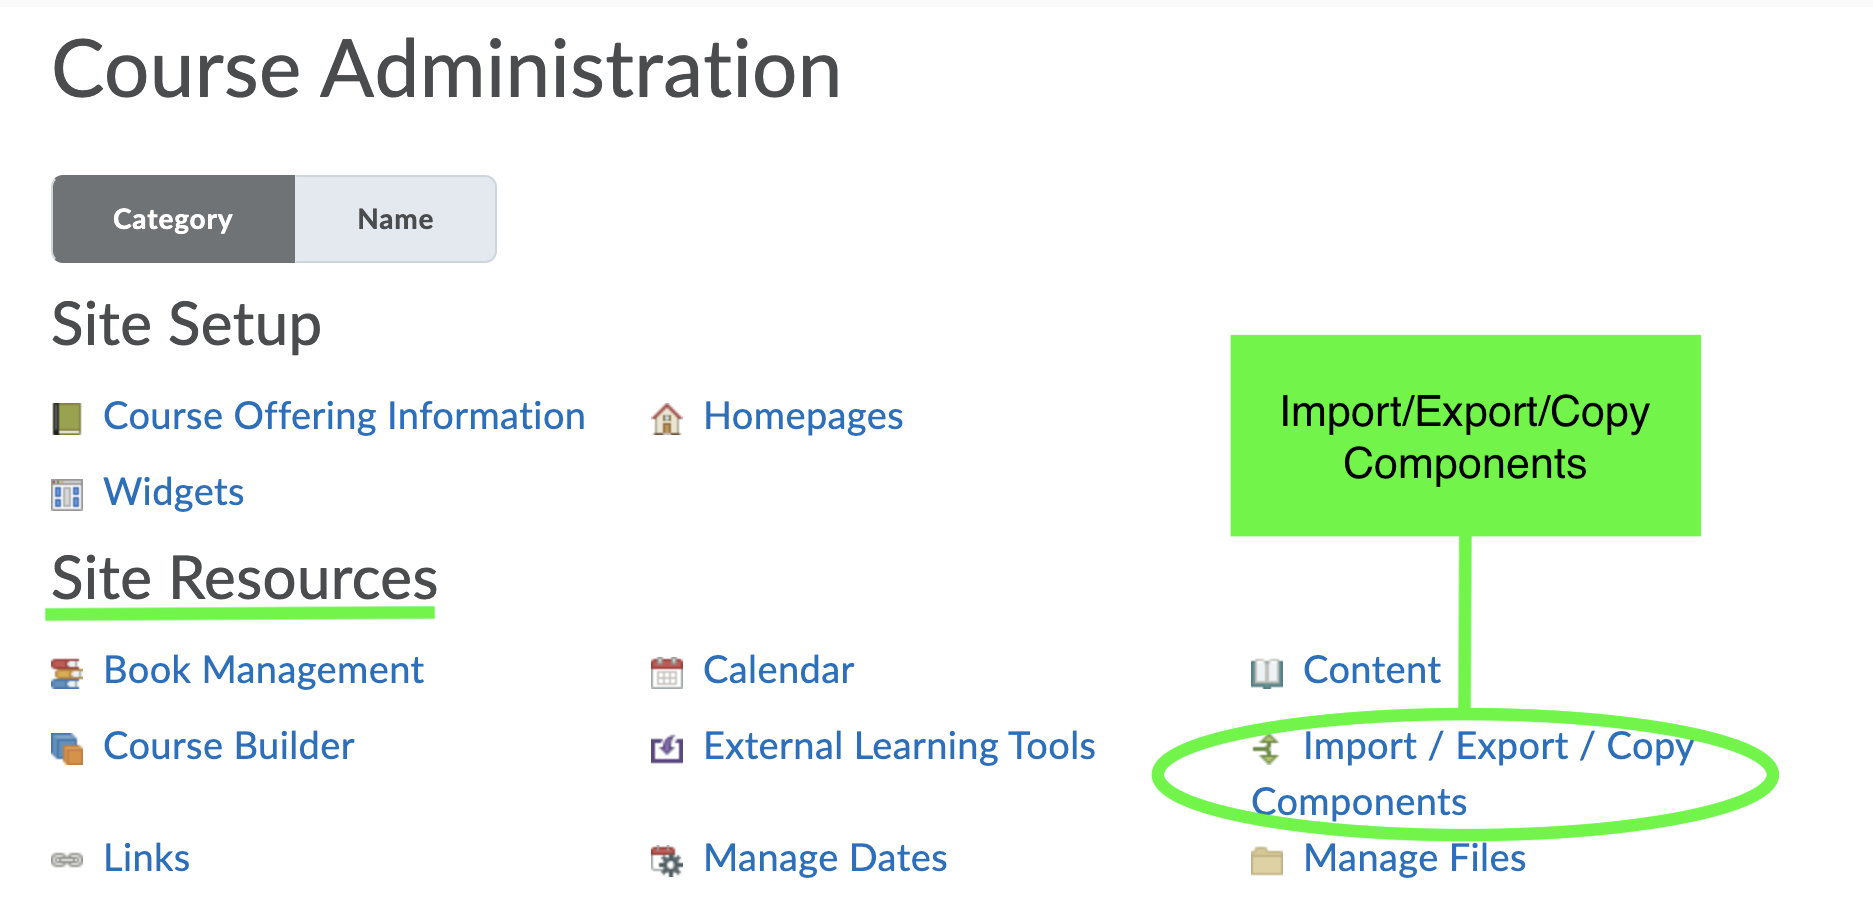
Under Course Tools, select “Course Admin.”
Then, in the Site Resources section, select “Import/Export/Copy Components.”
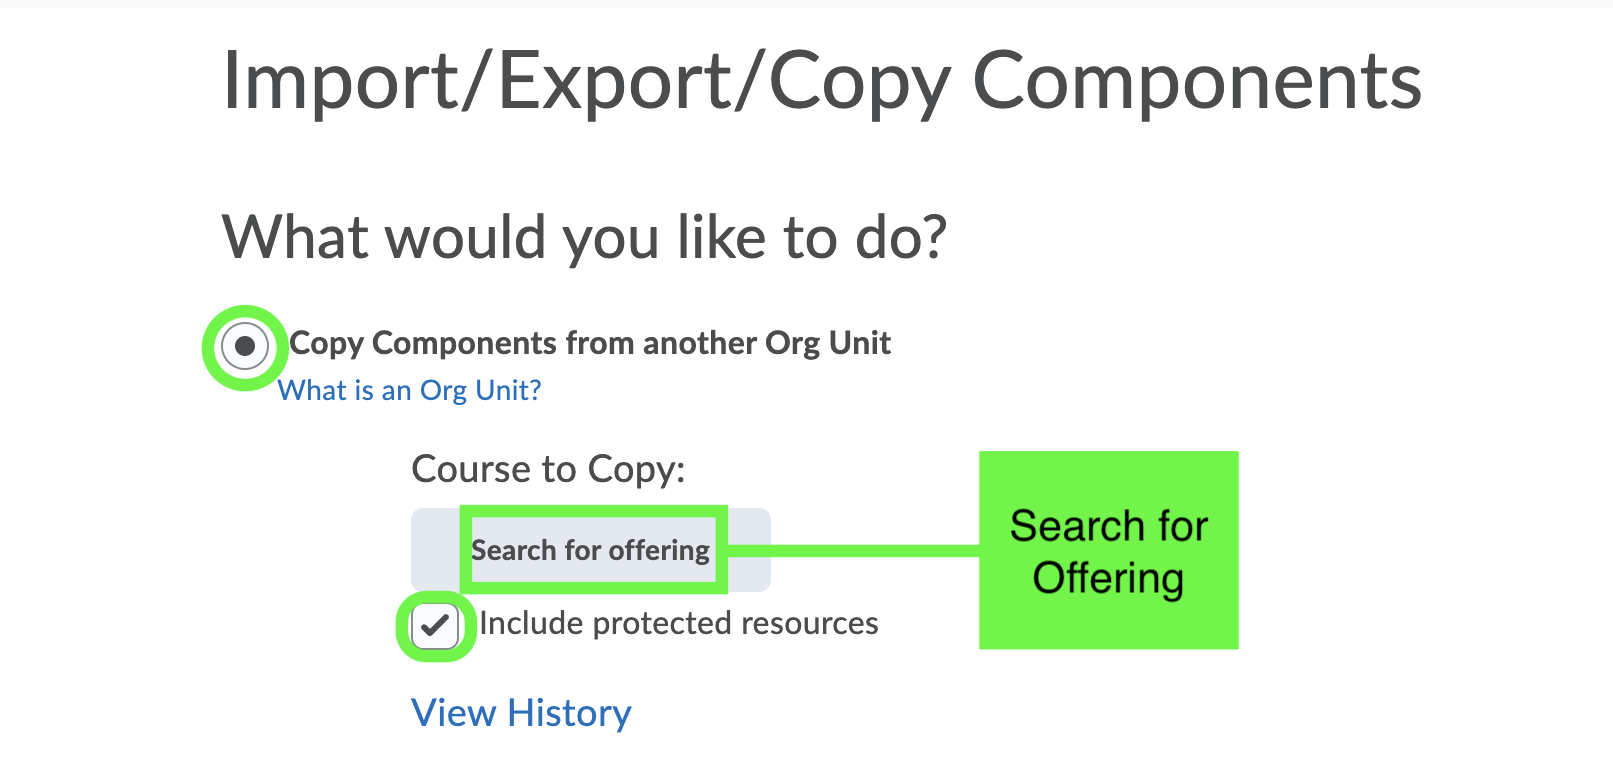
For best practice, make sure that “Copy Components from another Org Unit” and "Include protected resources" are selected. By default, these settings should be marked. If "Include protected resources" is not available, simply ignore this setting. Next, click on “Search for Offering.”
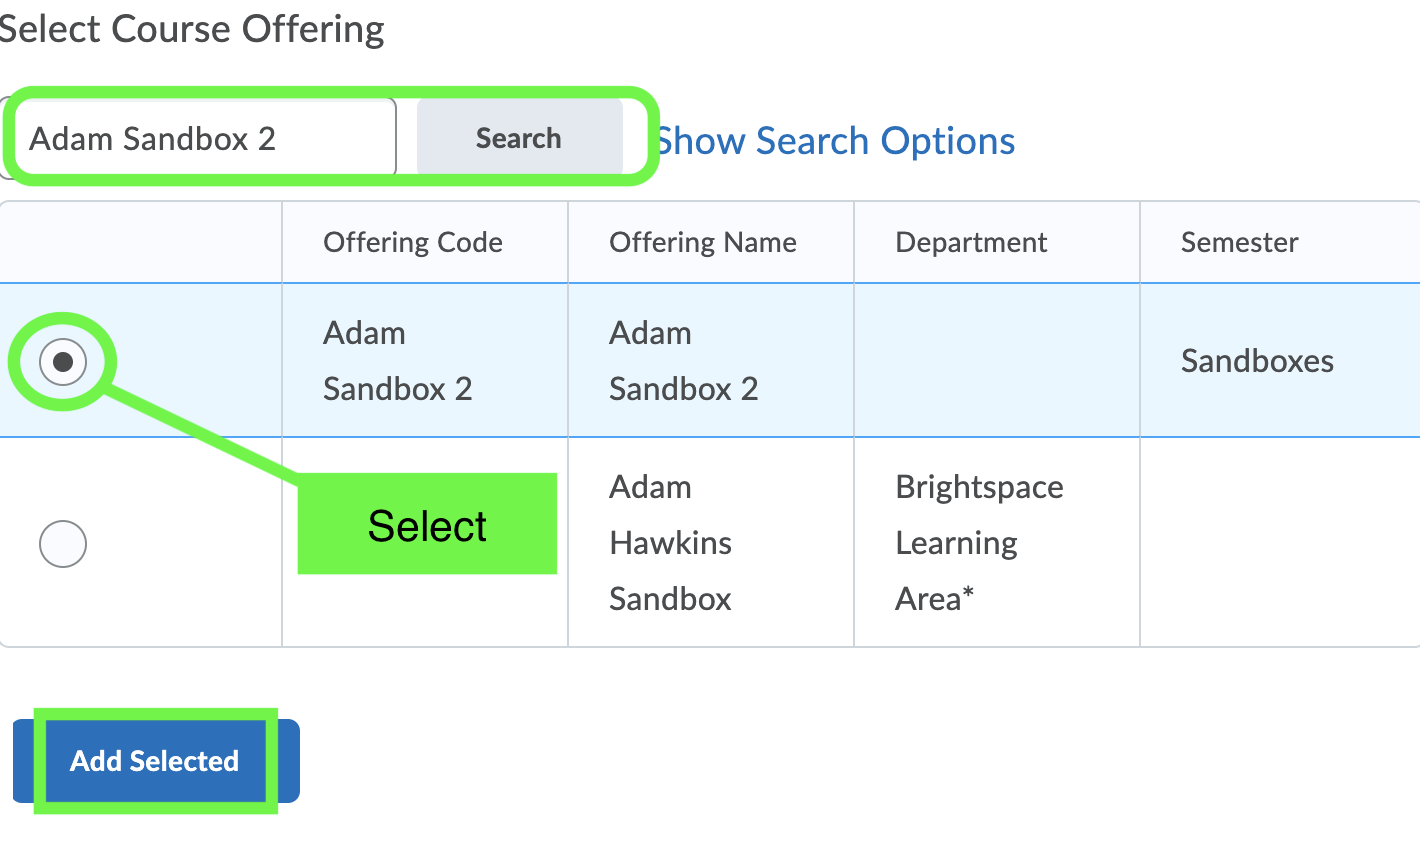
A new window will open. In the search bar, enter the course from which you would like to copy material. That is, search for a previous course. Check the desired course and click "Selected." [You may search for either the course number or course name. Be sure to double-check that you have selected the proper course, for the numbers and names are often very similar.]
At this stage, you may select between two methods of copying: Copy All Components, which transfers everything and Select Components, which transfers specific things. In either case, you will need to enter new due-dates/availability for material with deadlines (quizzes, assignments, discussion posts, etc.)
By choosing “Copy All Components,” all information from the selected course will be copied over immediately.

The green checkmark will indicate that it is complete.
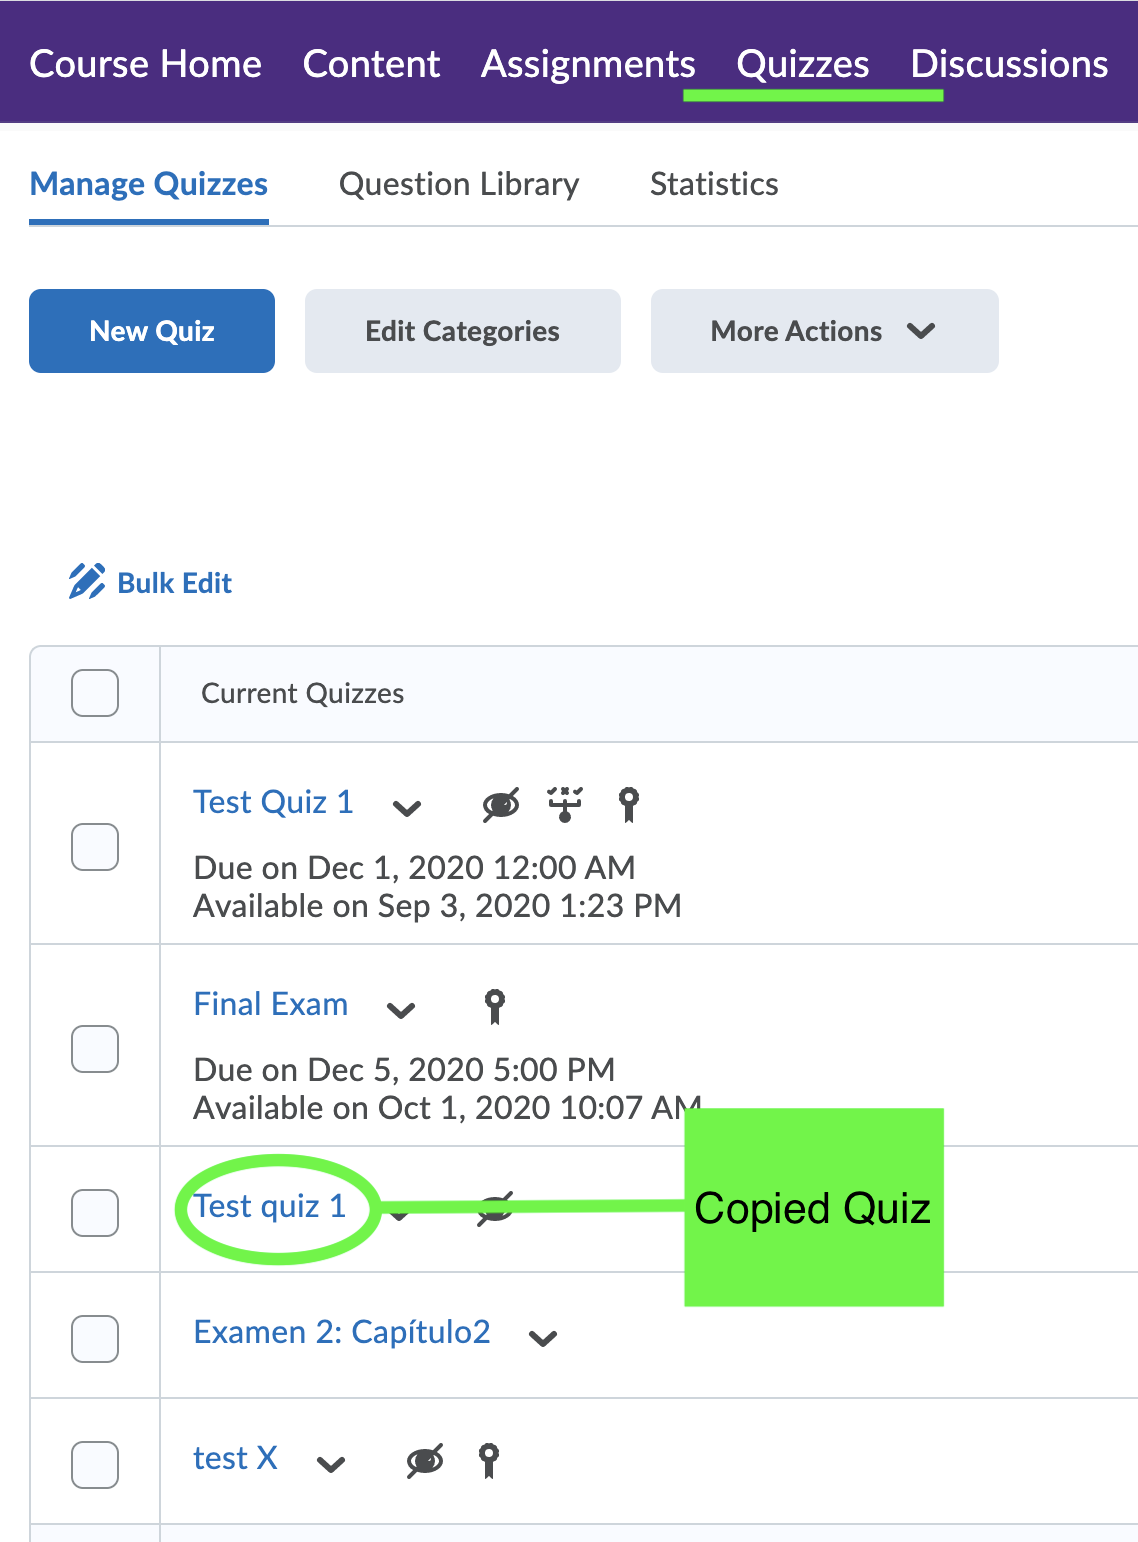
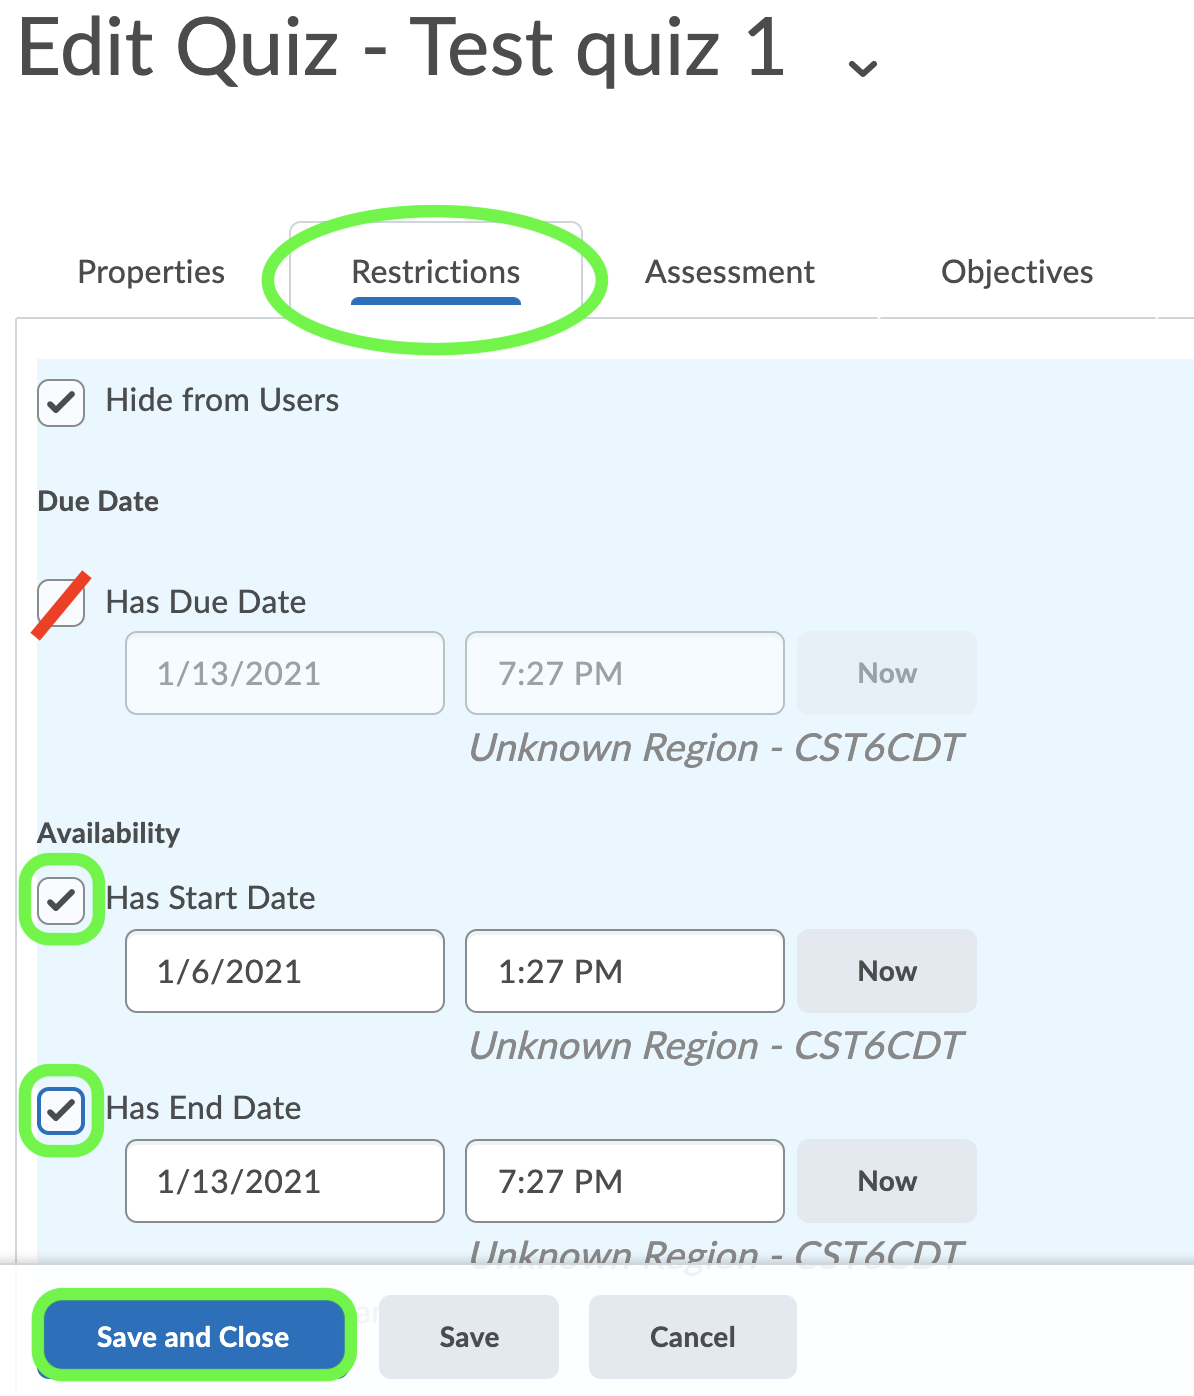
Once the transfer is complete, locate each copied item and enter its new due-dates/availability. In the case of a copied quiz, select Quizzes and click on the newly imported one. Please note, the following instructions only pertain to quizzes. For information on Assignments’ due-dates/availability, see Assignments.
Select the "Restrictions" tab, locate the Availability section, and check "Has Start Date" and "Has End Date." Availability dictates when students may access the quiz. If the students should begin the exam simultaneously, then make the start and end dates very close to one another. (A start date of 10/22/20 8:00am and end date of 10/22/20 8:30am allows for students begin the test from 8:00am-8:30am. This thirty-minute window provides a buffer for technological issues.) [For best practice, it is recommended not to check “Has Due Date” for quizzes.]
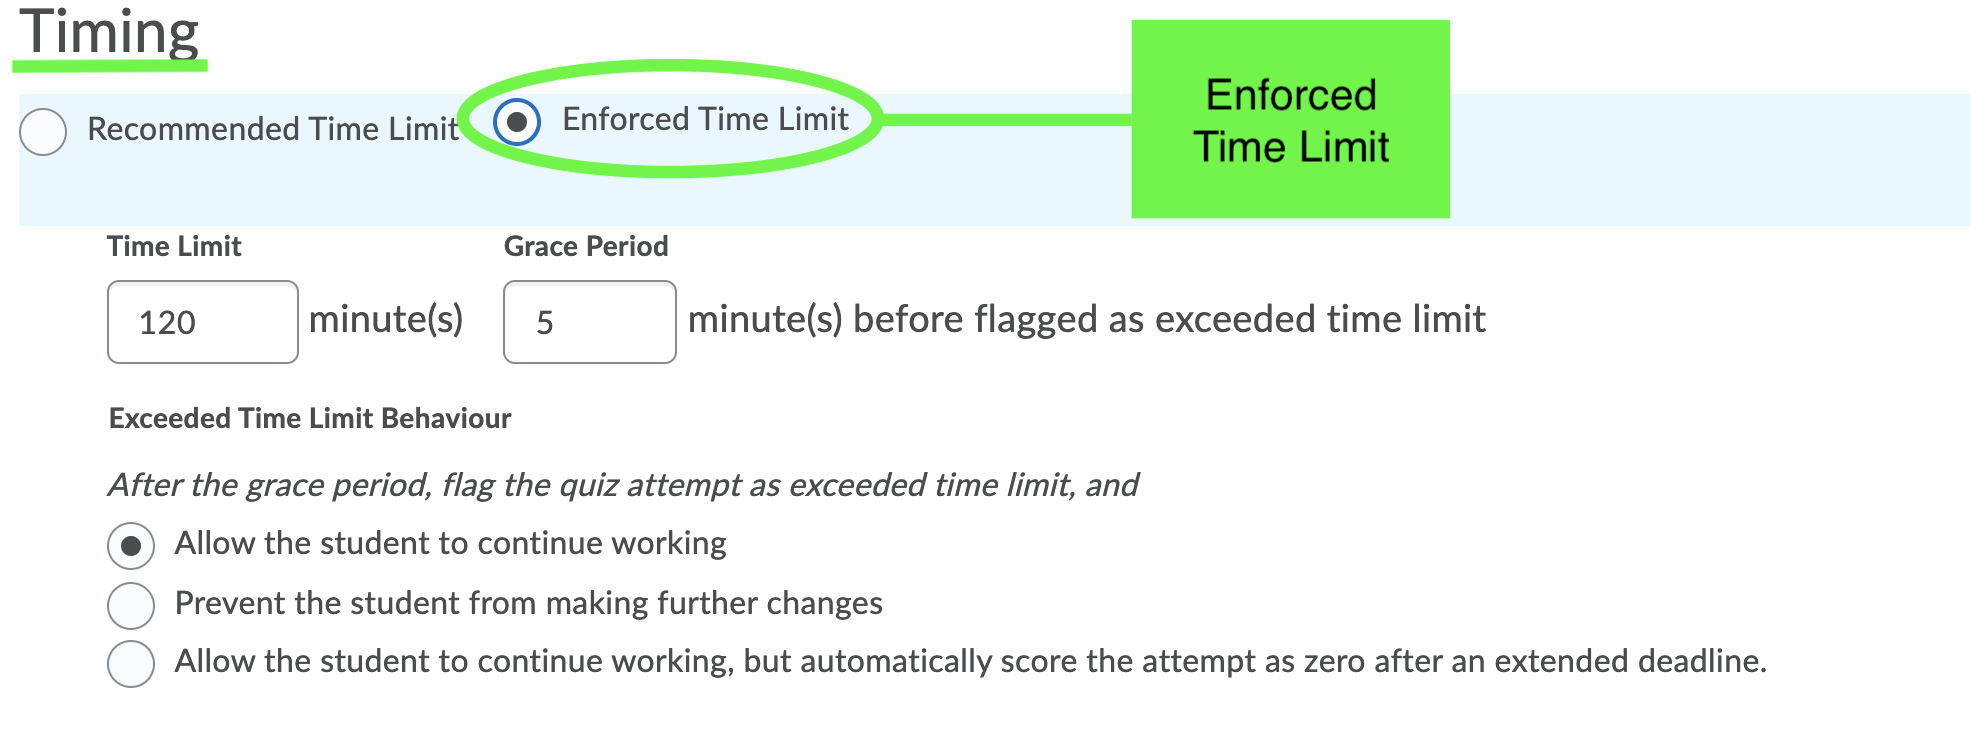
To ensure that students have a limited time frame to complete the quiz, scroll down to Timing and select "Enforced Time Limit."
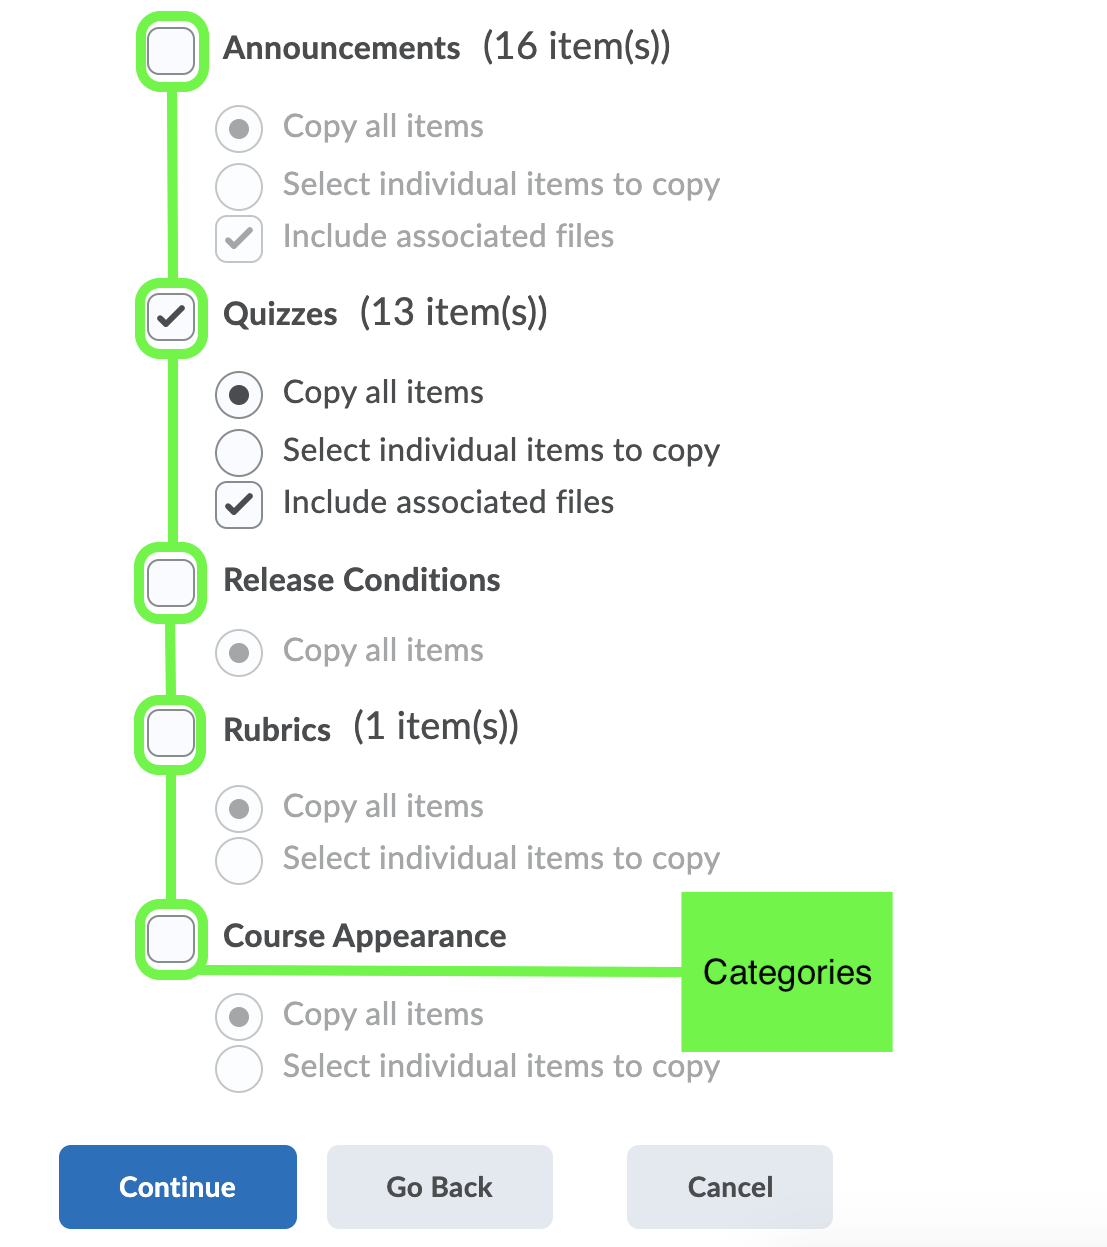
By clicking “Select Components,” you will be able to choose which types of material to copy. For instance, you may opt to copy material from specific categories such as Quizzes and Grades.

On the next page, select which categories (Grades, Quizzes, etc.) you would like to copy. Please note, "Grades" refers to individual grade items and "Grades Settings" refers to preferences such as points or weighted. Also, be sure to check that "Include associated files" is checked. If "Include associated files" is not visible, simply ignore it. This setting ensures that any external material pertaining to the category, such as web-links, will be copied.
If any material, such as a quiz, was previously associated with a grade item (i.e., the assignment was visible in the gradebook), then you must copy over both the Assignment and the Grade categories. Otherwise, the connection between the two will be severed. If you only copy the assignment, then the assignment in the new course will not be associated with a grade item, and it will not be connected to the gradebook.
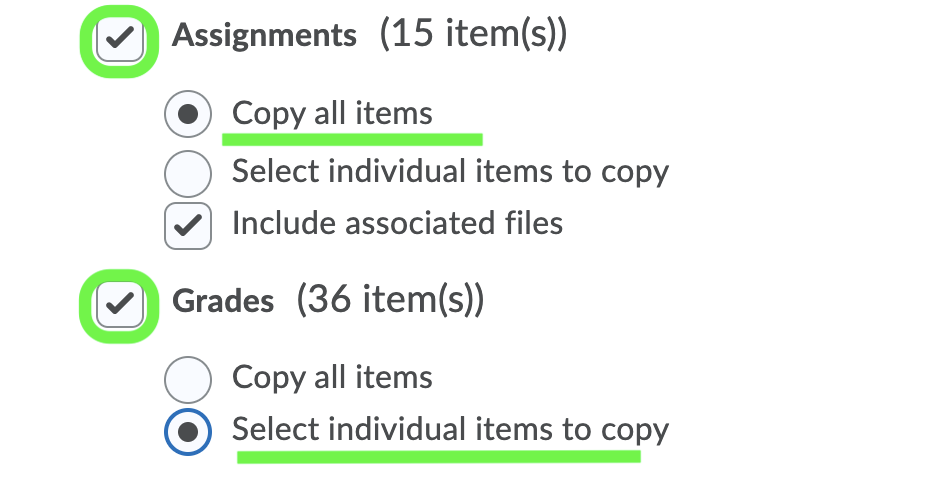
[In this example, all Assignments will be transferred, but only select Grades, those attached to assignments, will be copied.]
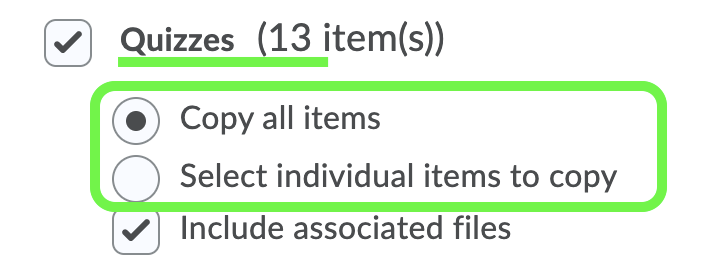
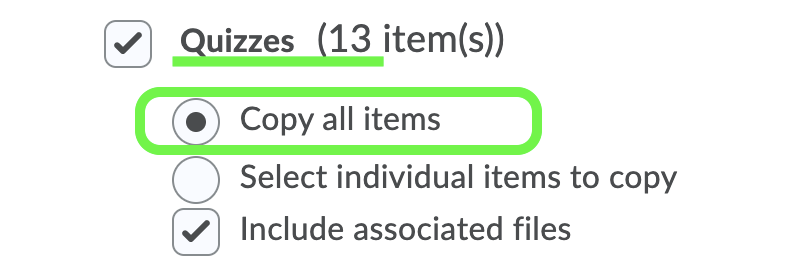
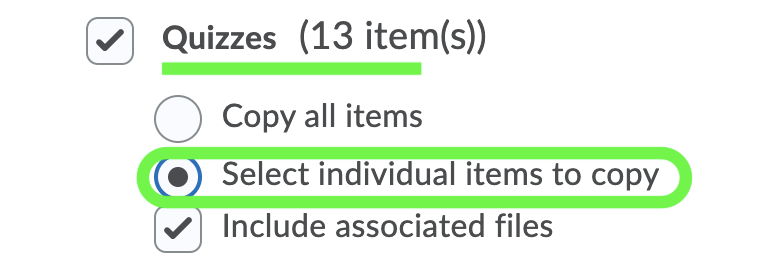
As indicated, under each category there is the option to Copy All Items from a Category or to Select Individual Items From a Category.
If you check “Copy all items” and "Continue," then everything from that category will be copied.
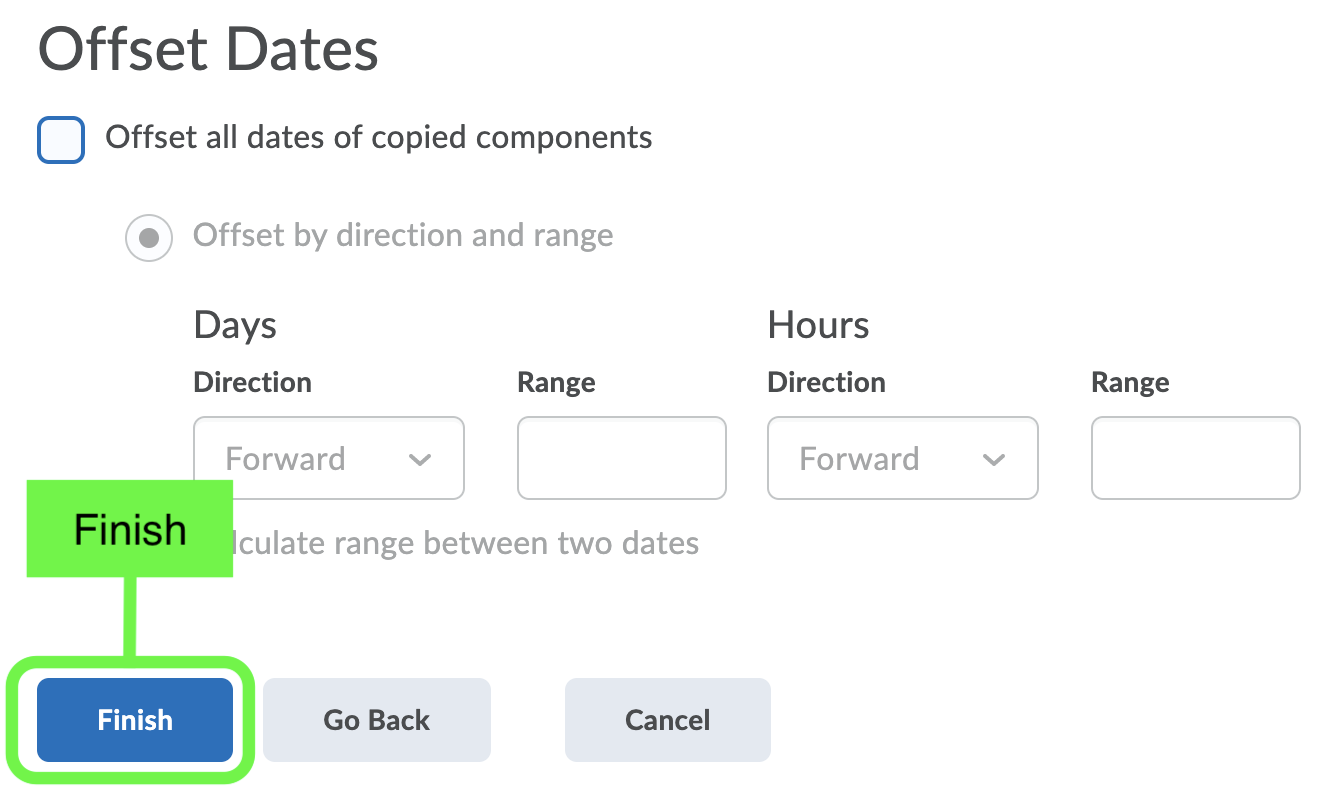
You will be given the option Offset Dates. For best practice, it is recommended not to check “Offset all dates of copied components.” This setting will change every due-date by X amount. However, it cannot factor in the shift from a M/W/F class to a T/R one. Similarly, it cannot account for holidays or breaks. Instead, select "Finish" to begin copying the material.
The green checkmark will indicate that it is complete.

Once the transfer is complete, locate each copied item and enter the new due-dates/availability.
If you choose “Select Individual Items to Copy” and click "Continue," you will be directed to a series of new pages.
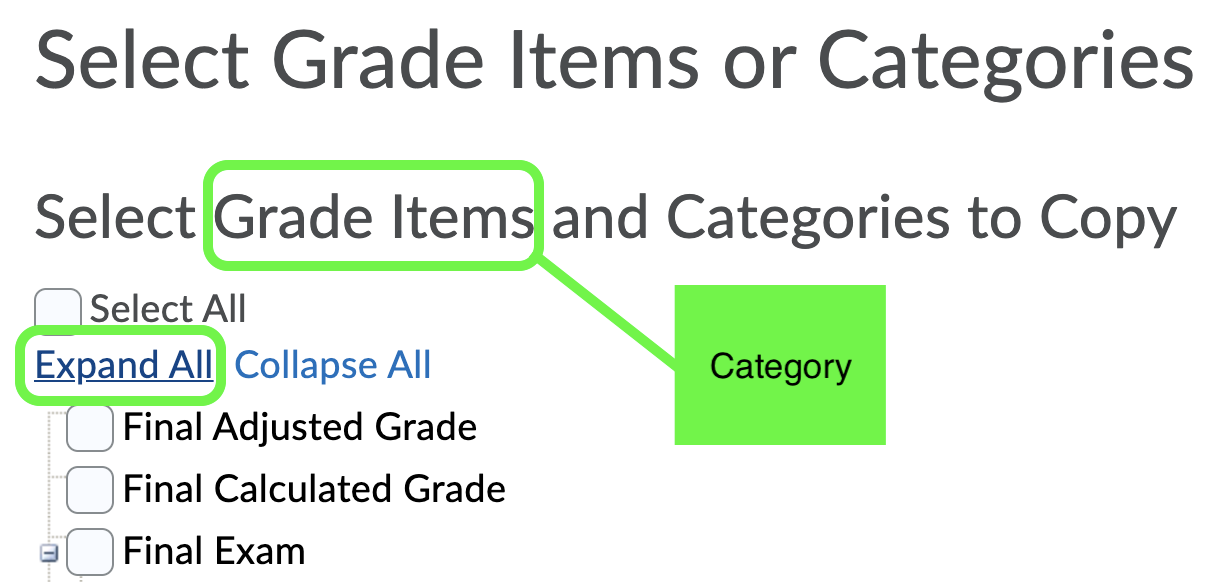
Each page shows a different category. For instance, this page only displays “Grades.” Click “Expand All” and you will be able to check exactly which material you would like to have copied.
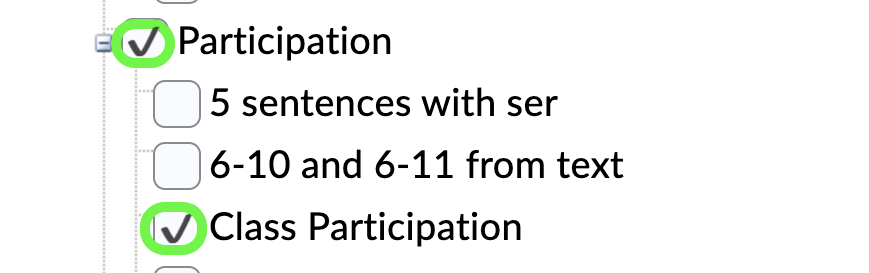
Be aware of the material's indentation. If it is slightly left, then it is a section (e.g., the section of participation in the gradebook). If it is further right, then it is an individual item (e.g., a single participation entry slot in the gradebook.) If you would like for your gradebook to contain both a Participation section and the single entry slot of "Class Participation," then select the squares next to “Participation” and "Class Participation." [This same principle applies to all material attached to grades (quizzes, assignments, etc.)]
Once satisfied, select “Continue” to view the next category of material. On each page, take note of the category, select “Expand All,” mark the desired selections, and click "Continue" to move forward. To navigate between the different categories click "Continue" or "Go Back."

After completing each selected category, you will be given the option to “Offset Dates." For best practice, it is recommended not to check "Offset all dates of copied components." This setting will change every due-date by X amount. However, it cannot factor in the shift from a M/W/F class to a T/R one. Similarly, it cannot account for holidays or breaks. Instead, select "Finish" to begin copying the material.
The green checkmark will indicate that it is complete.
Once the transfer is complete, locate each copied item and enter the new due-date/availability.
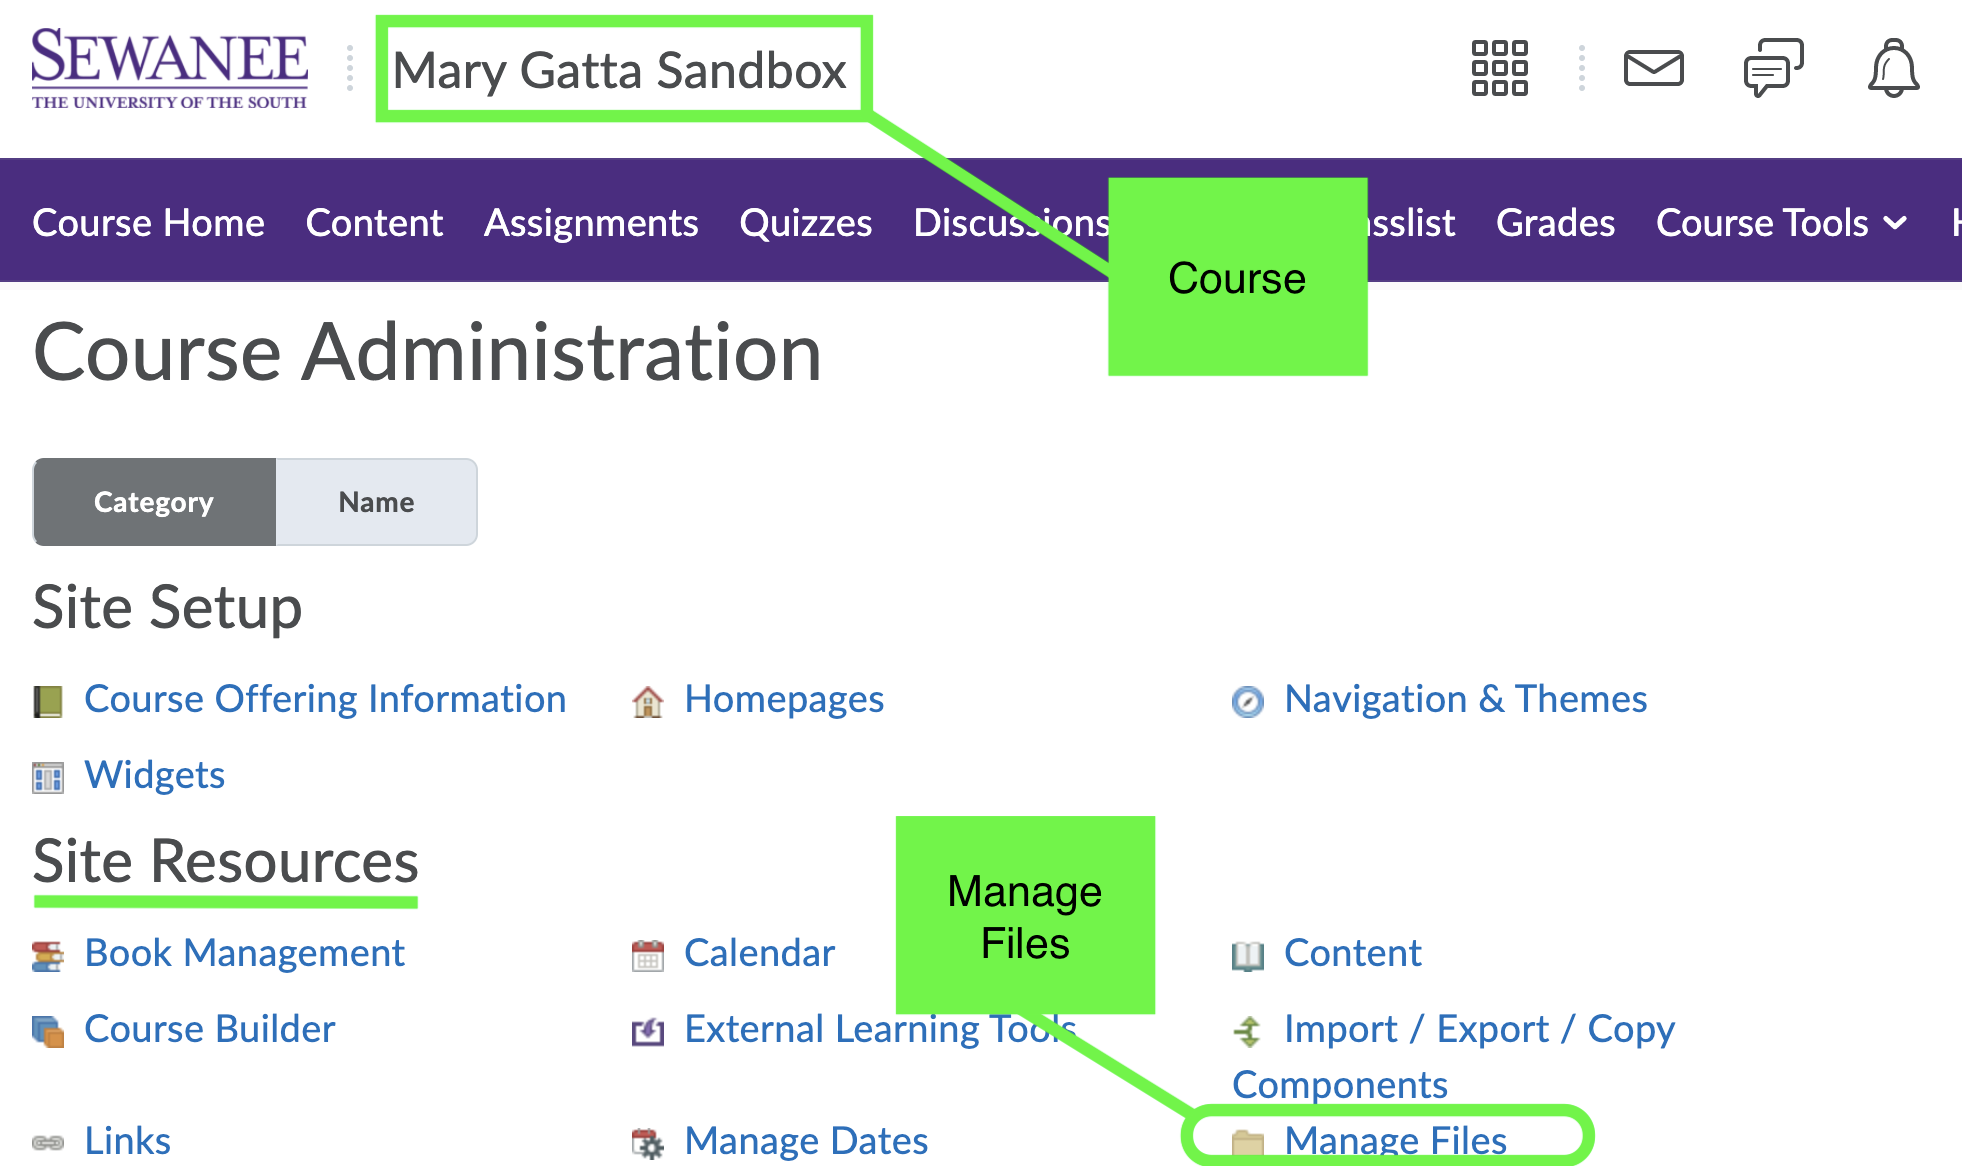
Only Course Files can be overwritten. If a copied Course File has the same name as an existing file, then the original file will be replaced by the copied one. A Course File is content that is external to Brightspace, such as a link to an online textbook. To view a list of Course Files, click “Course Tools” and select “Course Admin.”
Under Site Resources, click "Manage Files." (Be sure to check that you are navigating through the proper course.)
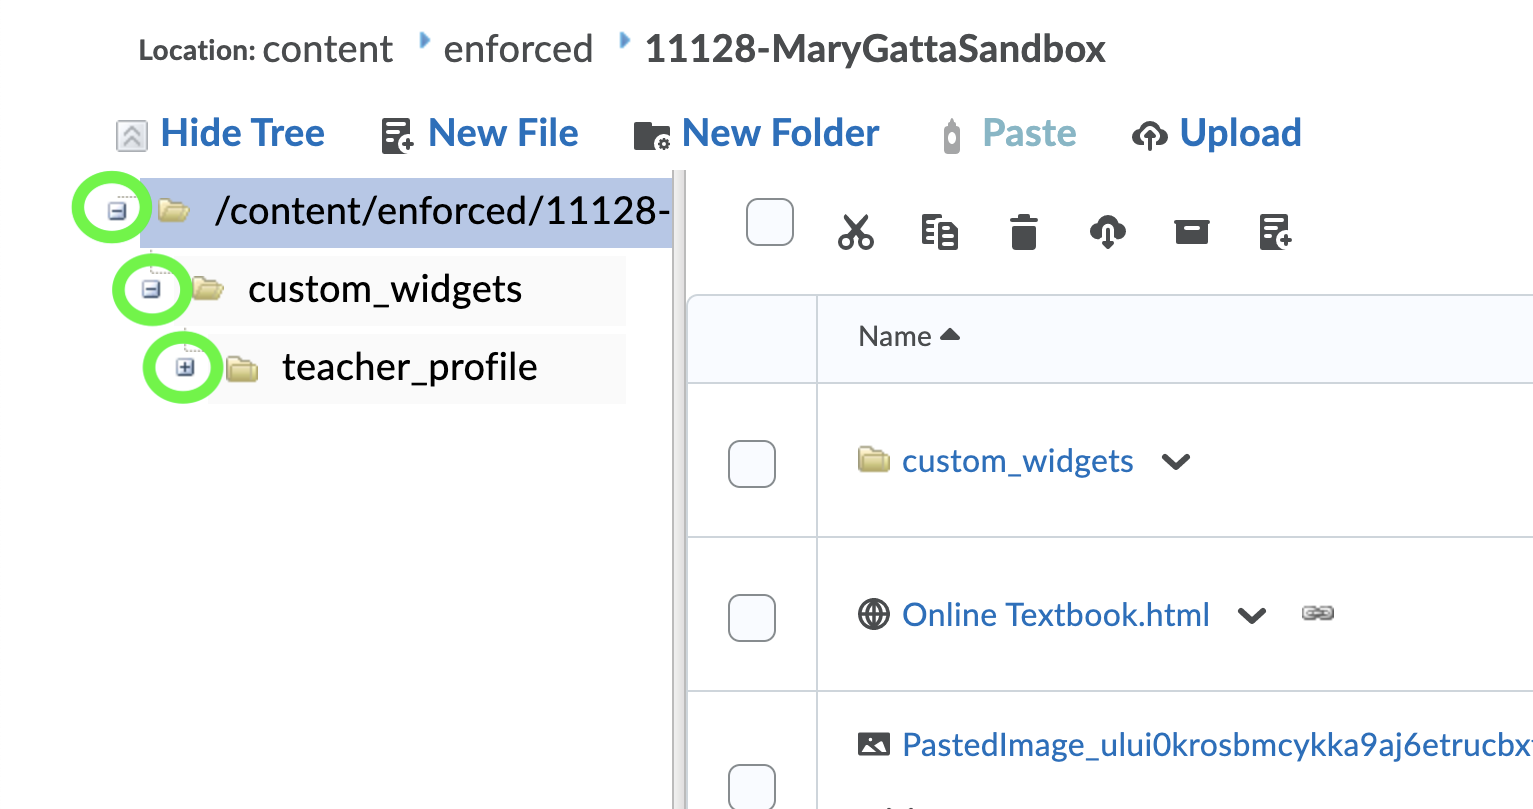
Click on the +/- sign next to each folder to view all Course Files. If the symbol is a +, then not everything is visible. If the symbol is a -, then everything is visible.
As stated, a shared name between content will result in an overwrite only if the material is a Course File. In all other instances, the material will be duplicated. For example, if the current/upcoming course has a “Quiz 1” and you also wish to copy a different “Quiz 1” from a previous semester, then you may do so. Once complete, you must rename at least one of the quizzes in order to avoid future confusion.
User data will not be copied. For instance, when copying a quiz, students’ attempts will not be transferred. Likewise, a discussion will only include forums and topics. No individual posts will be copied.
If you have further questions, please reach out to a member of our faculty support staff for help, or send an email to: facultysupport@sewanee.edu.
Browse through Sewanee's Brightspace Guides to find some basic information and instructions on using some of the most common features (Login, Homepage, Student View, Content, Assignments, Grades, and more.)
A page listing the University's faculty support staff for further help.
A link to the Brightspace Community which serves as the help/documentation portal for the platform.