Brightspace allows you to create an attendance roster on your course homepages that can be edited by you and viewed by your students. Similar to a paper attendance roster (or an excel spreadsheet), you (1) create a book, (2) create all the columns for class meetings, and (3) manually mark present or absent for each day of class.
If you keep up with your attendance entries after each class meeting, both you and your students will have access to an easily visible and transparent attendance record that can be checked throughout the semester.
1. make an attendance roster
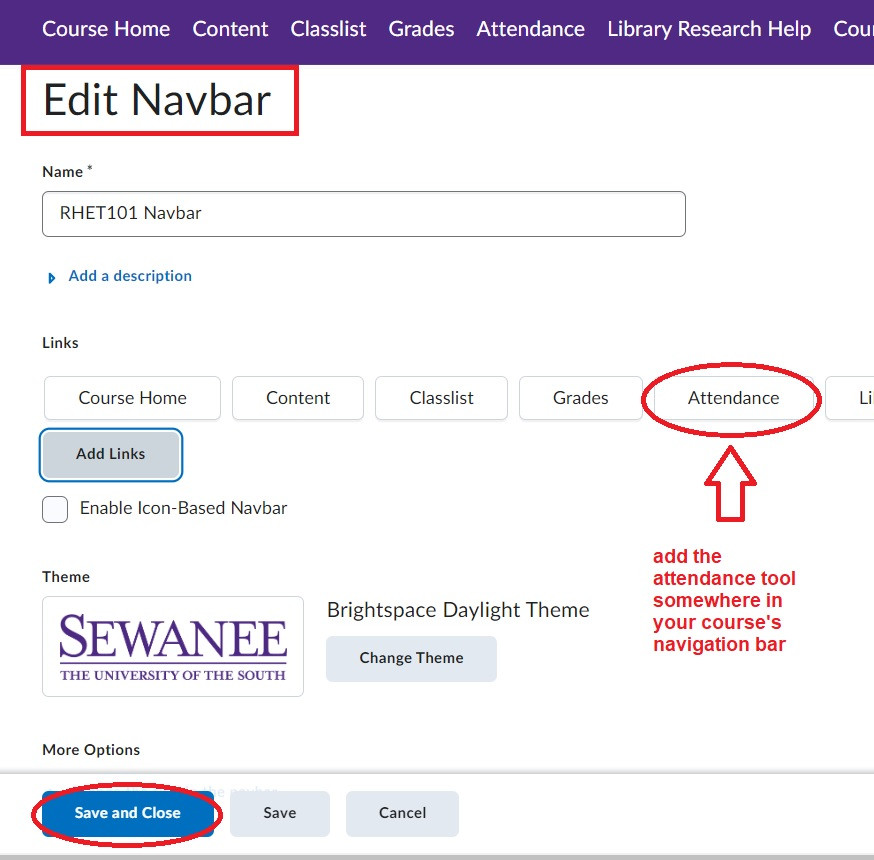
To get started, first you must add the Attendance tool to your navigation bar. You can do that by editing the navbar (see our guide), and putting in the attendance tool:
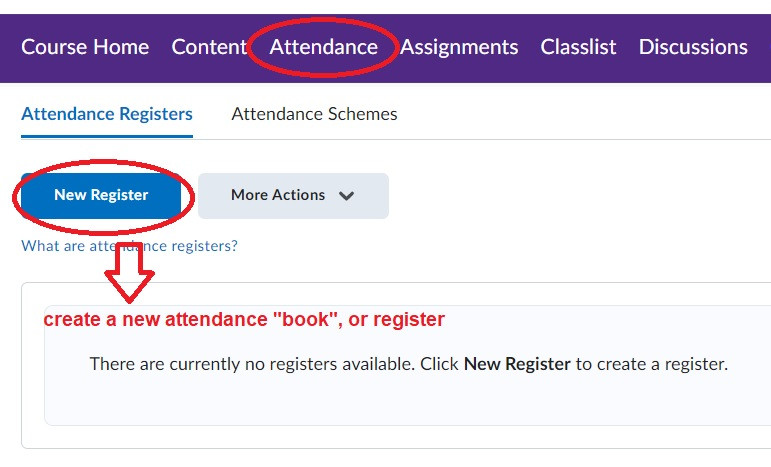
Once added to your bar, click on Attendance, and then New Register to create a new attendance book.
(*Note: You only have to create one register for the entire course)
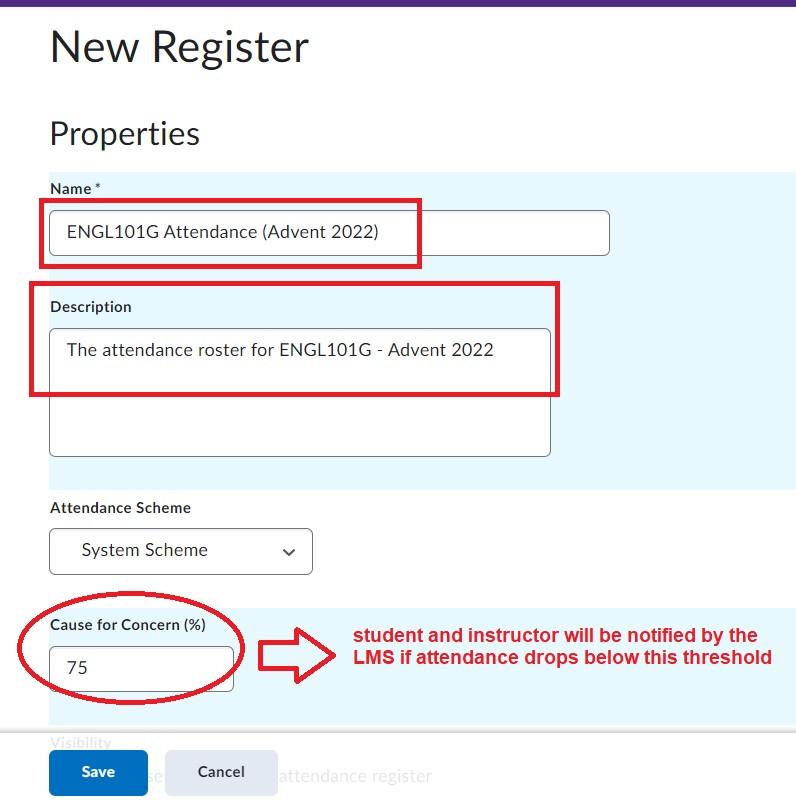
Write in a Name and a Description for your course's attendance book, and set a threshold for system alerts if a student's current attendance falls below a certain percentage of overall entered class meetings:
Scroll down, and then input the first three sessions of your class meetings, and hit save: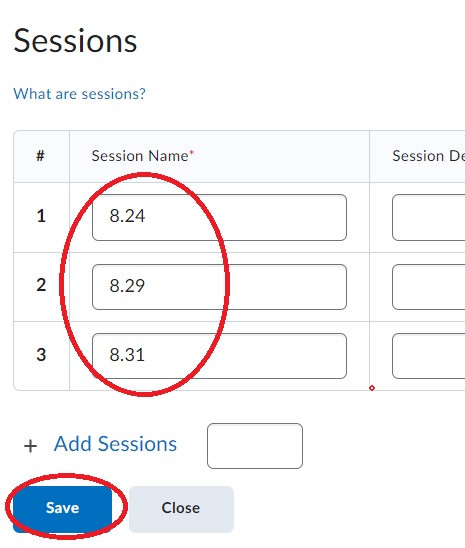
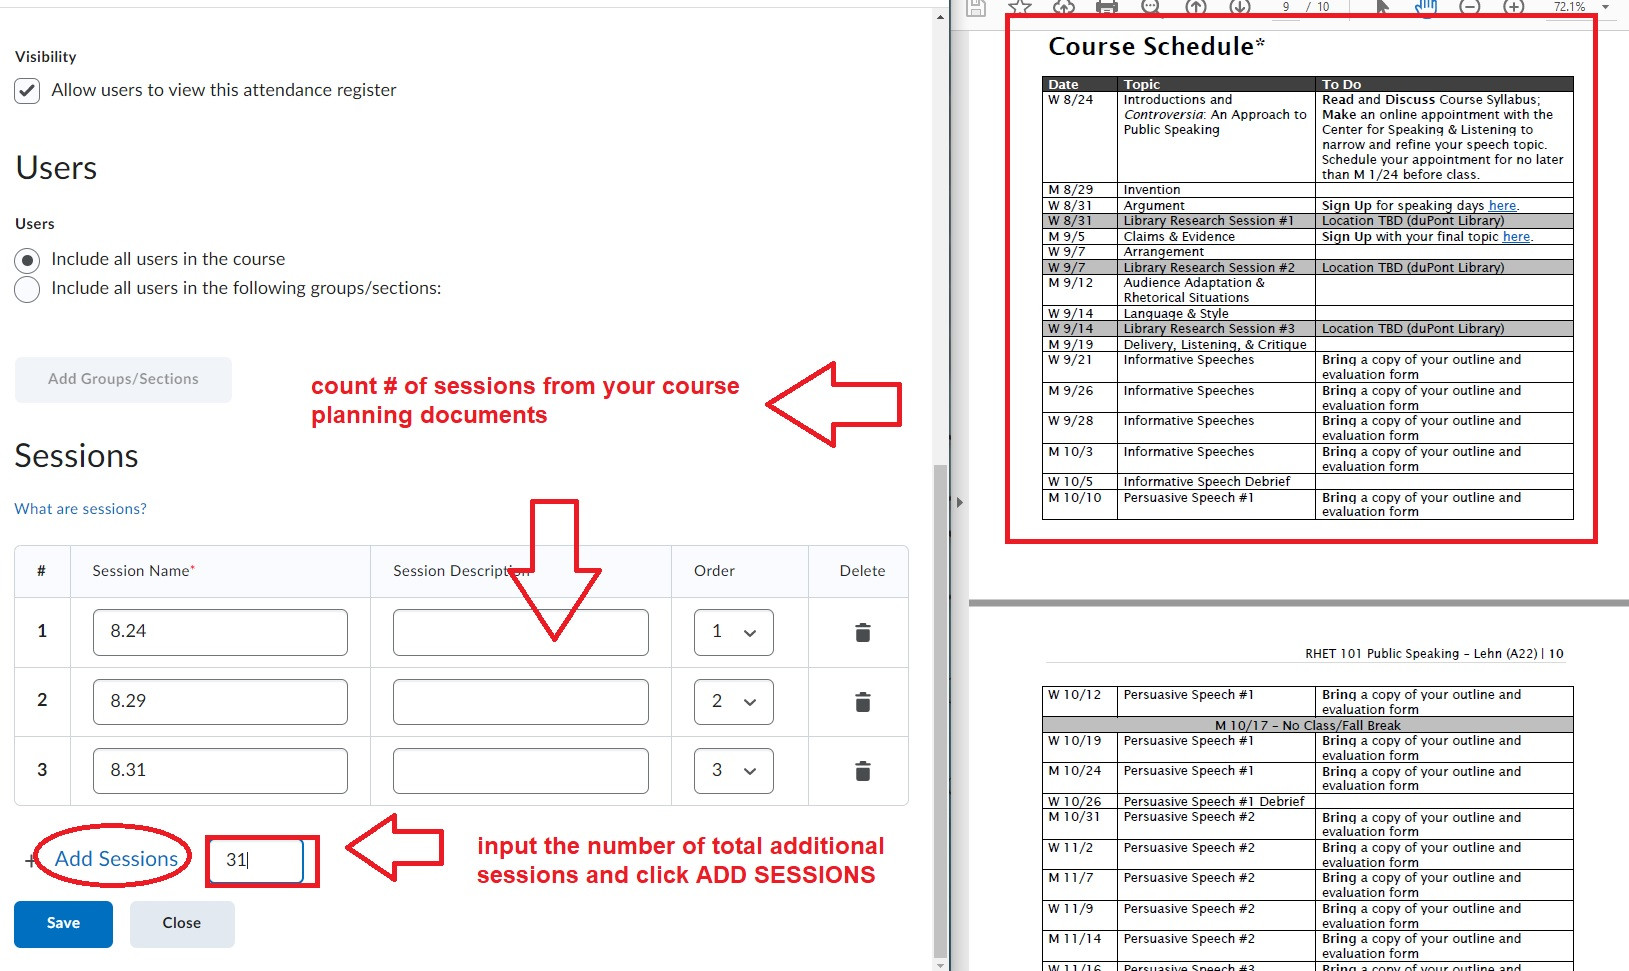
Once you have saved three sessions, you can add additional sessions to the roster. Open your course syllabus or course schedule document, count the number of sessions to be added, input that number, and click on Add Sessions to make enough columns in your attendance book for all class meetings:
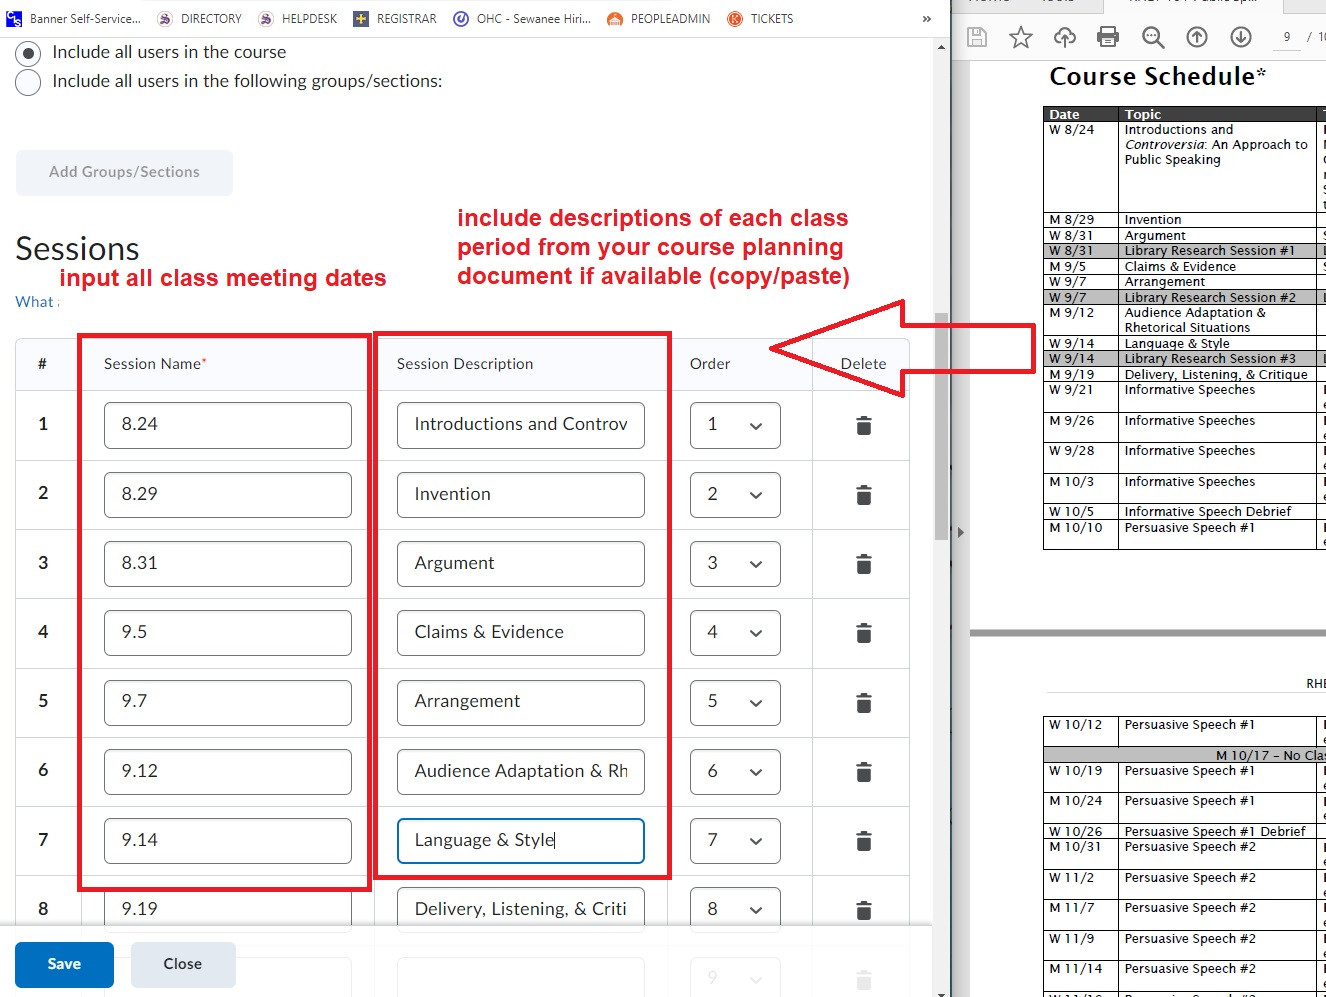
Complete your attendance register/book by inputting all your class meeting dates in consecutive order. You may wish to include descriptions of each class meeting if that information is available (and easily copy/pasted) from your course planning document:
Once you've filled out your register entirely from your course planning calendars/documents, hit SAVE and then use the navbar to return back to the attendance tool:

2. take daily attendance
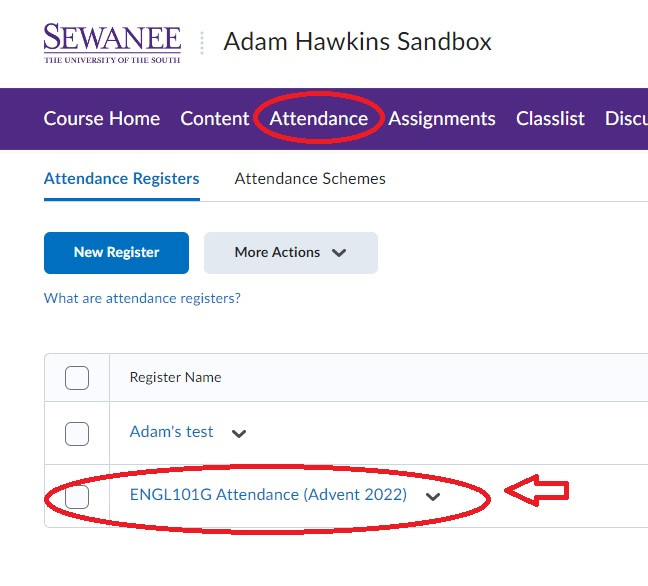
In order to take daily attendance, simply click on ATTENDANCE in your navbar and choose your now pre-made roster:
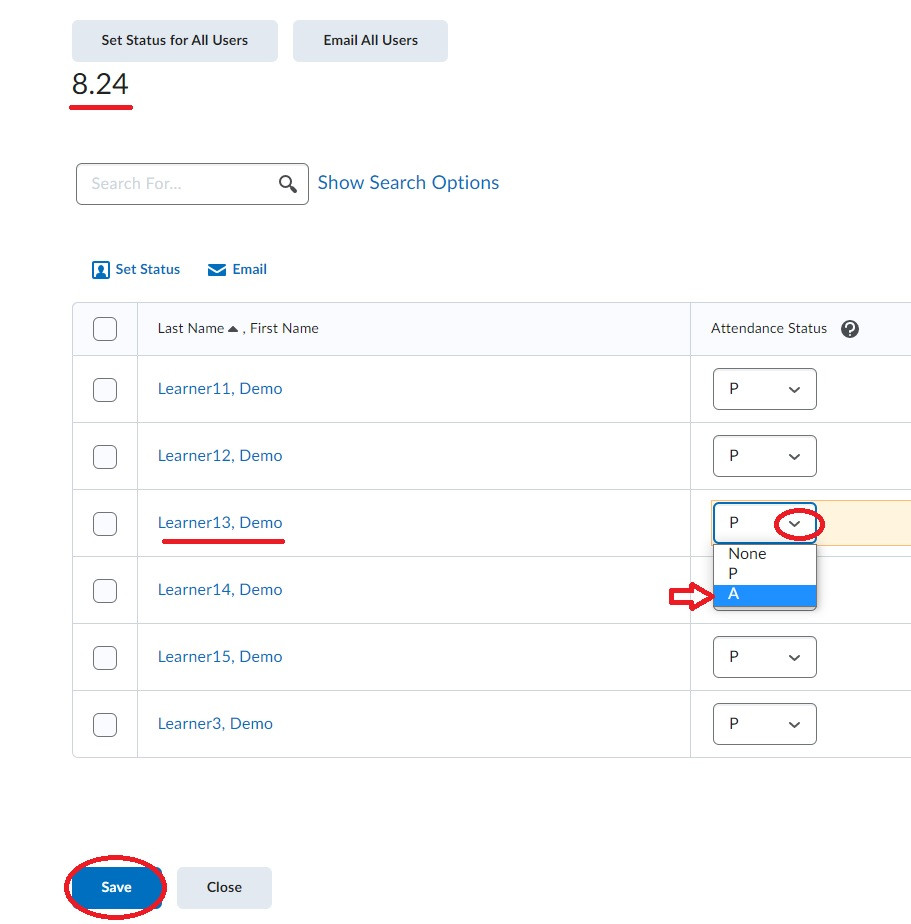
Once inside your roster, click on a date in the column in which you'd like to mark attendance:
For convenience, first set the status of all users to P (or 'present):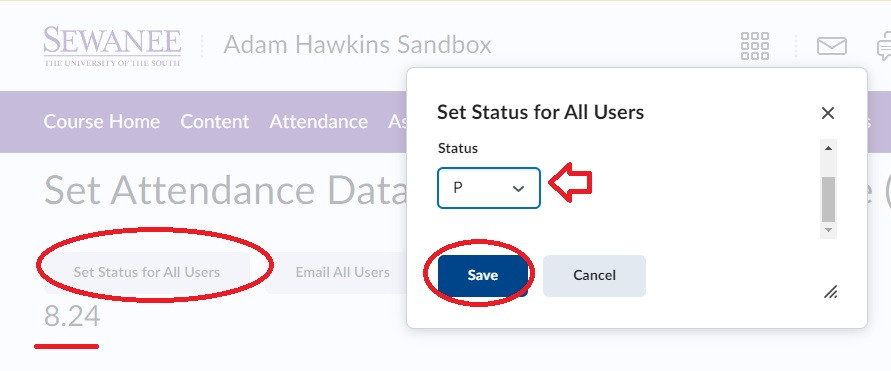
Once all the users have been set to present, you can go through and mark which students were absent from the drop-down menu, then hit save to complete that day's attendance record:
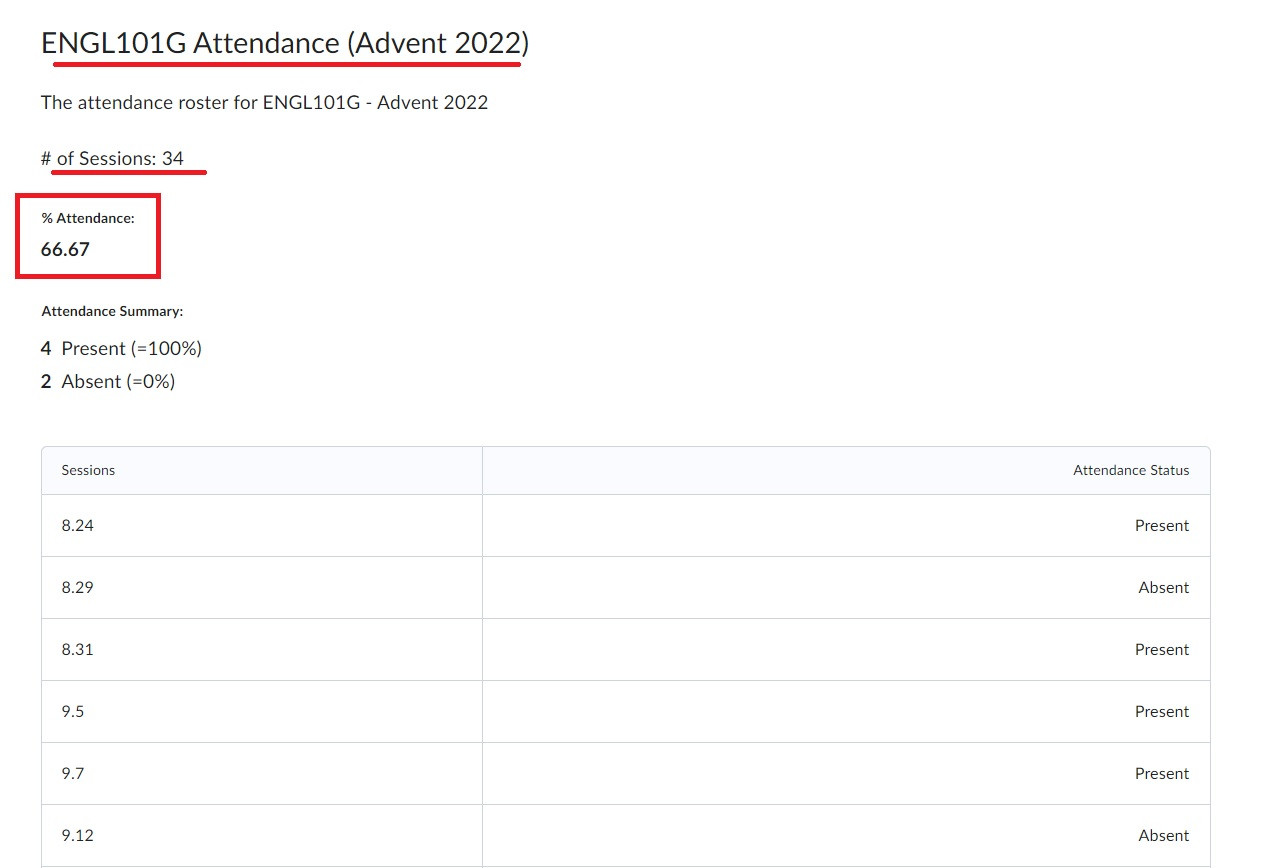
Your attendance taking is now complete for this class day! If you keep up with the records for each class period, your students will be able to view their own attendance report using the same tool. From their side it looks like this:
Questions about Attendance?
Contact your Faculty Technology Coordinator