Creating an assignment Using the New Experience
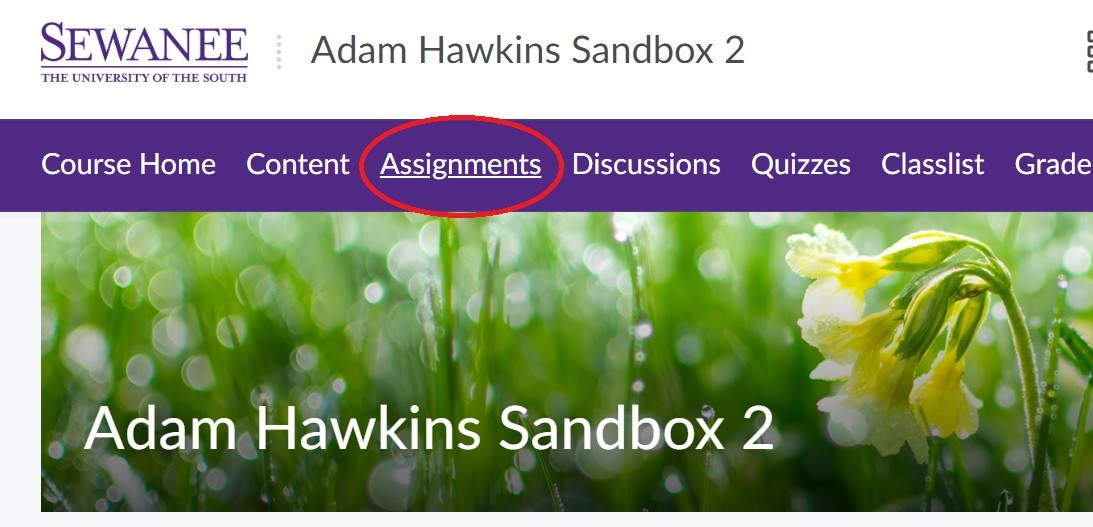
To create an assignment in Brightspace, first navigate to the Assignments section of your navigation bar. If you lost the link, you can edit your navigation bar to put it back:

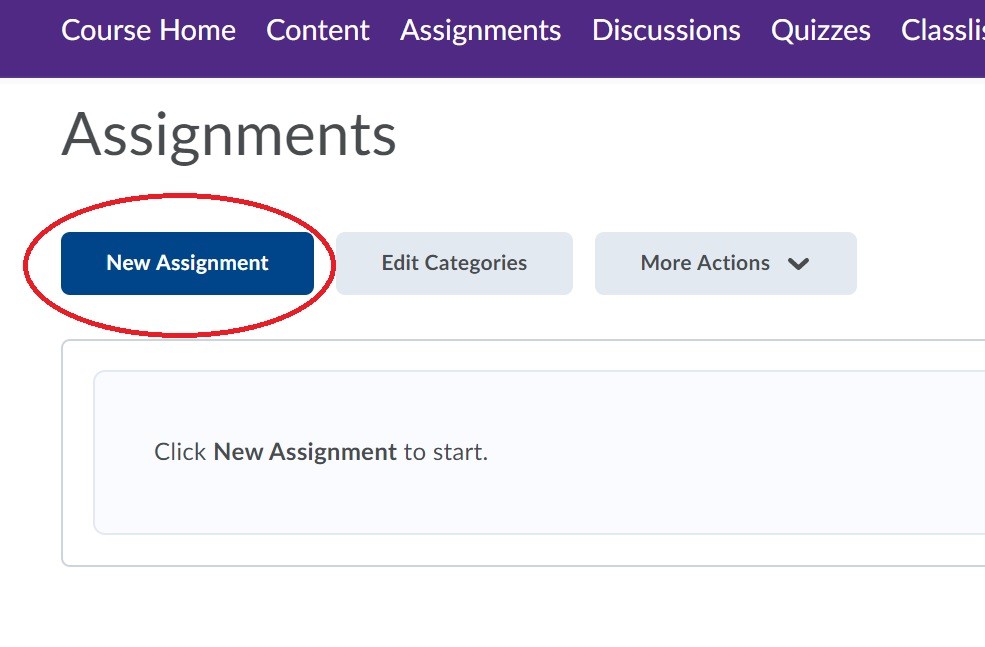
From this window, click on the blue New Assignment button to begin creating your assignment:

You’ll immediately notice a new layout with three menu cards on the right. These cards contain settings that will compliment the Assignment by adding additional control options. We'll look at these in a minute. Staying mostly the same are the standard boxes for Name, Grade Out Of, and Due Date.
Also provided is a familiar text box for brief instructions to your students. If you have a longer prompt (or some already written in other file formats) you can easily attach files to the assignment using the icons a the bottom of the page. The first icon (an arrow pointing into a cloud) is for uploading a file, the second (a lightning bolt and chain) is for linking to another activity within the class, and the third (a chain link) is for attaching a link to a website or external tool. You'll notice here that you also have the option to record audio or video for the assignment.

The following is an overview of some of the basic options for your assignment. As always, if you have questions please don't hesitate to reach out to your faculty technology coordinator or the Help Desk.
Availability Dates and Conditions for Release:
- Start and End Date: This box controls the window in which students can view the assignment. Leave blank if you want them to view the assignment for the entirety of the course.

- Release Conditions: You can add a condition to be met before students can view the assignment. There are several to choose from such as completing a checklist, visiting content, or participating in class discussion board. To remove condition, click on the X to the right of the condition.
- Special Access: To provide time accommodations for students, you can create exceptions to the start and end date for specific students. To do this, click on Manage Special Access and the light blue "Add Users to Special Access" button. Here you can set alternative dates and apply to select students.
Submission and Completion (Depending on your previous selected assignment and grade settings, some of these may not be available)

- Assignment Type: If this is a group project, you can select Group Assignment and set your groups using the Group Tool. Individual Assignment is the default.
- Submission Type: In this dropdown menu, you can select how you want to collect the assignment. Your options are:
- File Submission - Word, PDF, JPEG, etc.
- Text Submission - In a text box much like the one where you wrote the assignment description. This has limited editing tools and features, but it allows for students to submit a quick response.
- On Paper Submission - Students hand you a physical copy of the completed assignment.
- Observed in Person - Students to demonstrate mastery of the assignment by performance. This option could be especially helpful for the fine arts and laboratory sciences.
- Files Allowed Per Submission - Unlimited allows students to continue to revise and edit and submit until the deadline. Selecting One File will limit the student to a single submission.
- Allowable Files Per Submission - The default is No Restrictions which means students can upload in any of the allowable filetypes. Selecting Annotatable Files ensures that faculty can mark on the submission. There are more than 20 accepted files types for annotation, the most commonly used being .doc., .docx., .ppt., .xls., .jpg., and .pdf. For a complete list see here.
- Notification - If you wish to receive an email alert when a student submits and assignment, enter your email in this box.
Evaluation & Feedback
- Rubrics - If you have created rubrics for other assignments, you can attach them to the here for students to see. If you haven't created them or you want them specific to this task, you can create a new one now.
- Annotation Tools and Anonymous Marking - Check these boxes to enable the tools for markups and to create for hiding student names while marking. You can enable or disable this feature until a submission is made.
- NOTE: If the student's name appears in the paper, you will still be able to see it. This feature only blocks the name of the student from the submission timestamp.
- NOTE: You will not be able to see any learners' name in the submissions until you have hit the Publish All Feedback button. You can read more about this feature here.
Always remember to hit Save and Close in the lower left corner to apply your changes.

