Brightspace Documentation on Assessments
A link to managing quizzes and tests on the Brightspace community page.
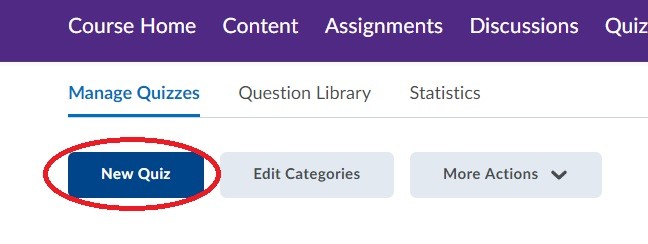
To create a quiz or a test in Brightspace, click on Quizzes in your particular course from the navigation bar at the top:

From this quizzes window, click on the blue New Quiz button to get started with your assessment:
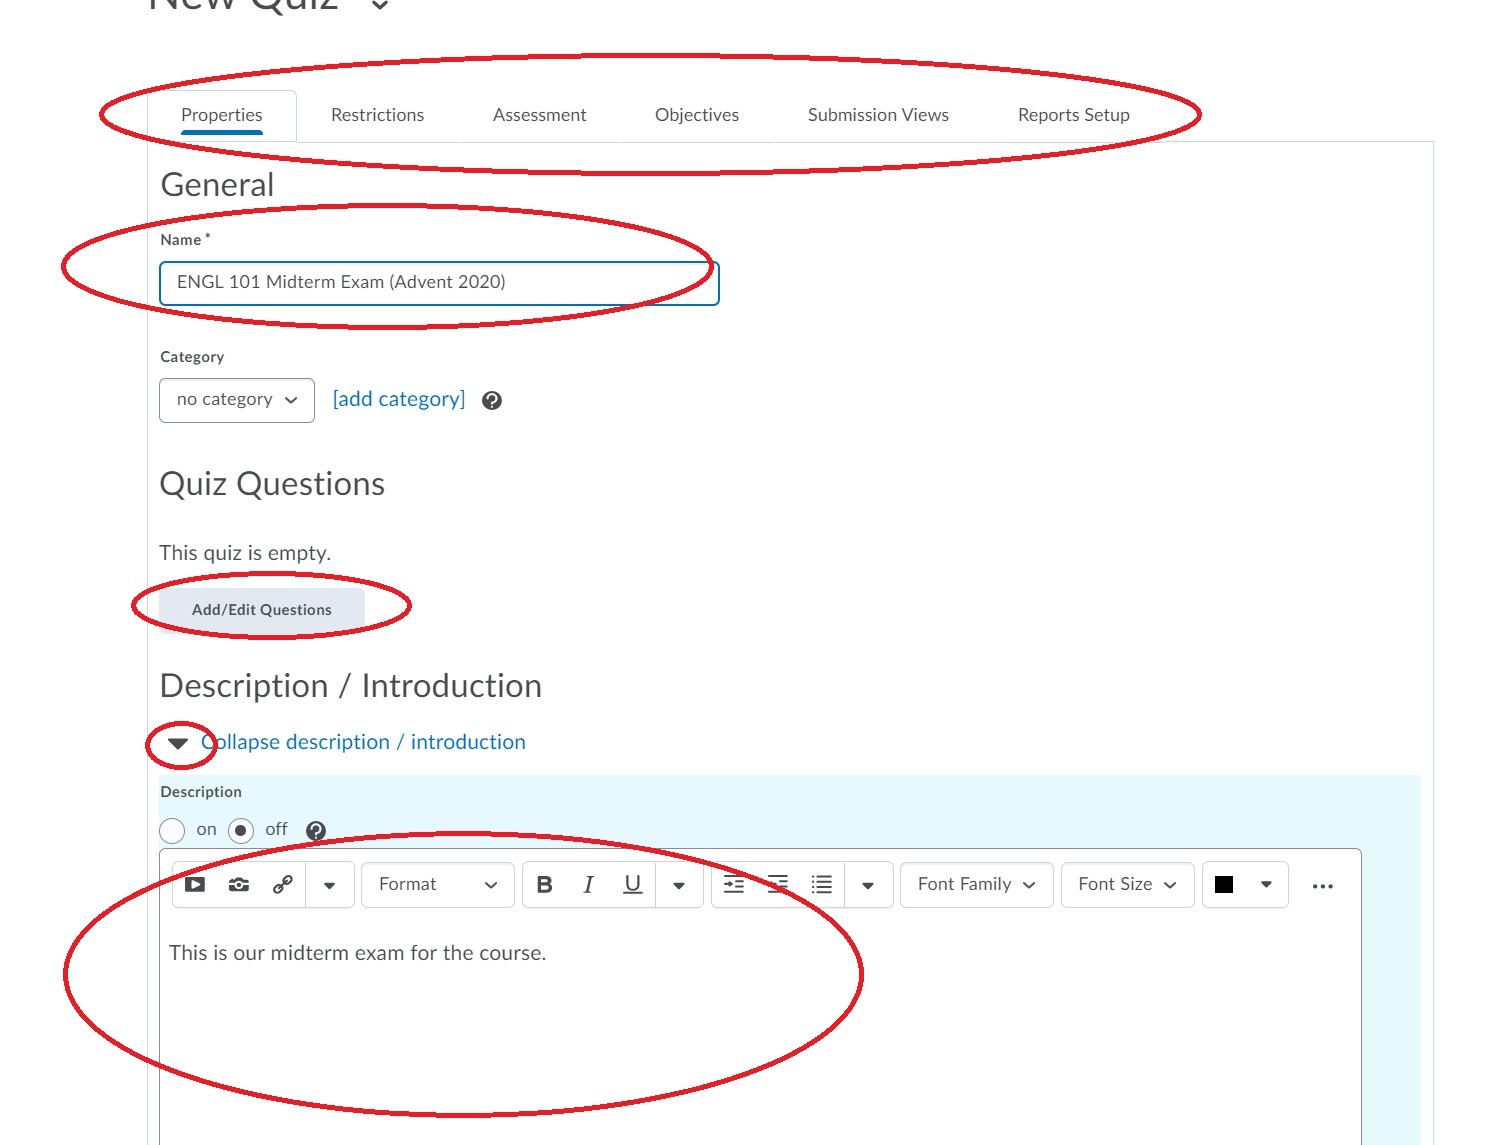
From the assessment creation window, first take note of the tabs at the top. You can use these tabs in much the same way you've created Assignments and Discussions. The restrictions tab will allow you to set due dates and availability dates, and the assessment tab will manage the grade item connected with this test.
For now, just make sure to include a title and a description of the assessment. When you have those, you are ready to begin adding questions by using the add/edit questions button:
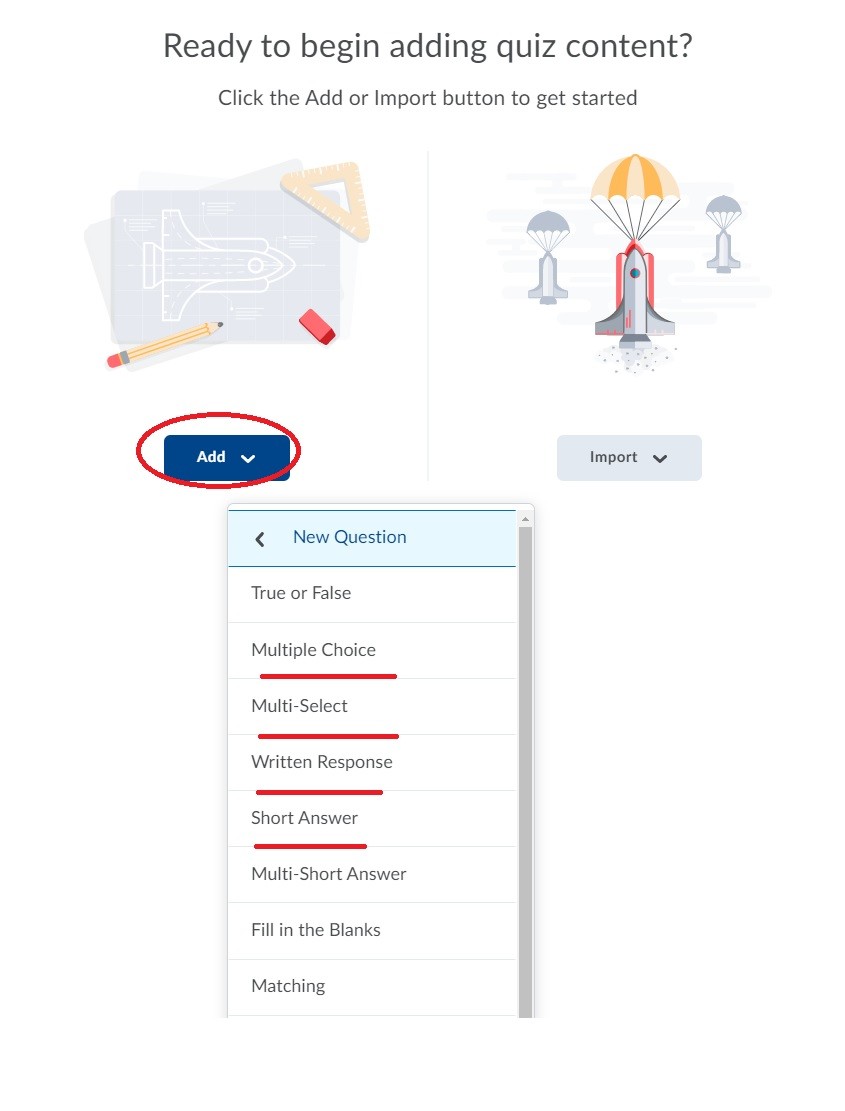
From the question creation interface, you'll be prompted to generate a new question or to import questions from a question pool or external file.
Learn more about Question Pools
Learn more about importing Questions from Excel (.csv file)
For now, you can get started by creating a new question directly in Brightspace using the blue Add button and choosing the kind of question that you want to create:
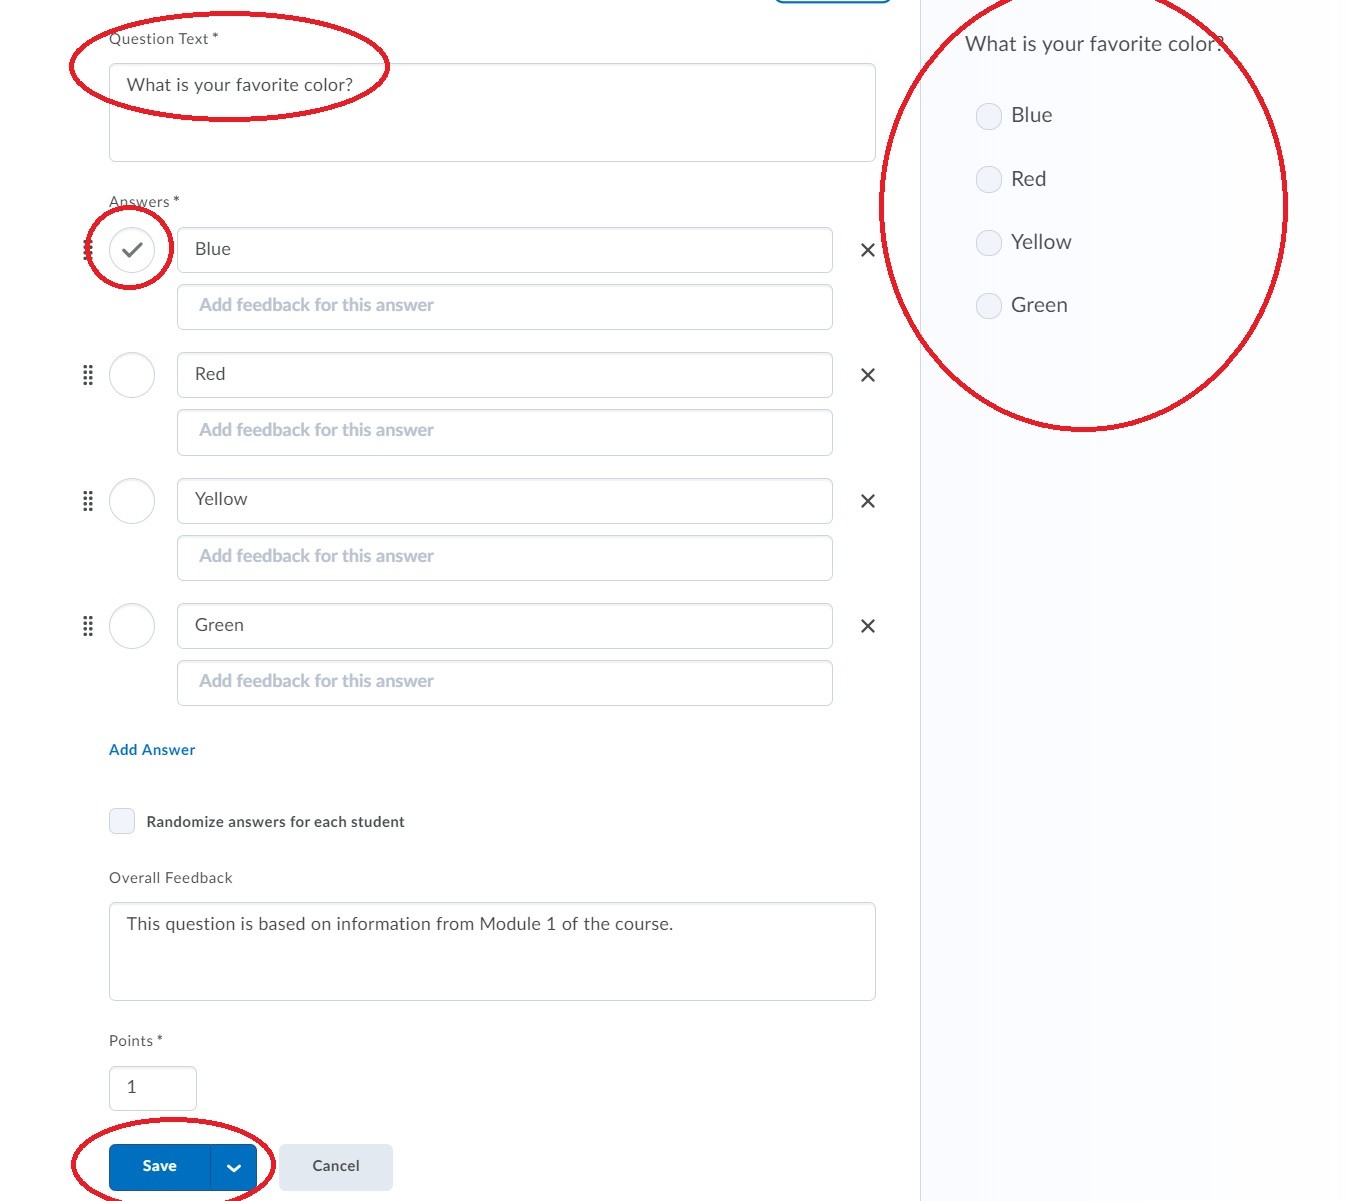
Type your assessment question at the top, and, if your question is multiple choice, you can type in the different answer choices in the boxes below. Click on the bubble next to the question to mark the correct answer. A preview of what the quiz question looks like is shown on the right side as you design it. When you are finished, make sure to hit the blue Save button to continue and create the next question.
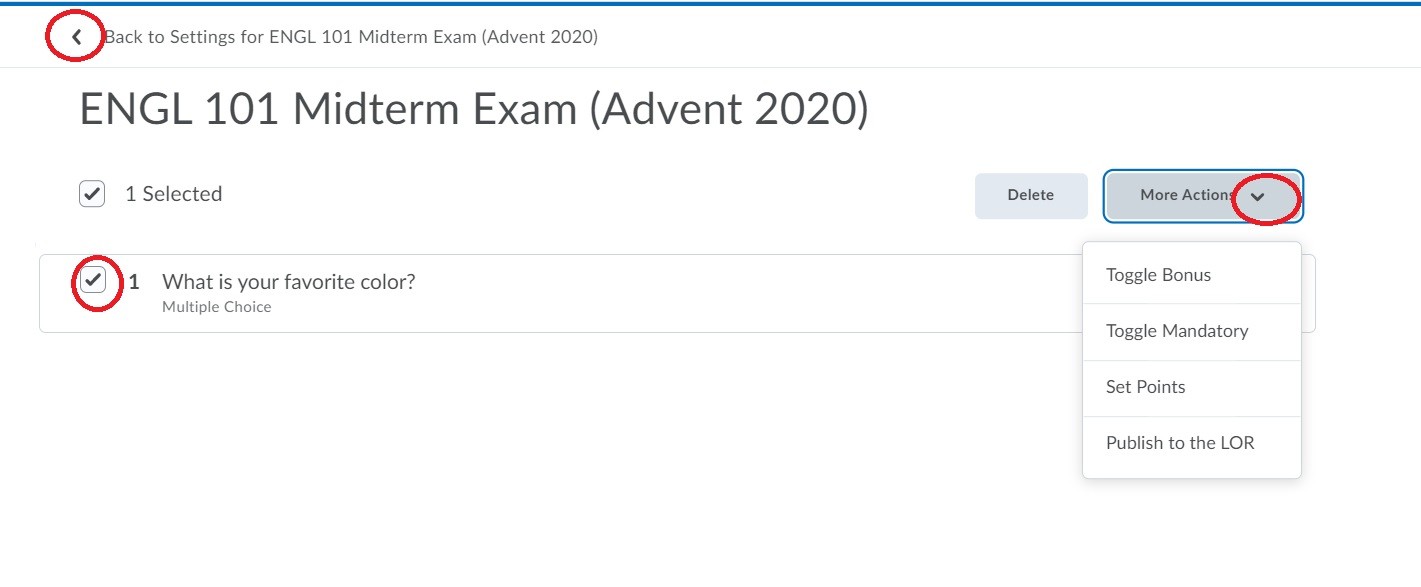
When you are finished creating questions, you'll be taken back to a summary page of all the questions in a list. You can edit individual questions or set options for them by using the checkbox next to the question and choosing More Actions on the right. When you are finished creating questions, use the Back to Settings arrow to return to the assessment options:
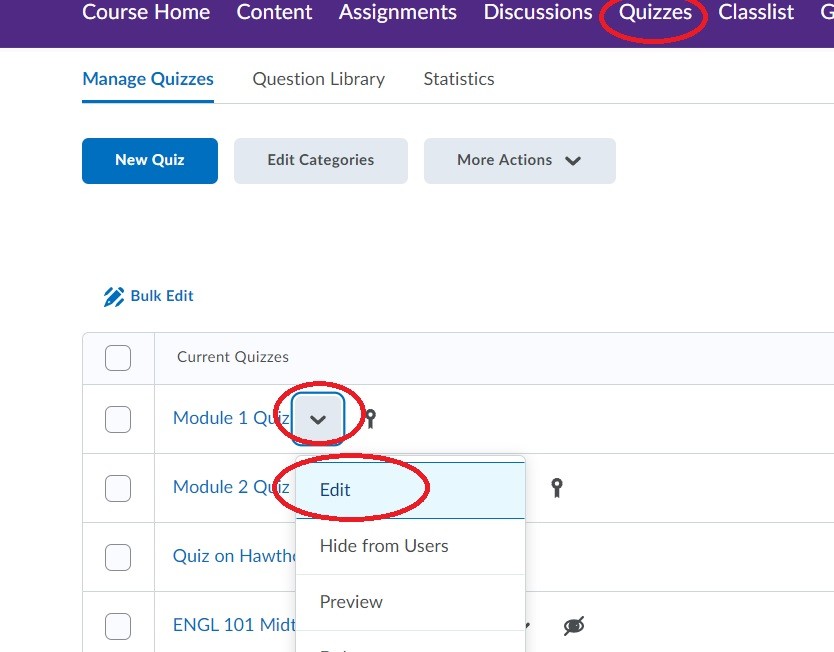
By default, all assessments made within Brightspace are hidden from students. You must manually unhide an assessment for the students to view it. You can do this by click on Quizzes in your navigation bar and choosing the Edit contextual option using the down arrow next to your assessment name:
From the editing menu, navigate to the Restrictions tab at the top. Next, make sure to uncheck the hide from students box so that your students can see the assessment when it's time. From here, you can set availability dates for your assessment so that it only appears within your course at a specific date and time. In the example below, the quiz goes live at 8:00am on August 5th and disappears from the course at 11:59pm on the same day. Finally, you can click on the Display in Calendar checkbox to alert students via the calendar widget when their quiz or test is live and ready to take on Brightspace:

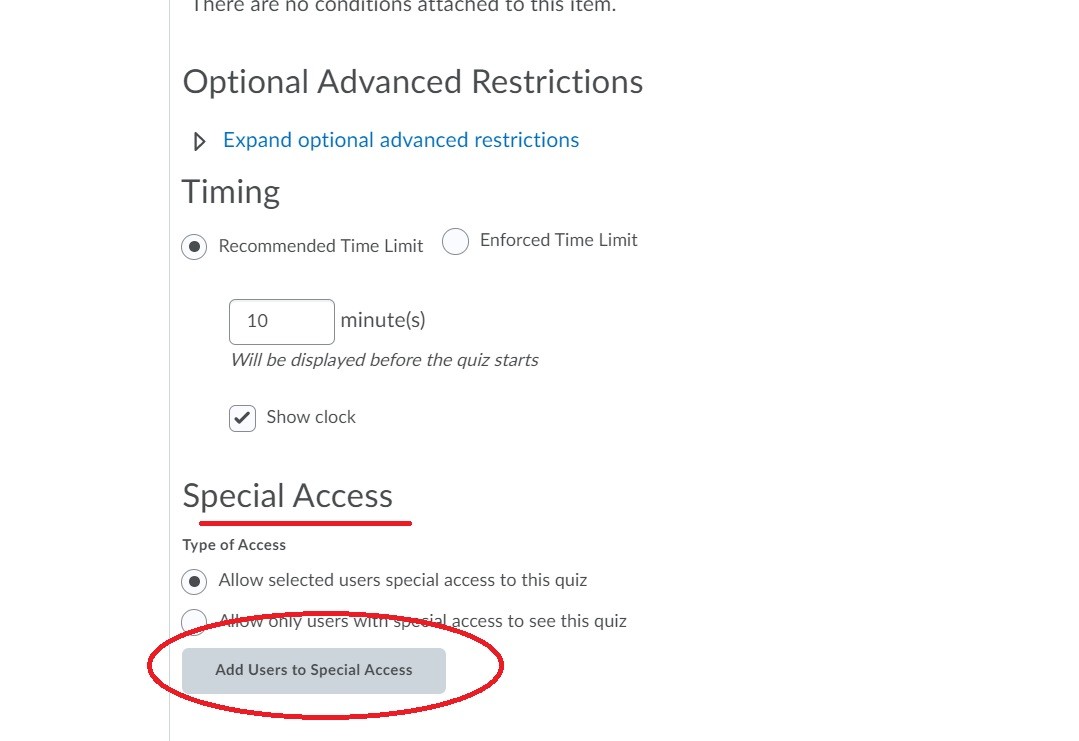
From the window pictures above, you can also provide select students extra assessment accommodations as needed. Once again navigate to the Restrictions tab when editing your quiz, and scroll down to the Special Access section. Click on the button to add users to special access for this assessment:
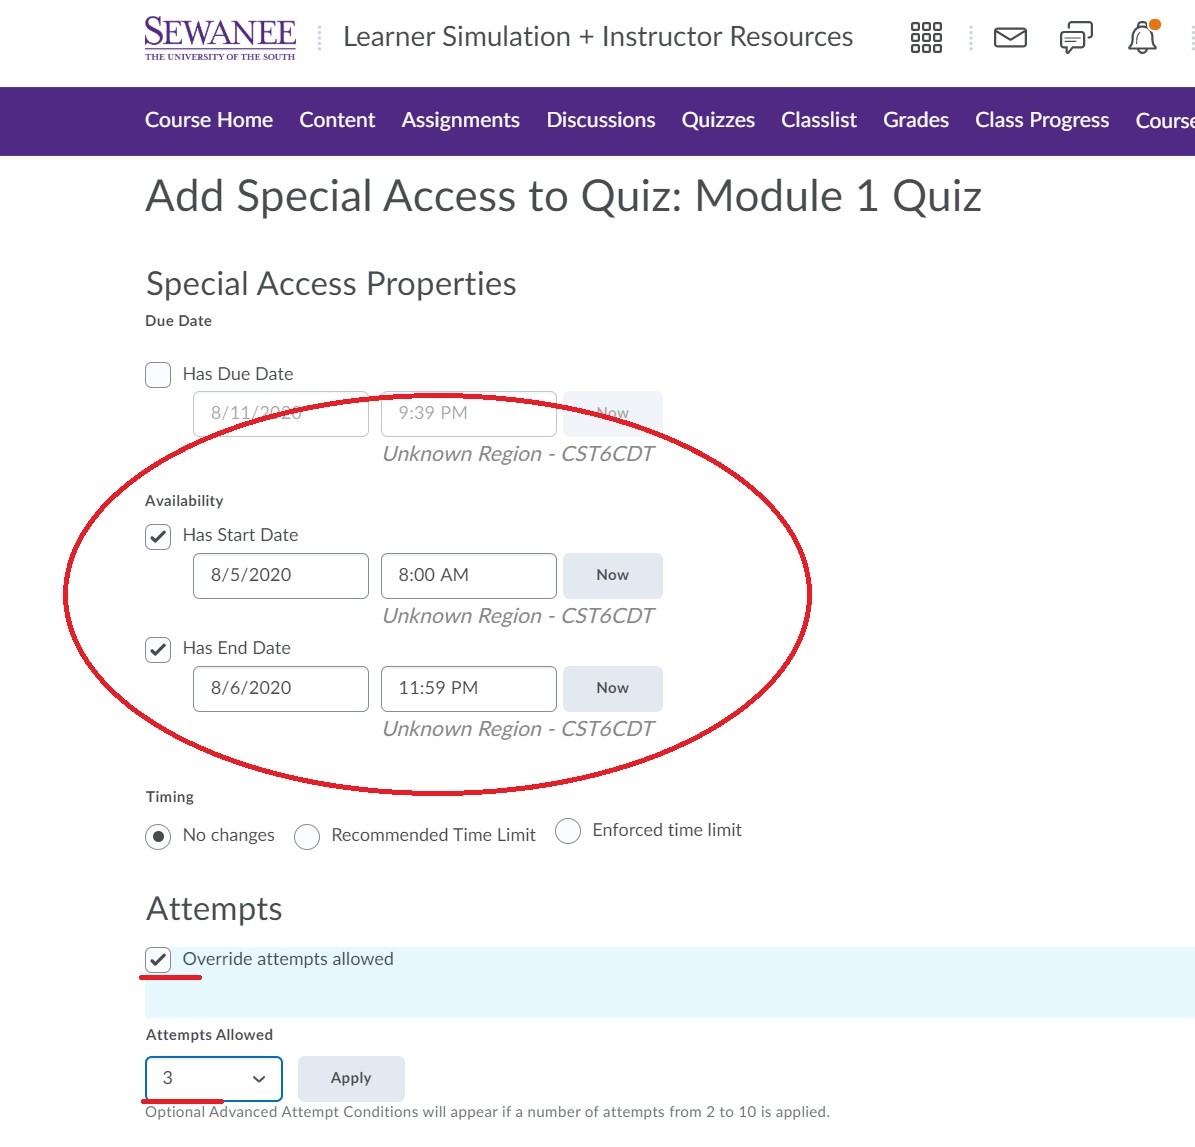
First you have to create the special access conditions for your students with accommodations. In this example, while in the quiz above my students had to turn in this assessment by 11:59 on August 5th, for my accommodation I allowing one extra day, until August 6th, for these students to complete this test. You can also override the number of attempts in your regular quiz options and allow additional attempts based on your students' needs:
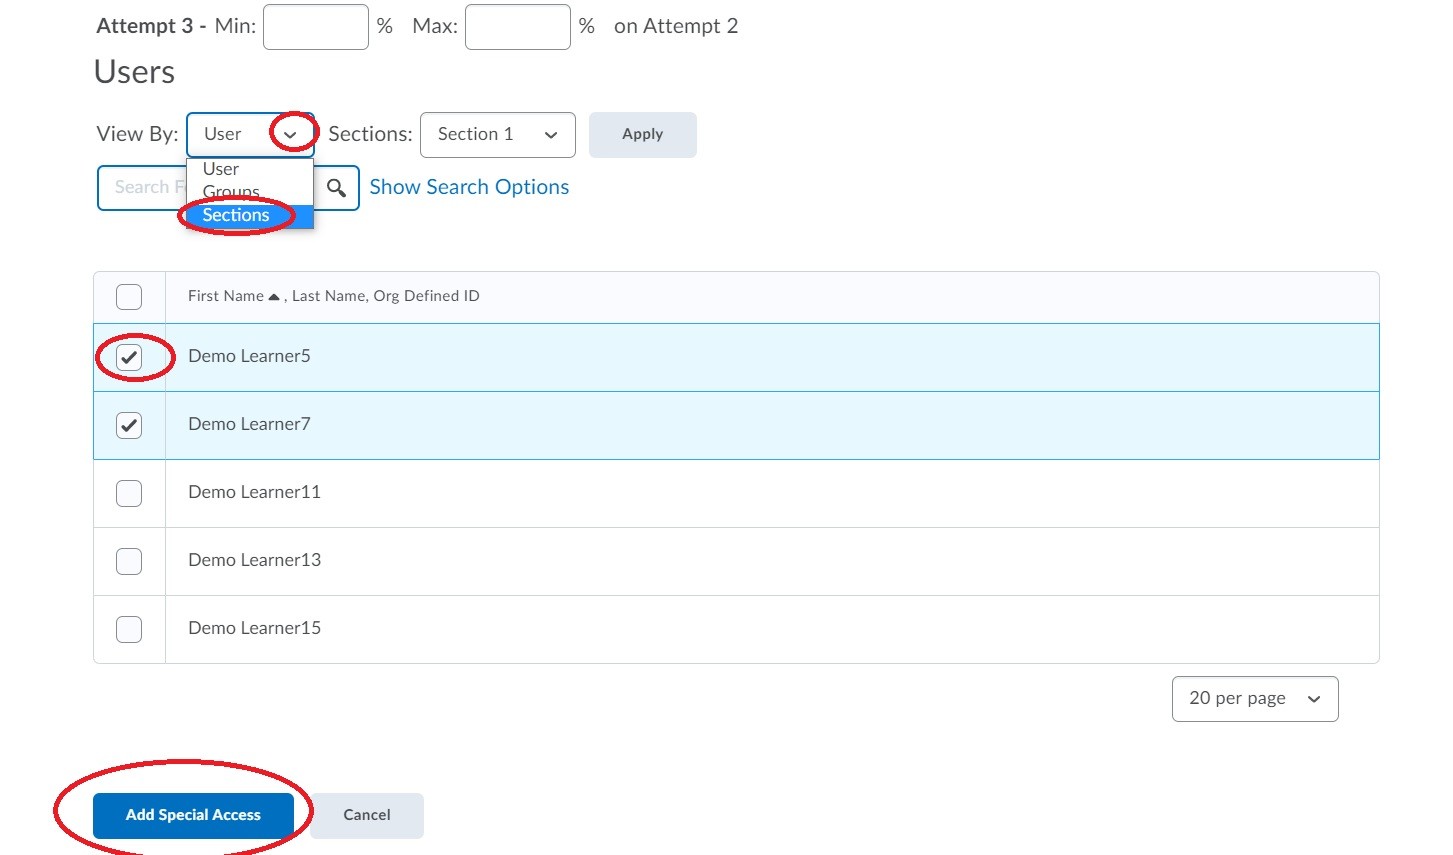
Once you've set the special access rules, you are ready to add individual students to these rules. This is done by scrolling down to the bottom of the page and picking individual students by using the select boxes next to their names. You can also apply special access restrictions to sections (if you are working in one parent course with multiple sections) by browsing special access users by section. When you are finished, make sure to hit the blue Add Special Access button to return to the regular editing options for your assessment.
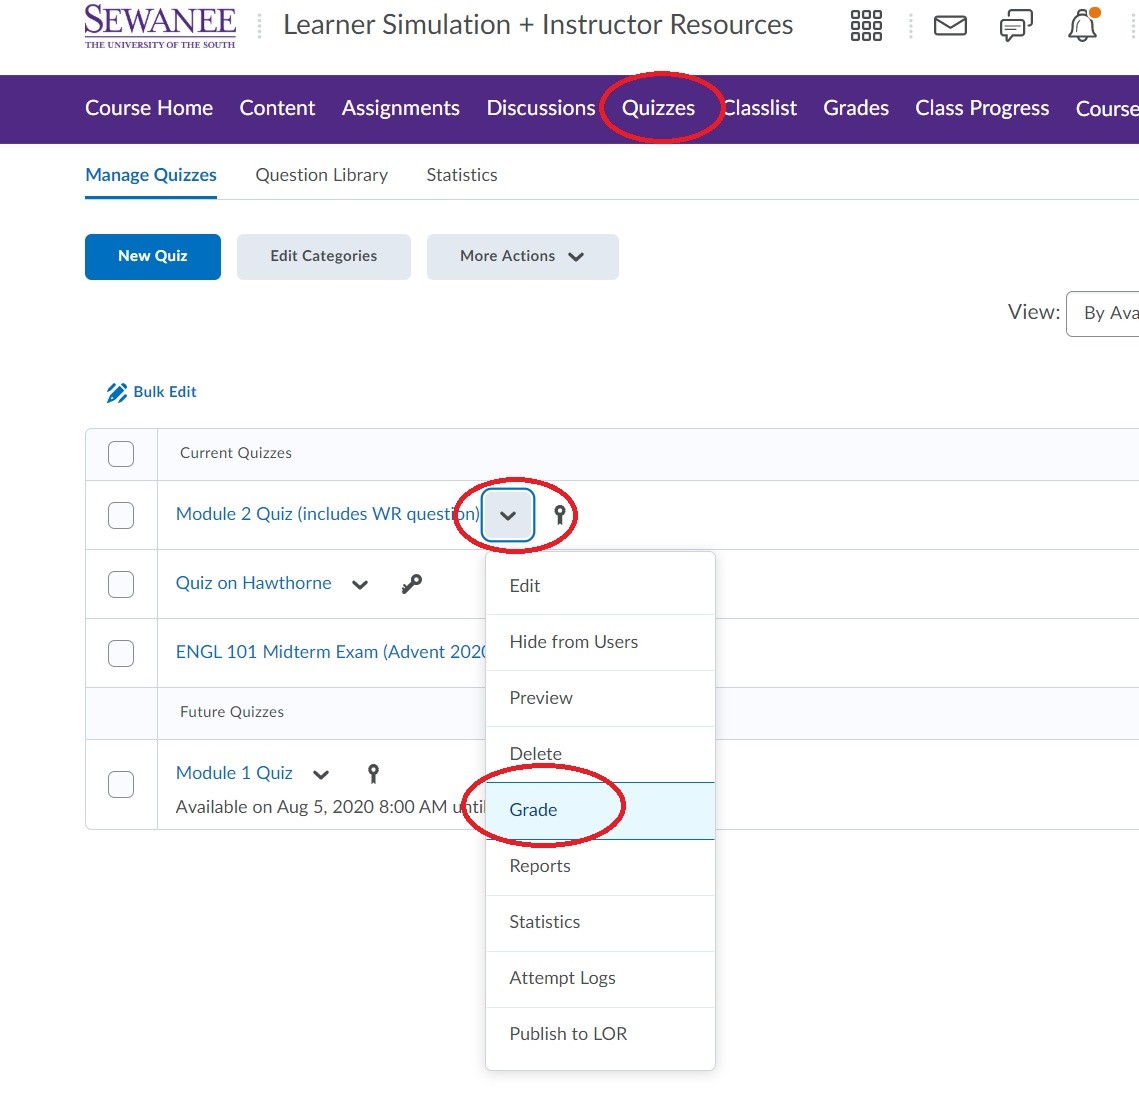
If your quiz is not auto-graded (e.g.: it has some written response questions), then you can enter the grading/feedback interface by clicking on Quizzes in your navigation bar and using the contextual down arrow to enter the Grade window:
 *Note: Your assessment must have a grade item attached to it before it can be graded. Review our page on Grades to create and manage grade items.
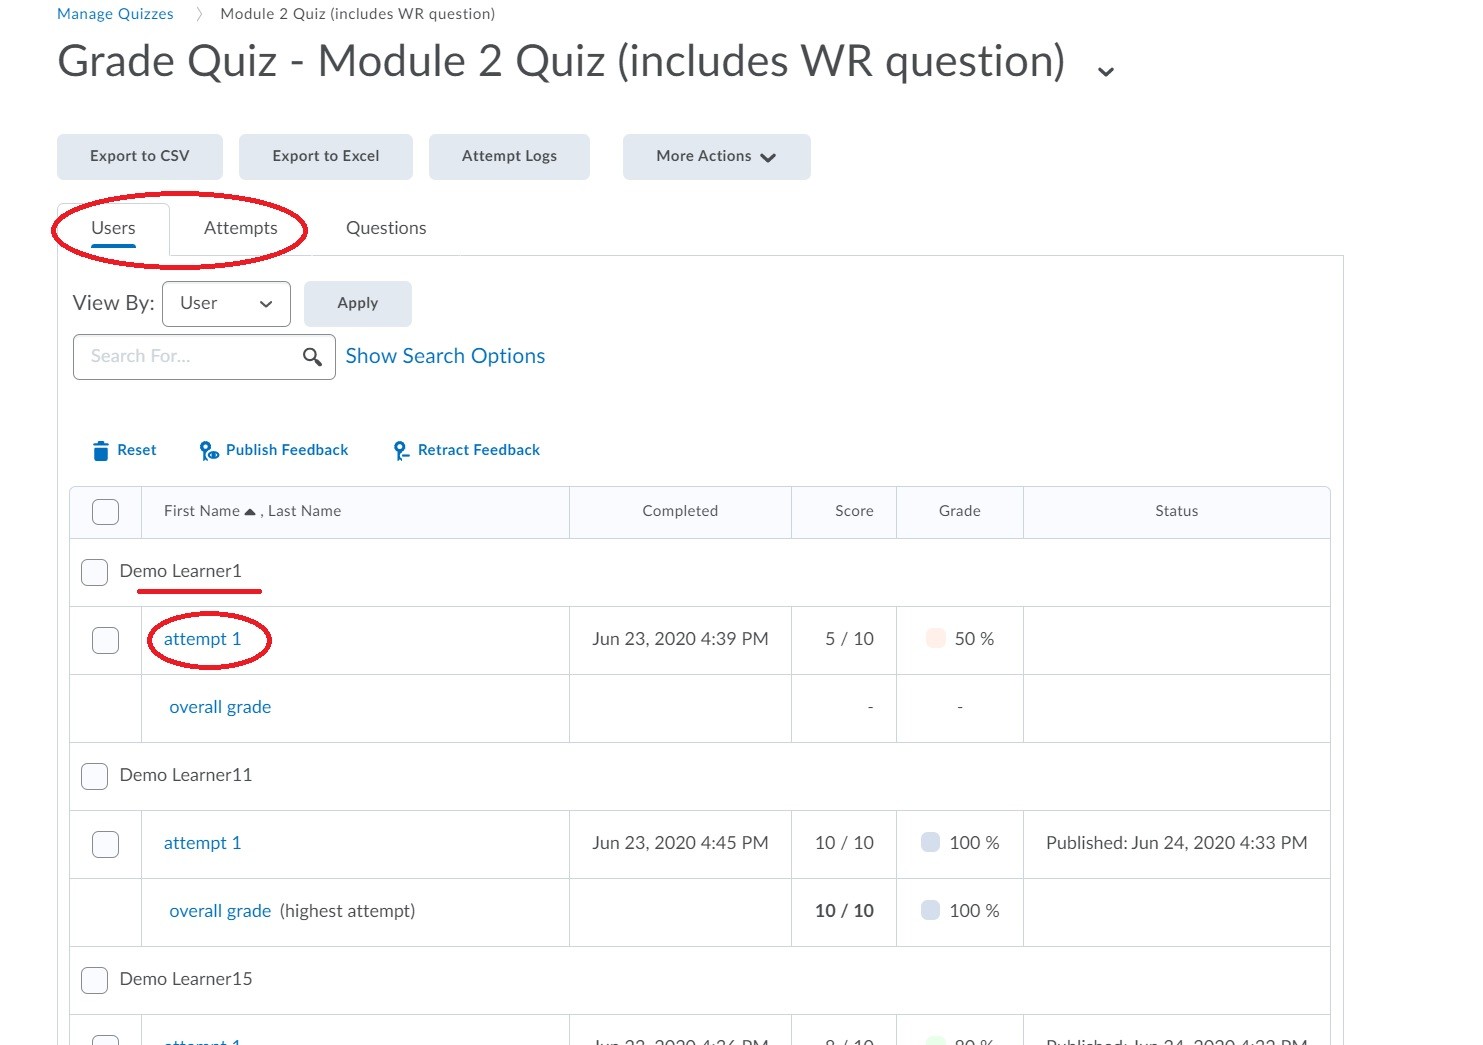
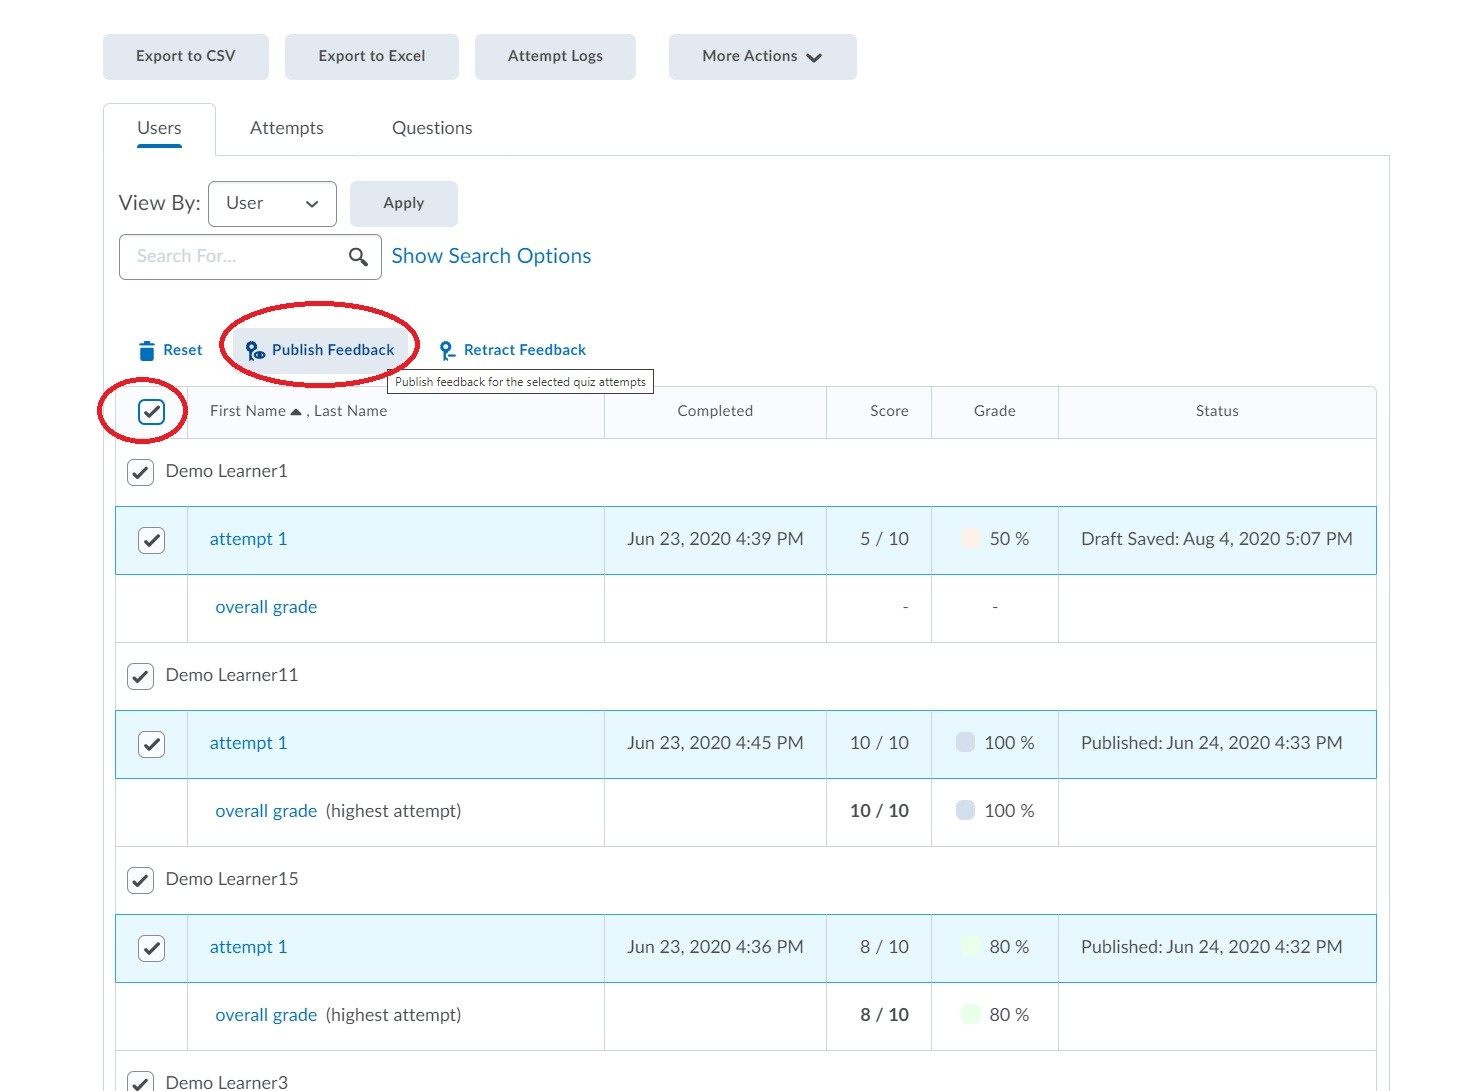
The grading menu defaults to viewing quiz attempts by user, or by student. You can also view each attempt individually (or even grade by question) by using the other tabs at the top. In the users tab, you can see the name of each student and click on his/her individual attempt to grade it:
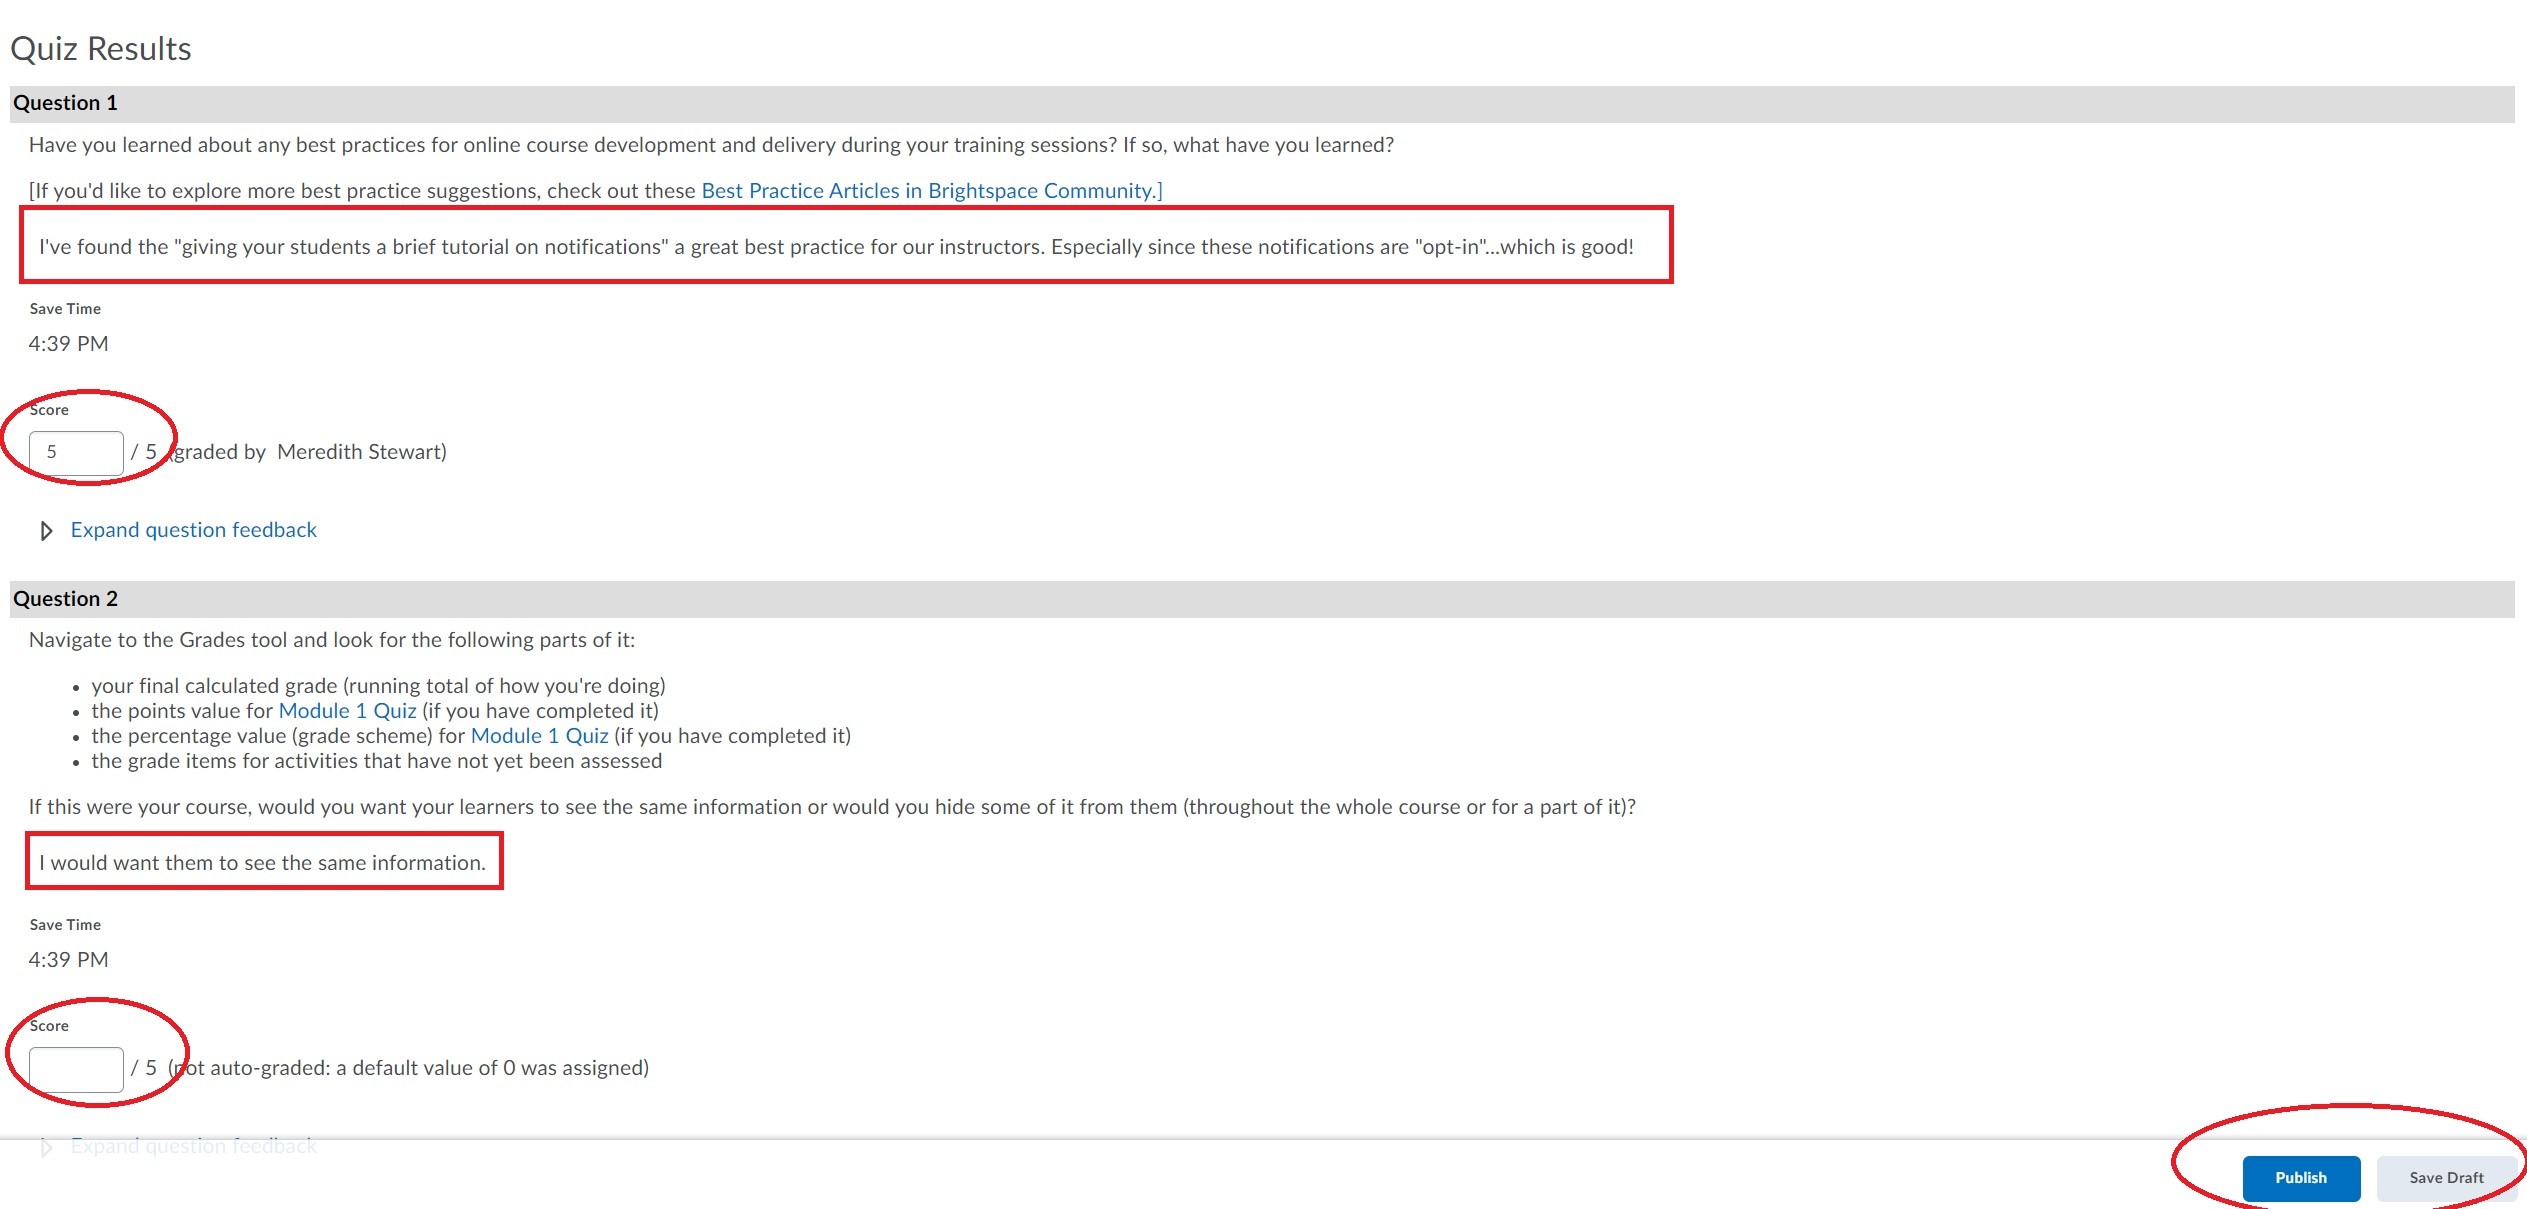
In this example, there are two written response questions to grade for this particular student on this particular assessment. You can view the question and your student's response, then type in a score for each question. When finished, make sure to choose either Publish (which sends the student his/her immediately) or use the Save Draft feature to publish the results all at once later:
When you are finished grading the assessment, you can send the students their grades by using the Publish All Feedback button in the grading window after selecting all users:
Questions about Creating and Grading Assessments?
Contact a member of our faculty support staff.
A link to managing quizzes and tests on the Brightspace community page.
A collection of Brightspace video tutorials on creating and managing assessments.