Setting up your Grade book
Documentation from D2L/Brightspace on setting up your gradebook.
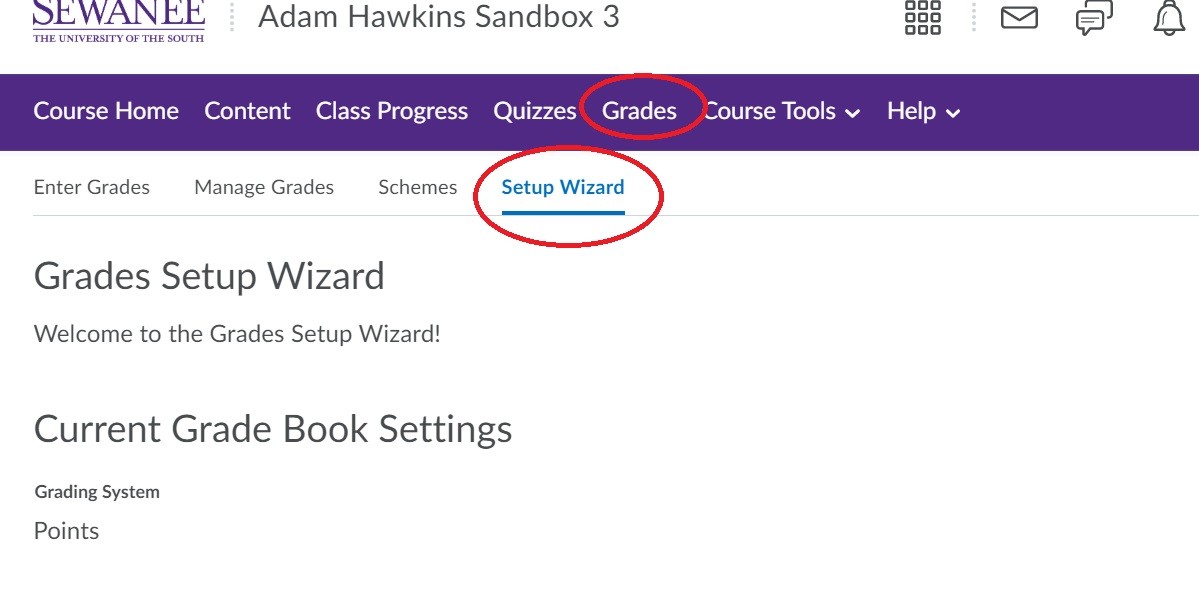
The first step in using Brightspace to grade your students is to setup your grade book parameters. To do this, first click on Grades in the navigation bar. If this is your first time clicking this button, the system will automatically redirect you to the Setup Wizard. You should run this wizard only once:
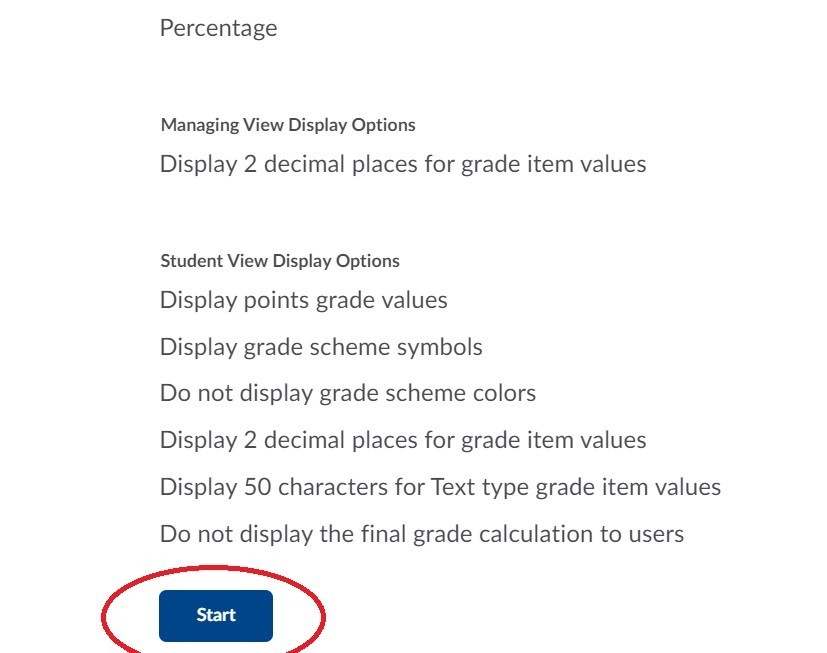
 Scroll down and click on the blue Start button to begin the wizard:
The first page of the wizard prompts you to chose your grading system:
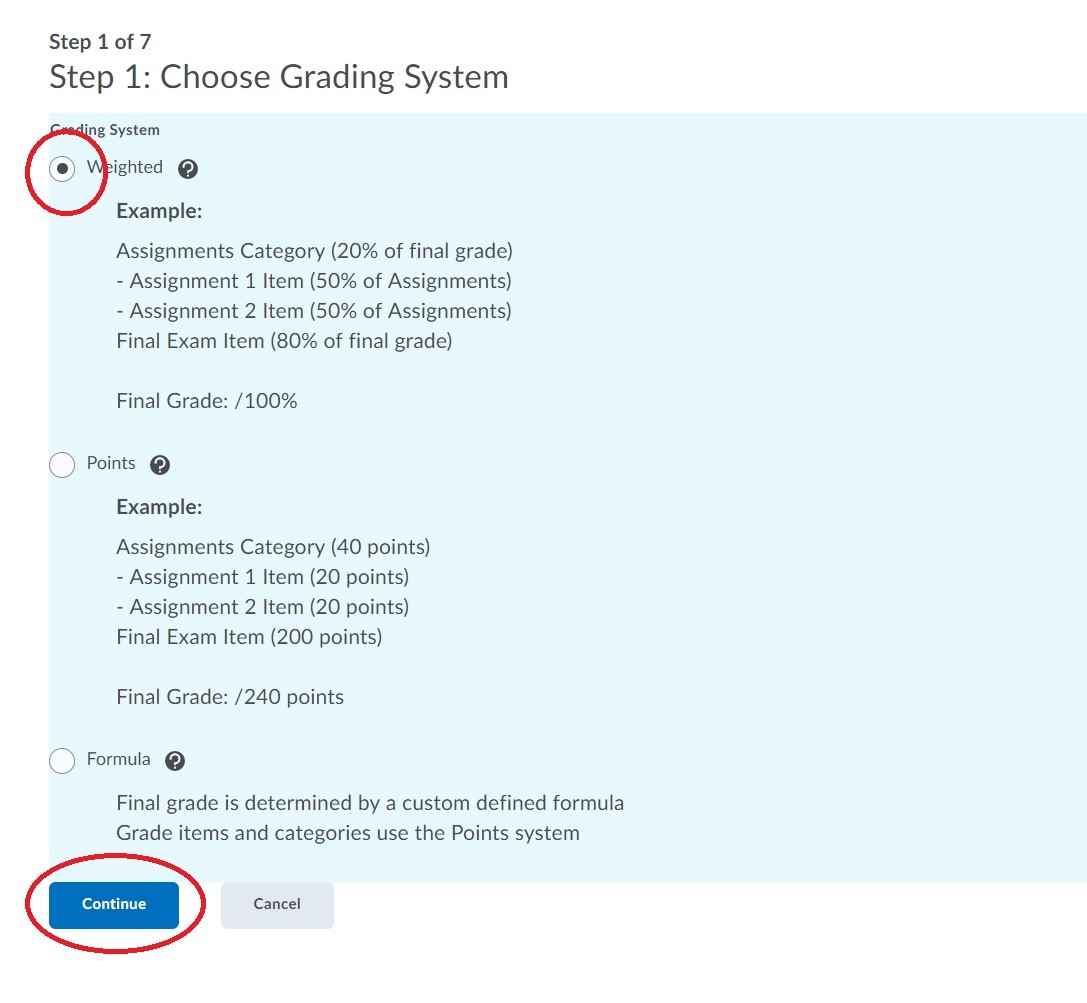
Weighted = weighted categories for the final grade
Points = students earn points out of a total possible points for their final grade
Formula = develop your own custom formula for calculating a student's final grade
Next, chose your final grade display options to the students:
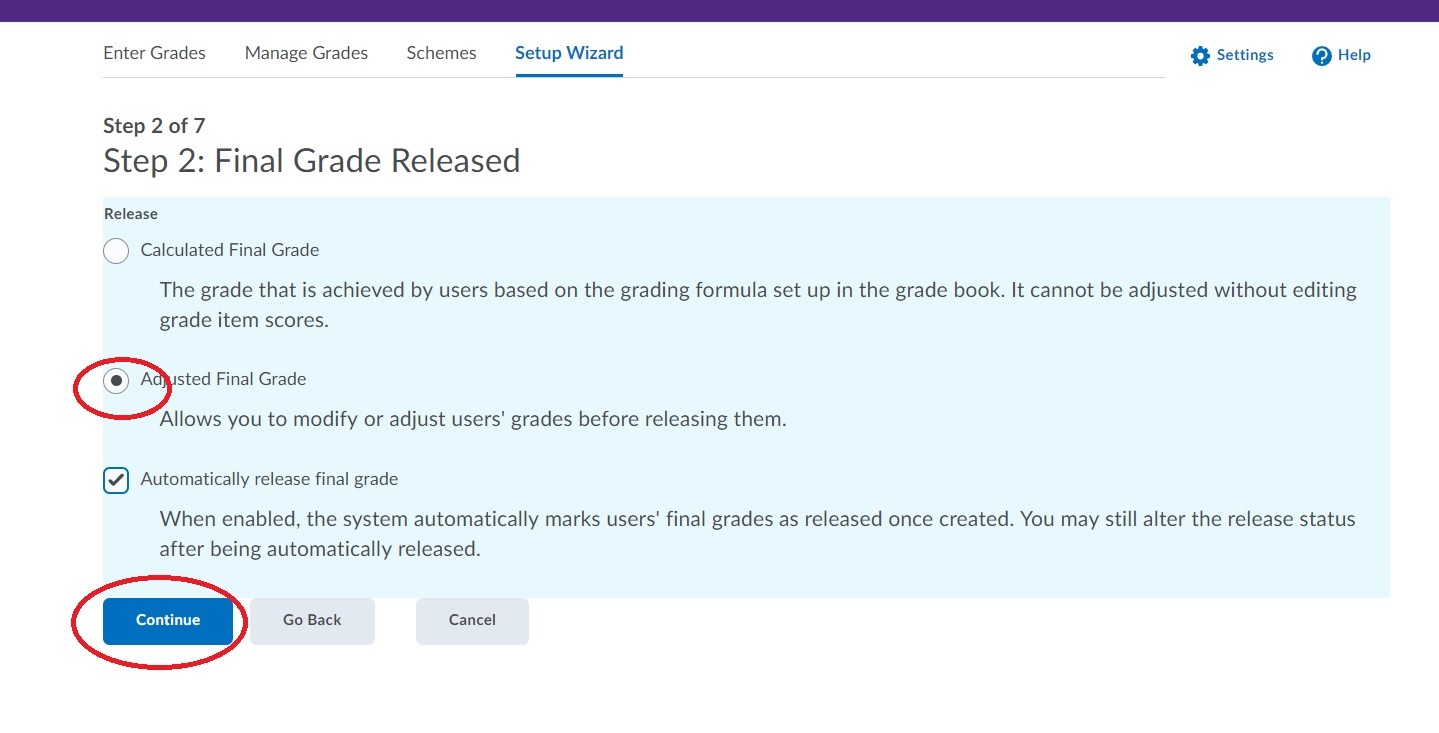
Calculated Final Grade = The system automatically calculates the grades for the students and you cannot change this value
Adjusted Final Grade (recommended) = Give yourself the option to manually adjust your students' final grades before they are released
Automatically Release Final Grade = Choose whether you want the system to automatically show your students their final grades, or if you want to only release the final grades manually at a later date and time
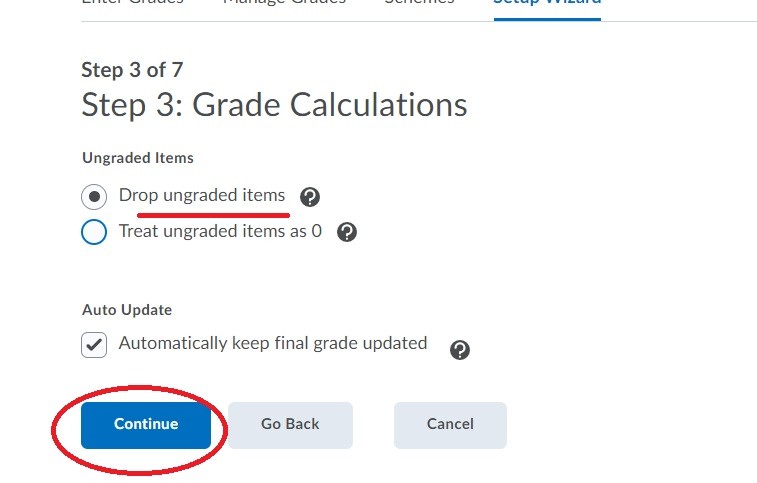
Next, you'll be prompted to decide how to treat items that you haven't graded yet. You can choose whether or not to "drop" (not count) those items, or give students a 0 for items you haven't graded. The recommended option is to drop ungraded items:
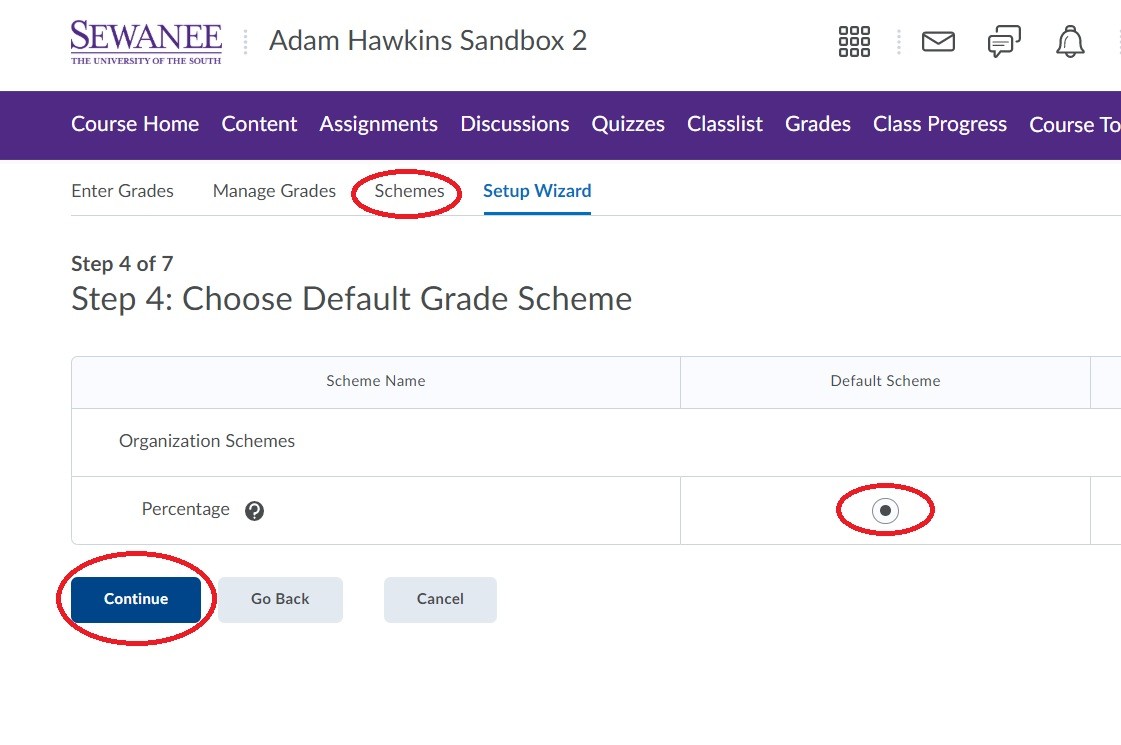
Next you'll be prompted to Choose a Grade Scheme. The default scheme is a recommended option, but if you wish to setup your own percentages categories and "cut-offs" for letter grades, you can do so once you've finished with the setup wizard using the Schemes tab when you're in the Grades menu from the navbar:
 During this first-time setup, click on the default option and choose Continue.
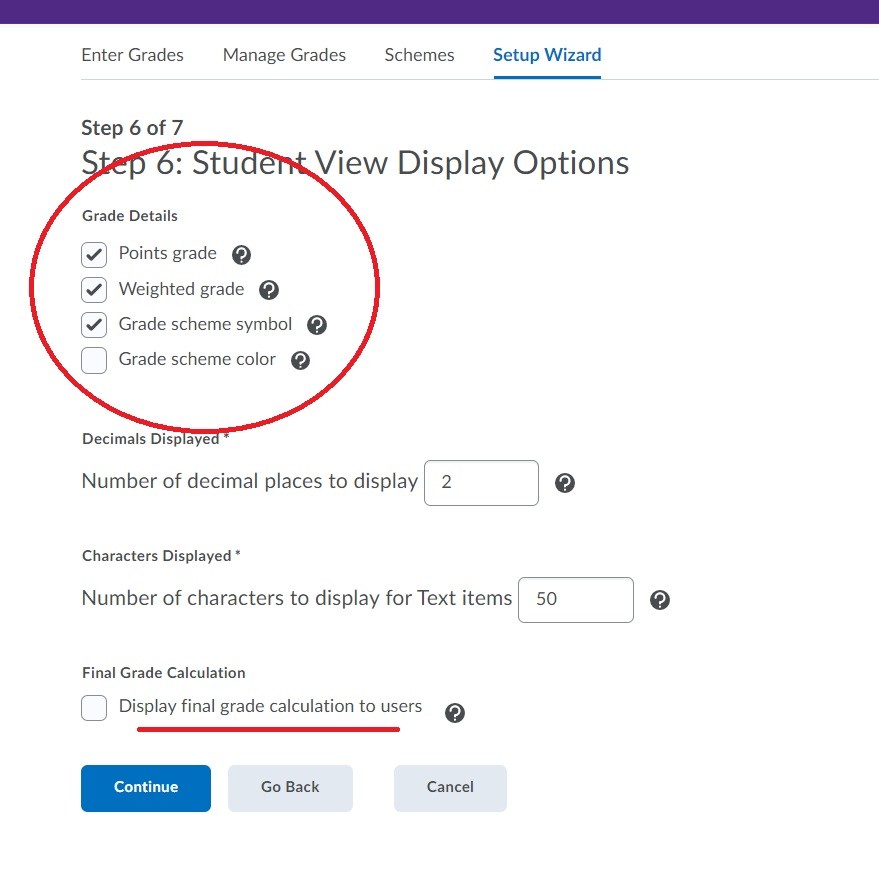
After choosing the number of decimal places to display in grade calculations, you'll be prompted with the Student View options in grades, or what the students see on your graded items. The list at the top allows you to check and uncheck different grade viewing options to show to your students. For example, if you only want them to see a letter grade in the grade book as a whole (and not the points value), you can uncheck "points grade." Finally you can chose whether or not to show the students exactly how the final grade was calculated based on your weighted, points, or formula options (from step one):
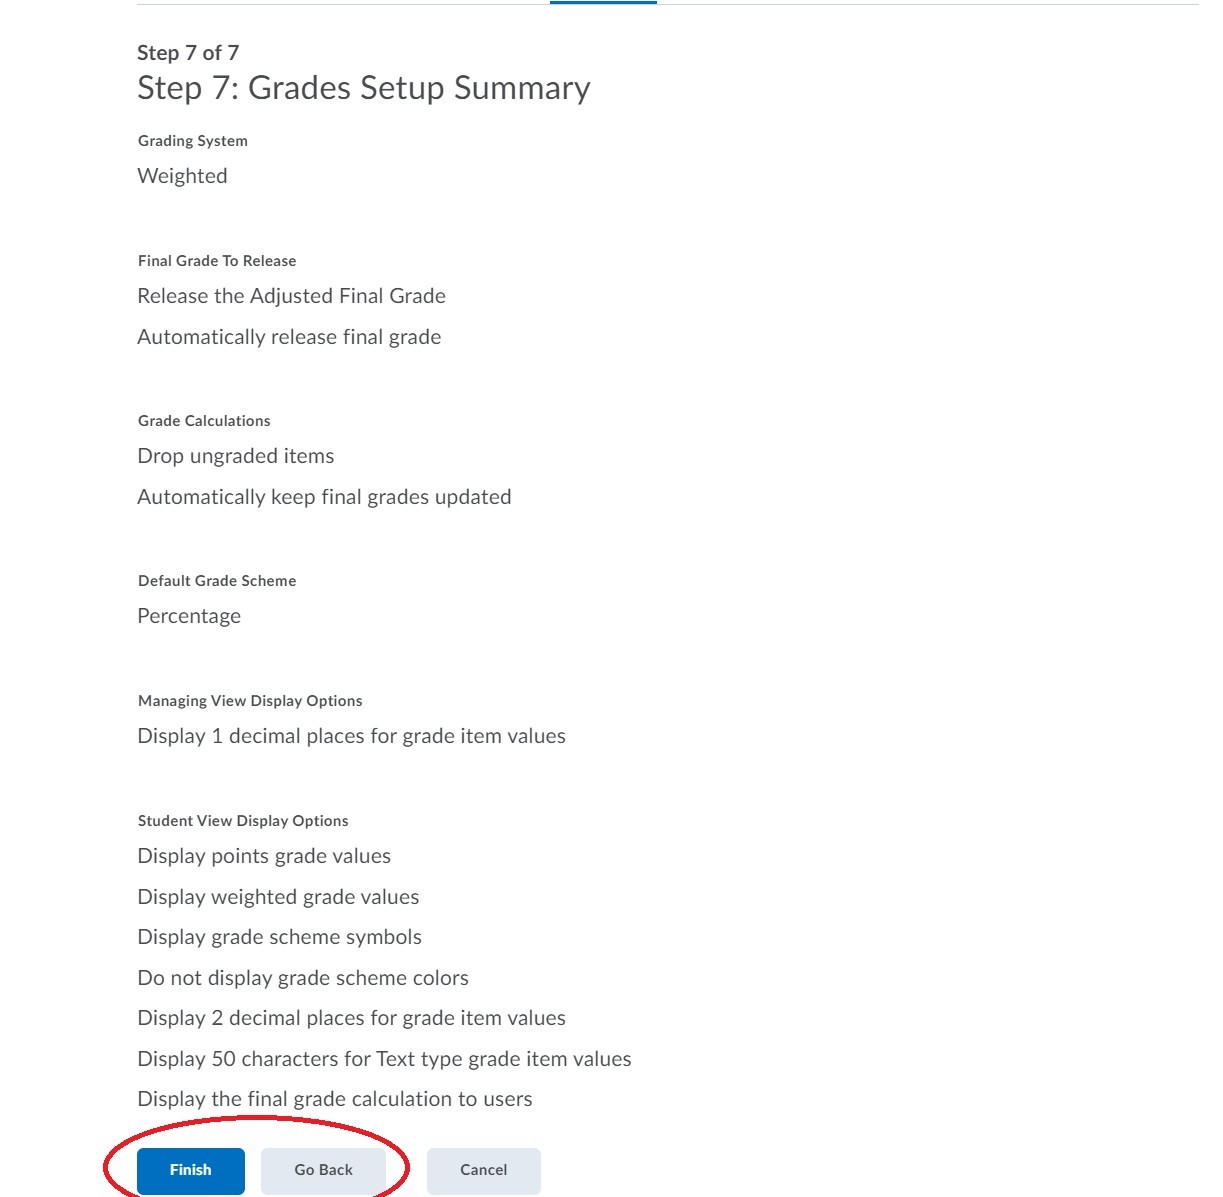
The last options provides a summary screen of your "grade book first time setup" choices. If you can either Finish the options or Go Back and change anything:
In order to grade assignments, tests, quizzes, or discussions in Brightspace you must create a GRADE ITEM for each assessment. These items are a separate digital entity, and have to manually be joined to each assessment once you create it.
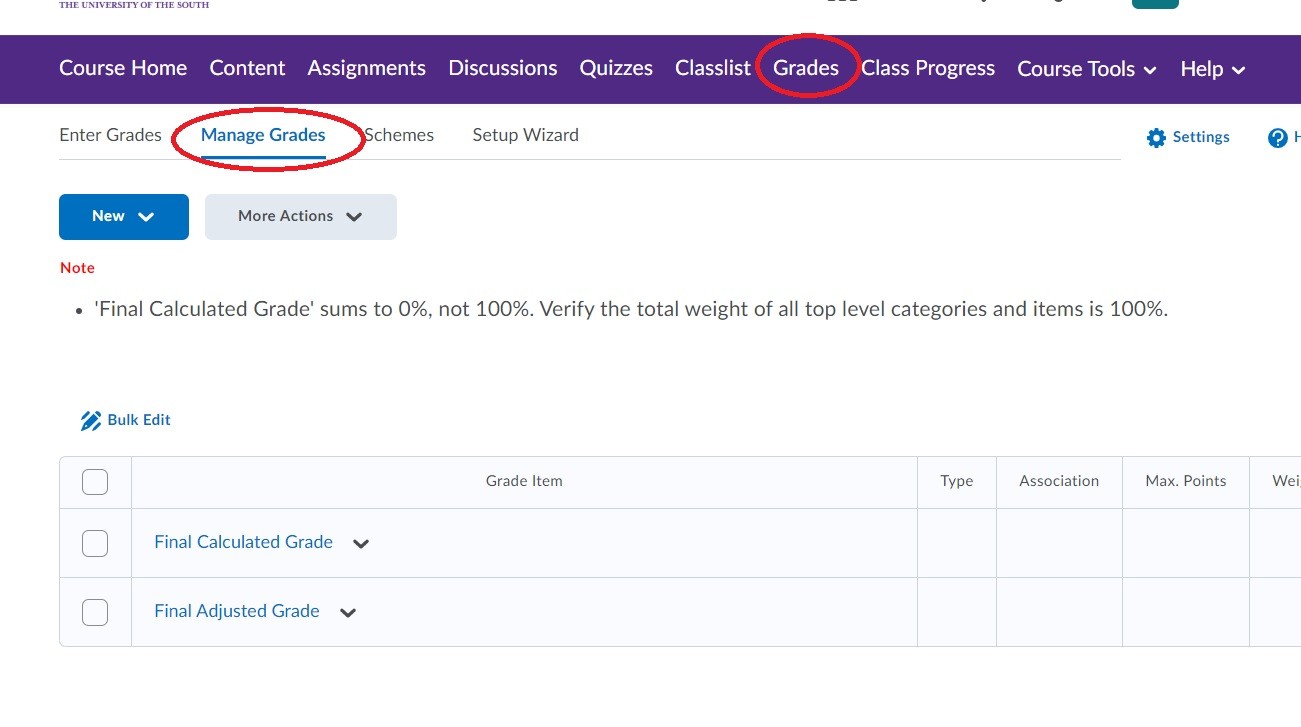
To get started, click on Grades in your navigation bar and then go to Manage Grades:
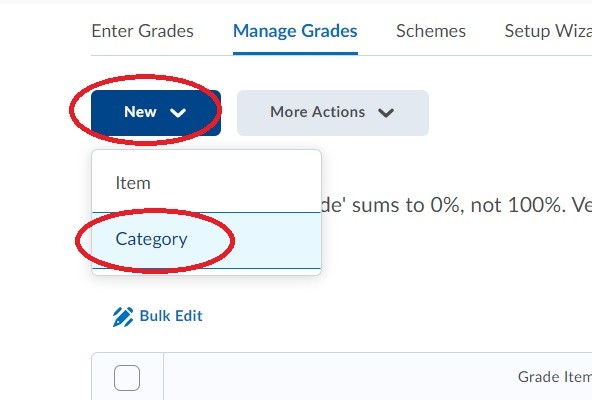
 If you are using a weighted system, you have to setup your categories. Create your categories by using the blue New button and choosing Category:
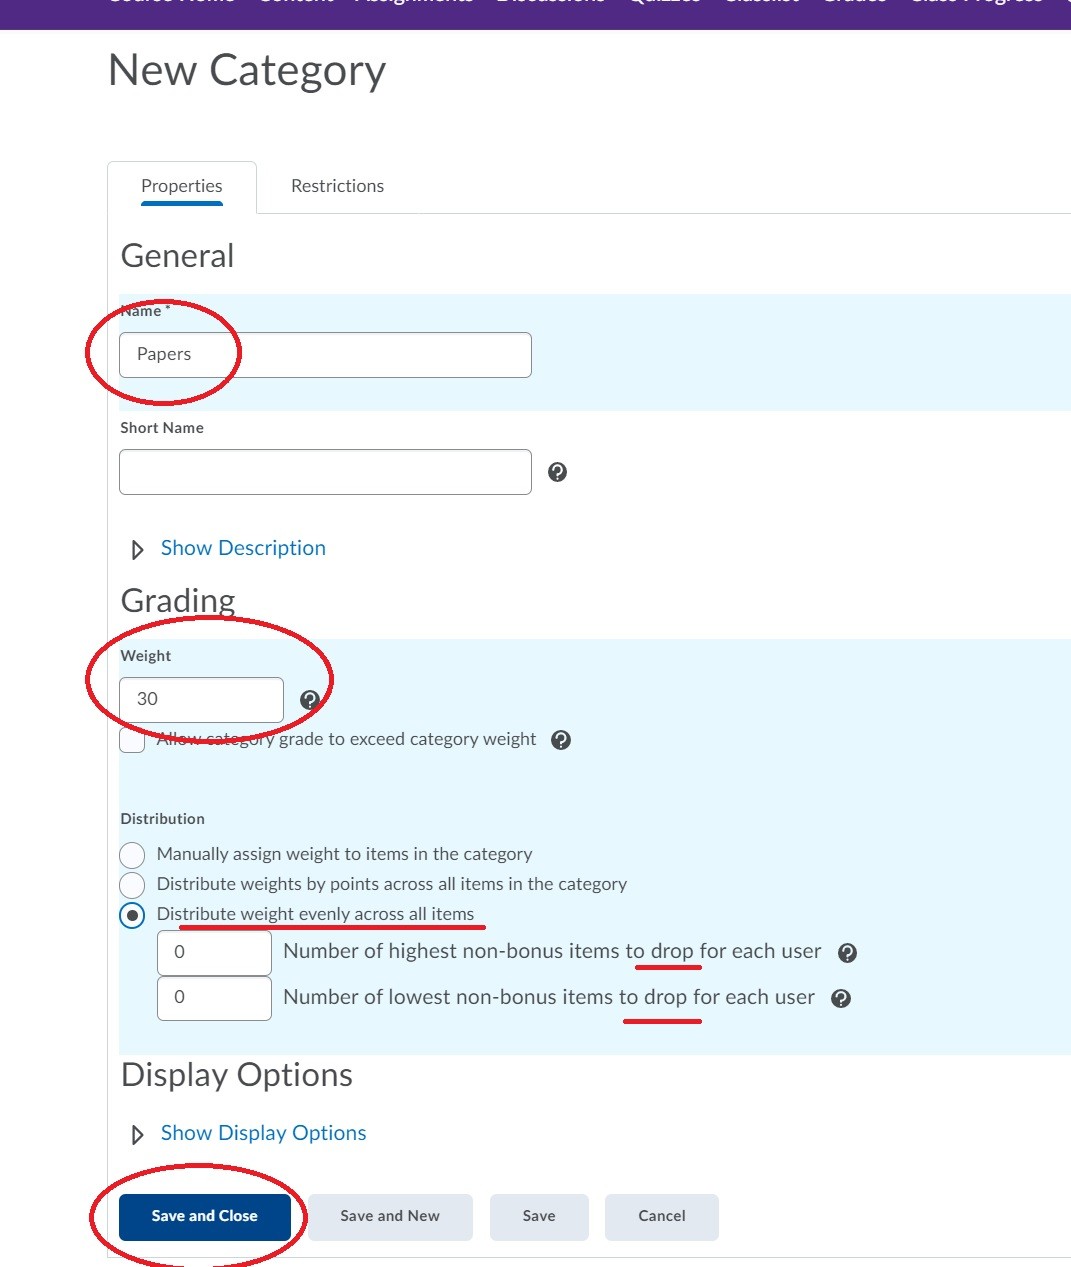
In the category creation window:
(1) Name your category
(2) Input its weight (out of 100%)
(3) Decide whether or not to manually assign individual weights to each items (e.g.: Paper #3 is worth more than Paper #1) or to distribute weight to all graded items in this category equally (e.g.: Paper #2 is worth the same as Paper #1)
(4) Hit Save and Close and repeat the process to create each category in your grade book
Once you've made all of your categories (or if you're not using weighted categories) you are ready to Create Grade Items for everything that will be graded in your course. You must create a grade item for anything you wish to create in Brightspace, and then join that item to an assessment (assignment, quiz, test, discussion).
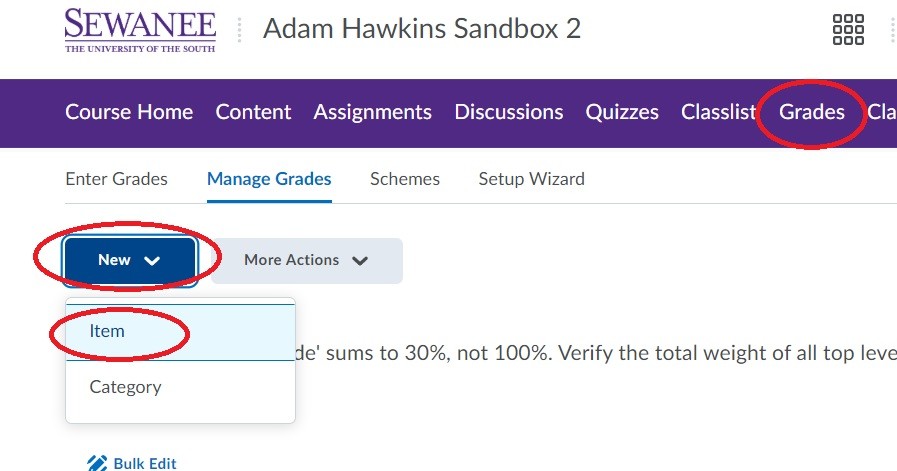
It is recommended to setup as many grade items as you can early so that you have an easy list of graded material to join to assessments as you create the prompts. To get started, go back to Grades ---> Manage Grades and use the blue New button to grade a Grade Item:
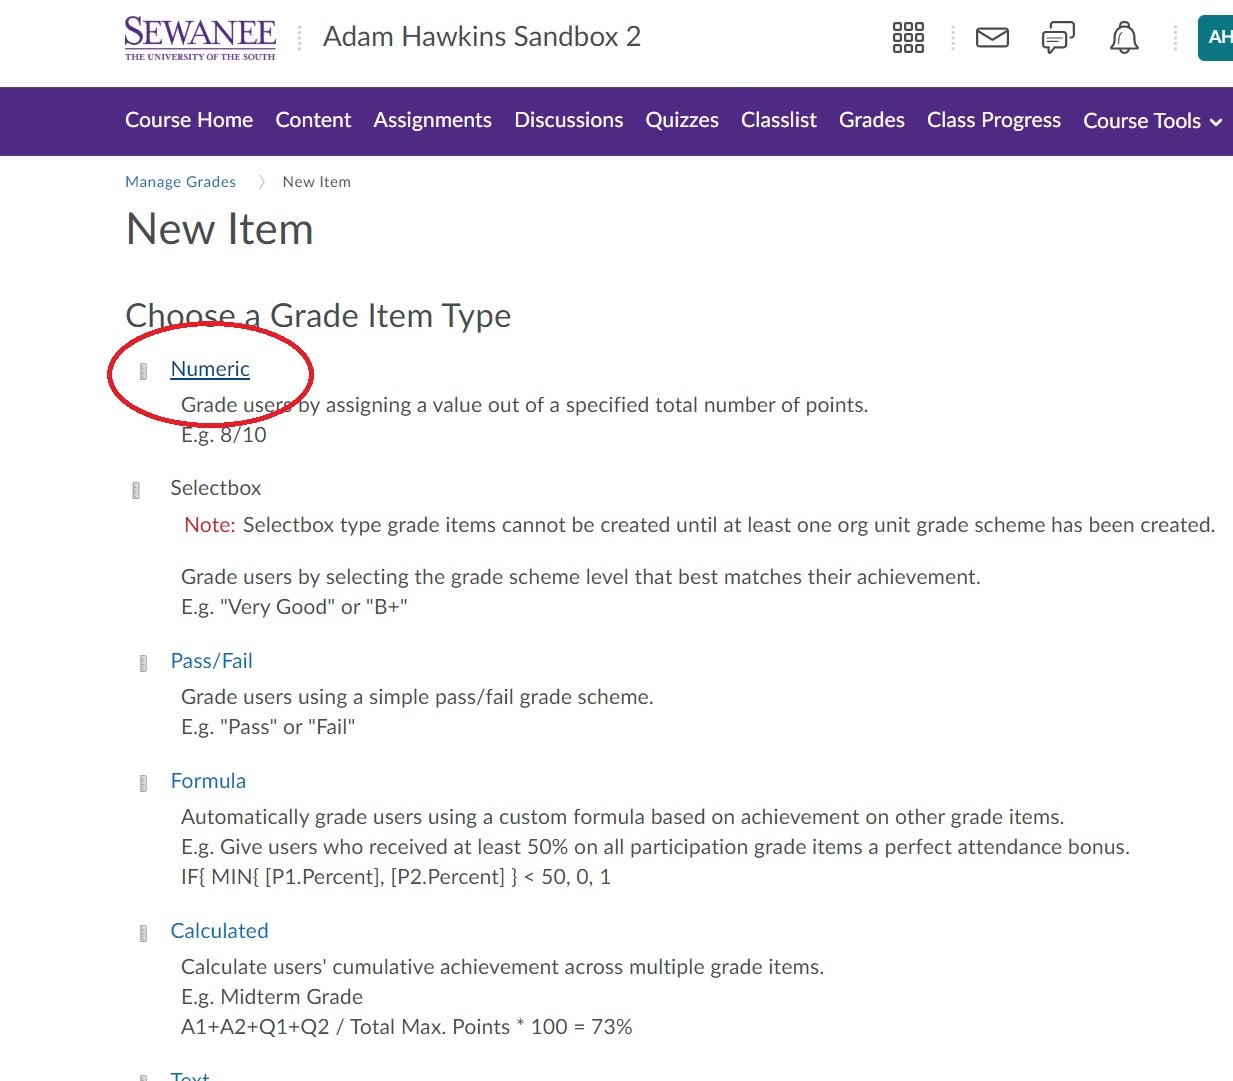
When creating a new grade item, you must first chose how you are going to grade this particular assessment. You can choose from the options listed below. Numeric is the most recommended option (i.e.: provide a student a points value out of a total):
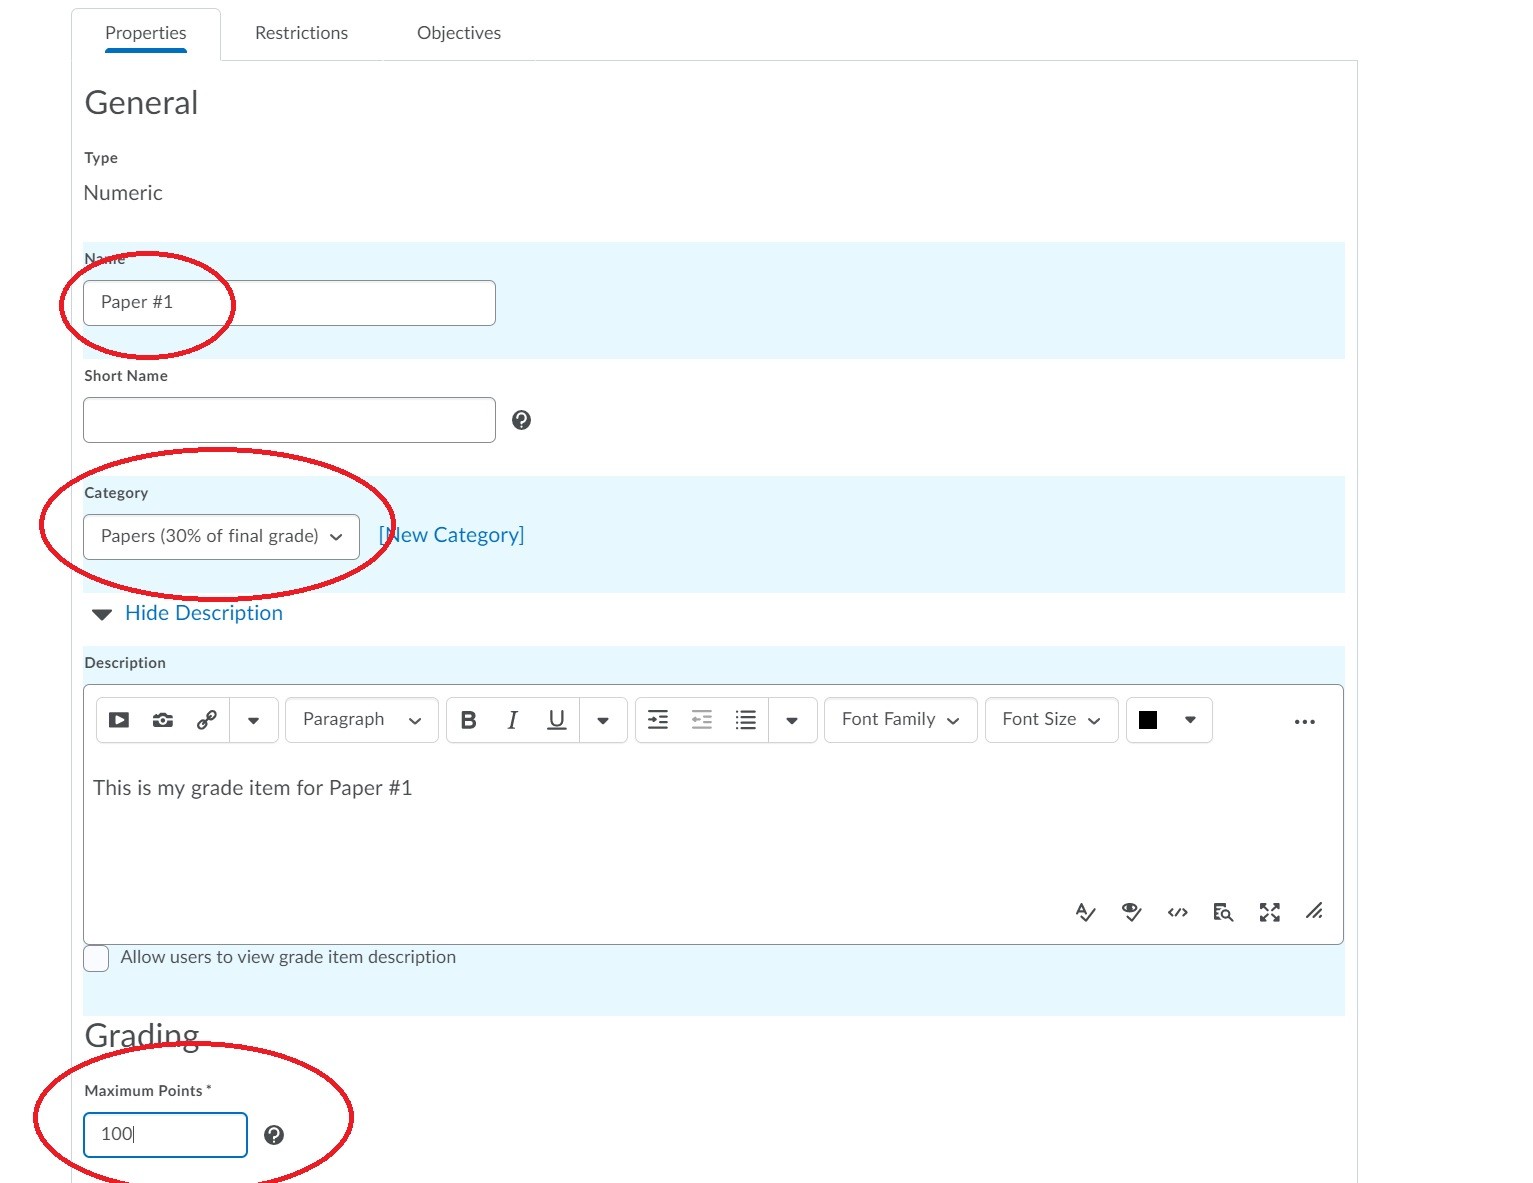
Next you have to give your grade item a name, make sure that it's placed in the right category (which you created first and thus will be weighted properly), provide a description (for yourself and/or your students) and type in a maximum points value:
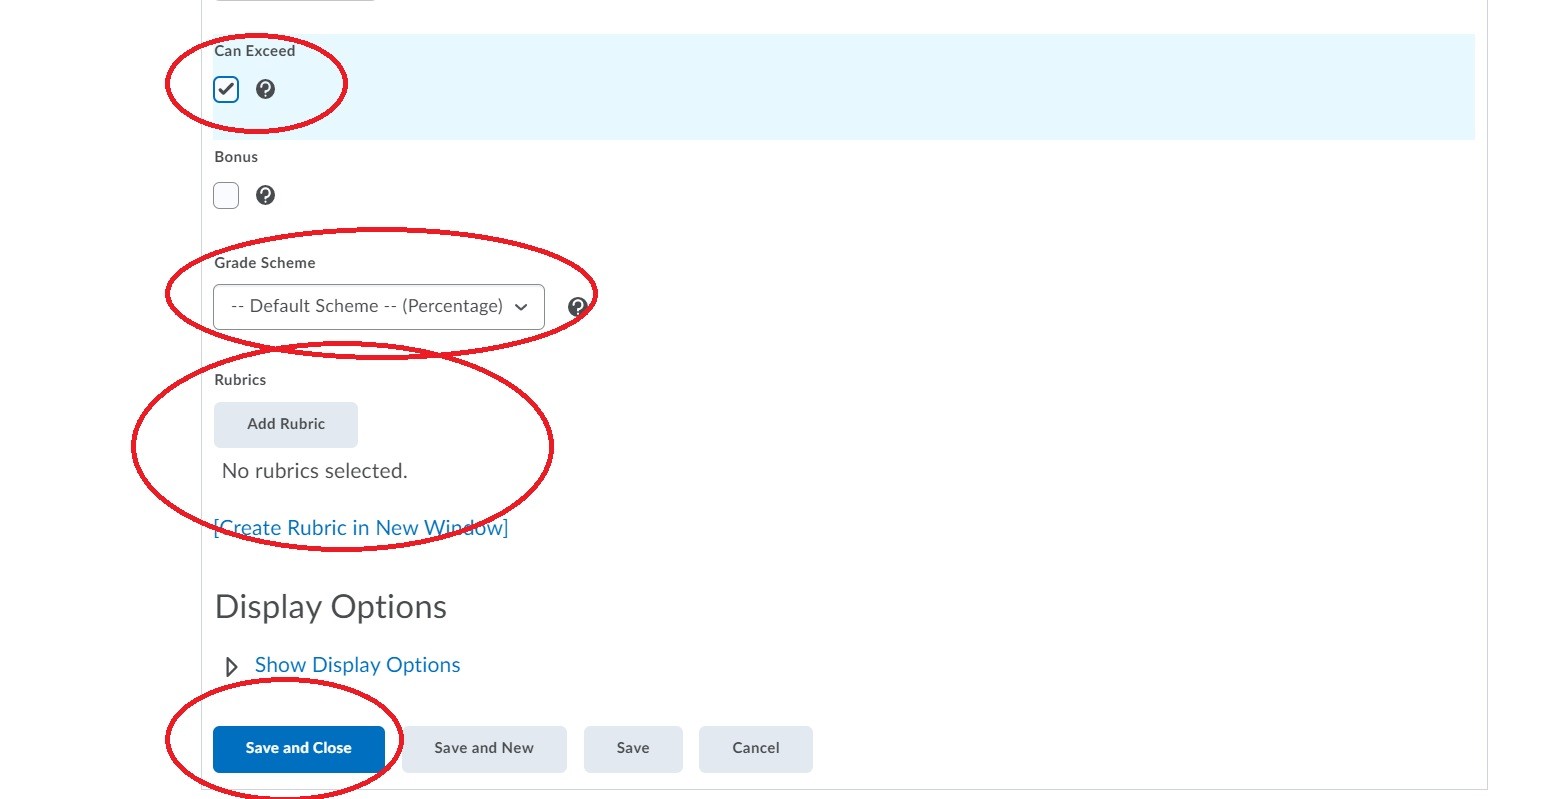
Finally, choose whether or not your student can get above 100% on this item, what grade scheme is used, and if you want to attach a rubric (and use it to grade) this particular assessment.
When you are finished, hit Save and Close:
You can always review your categories, and the grade items you've created, from the Manage Grades window in your course:
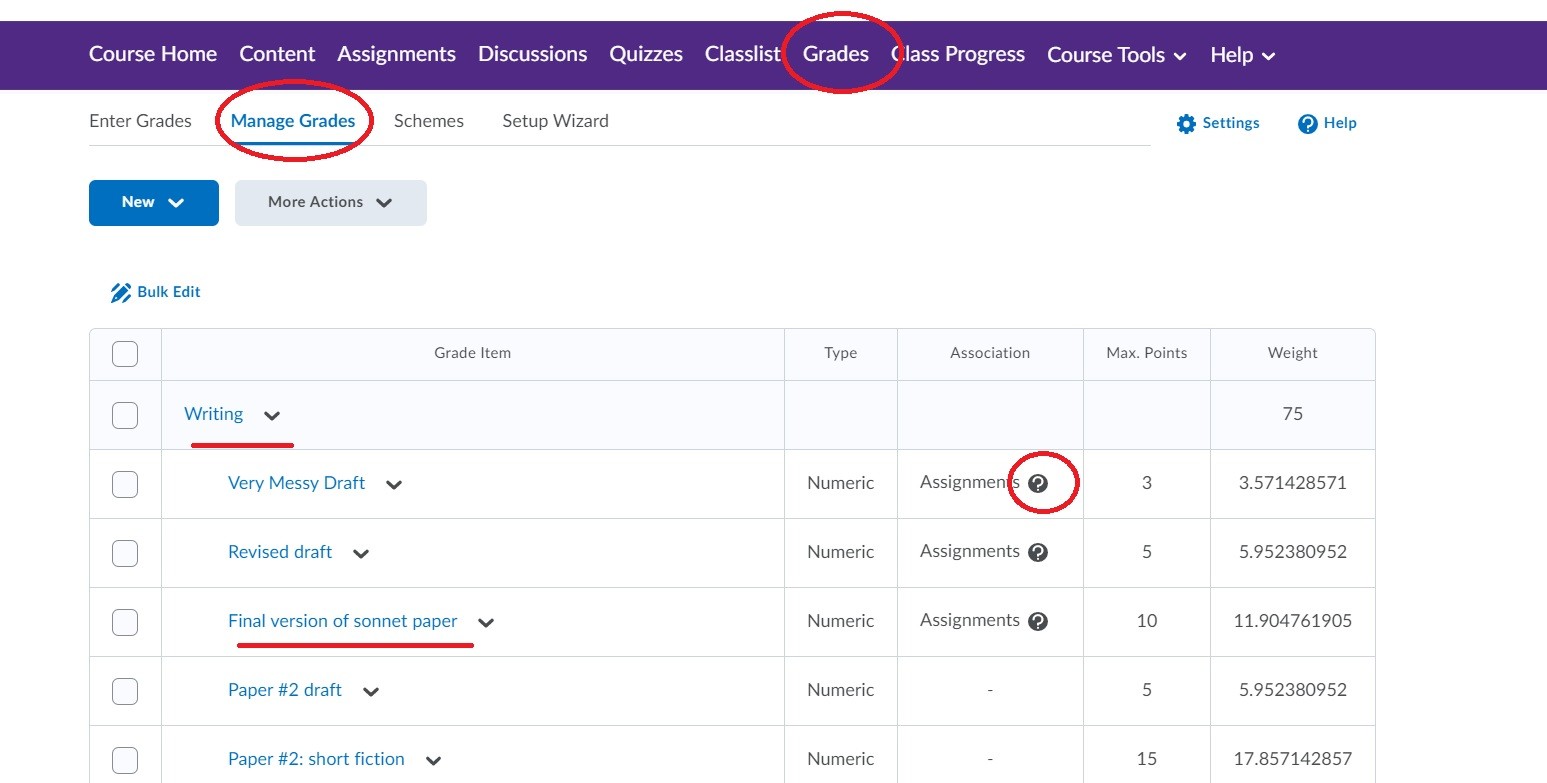
Your categories are highlighted in grey, and you individual grade items have a white background and are indented underneath each category. The Association column lets you know whether or not each particular grade item is attached to an assignment.
With submissions through Brightspace itself, you'll grade assessments through the particular assessment page itself in the feedback interface (see the page on Assignments for how that works).
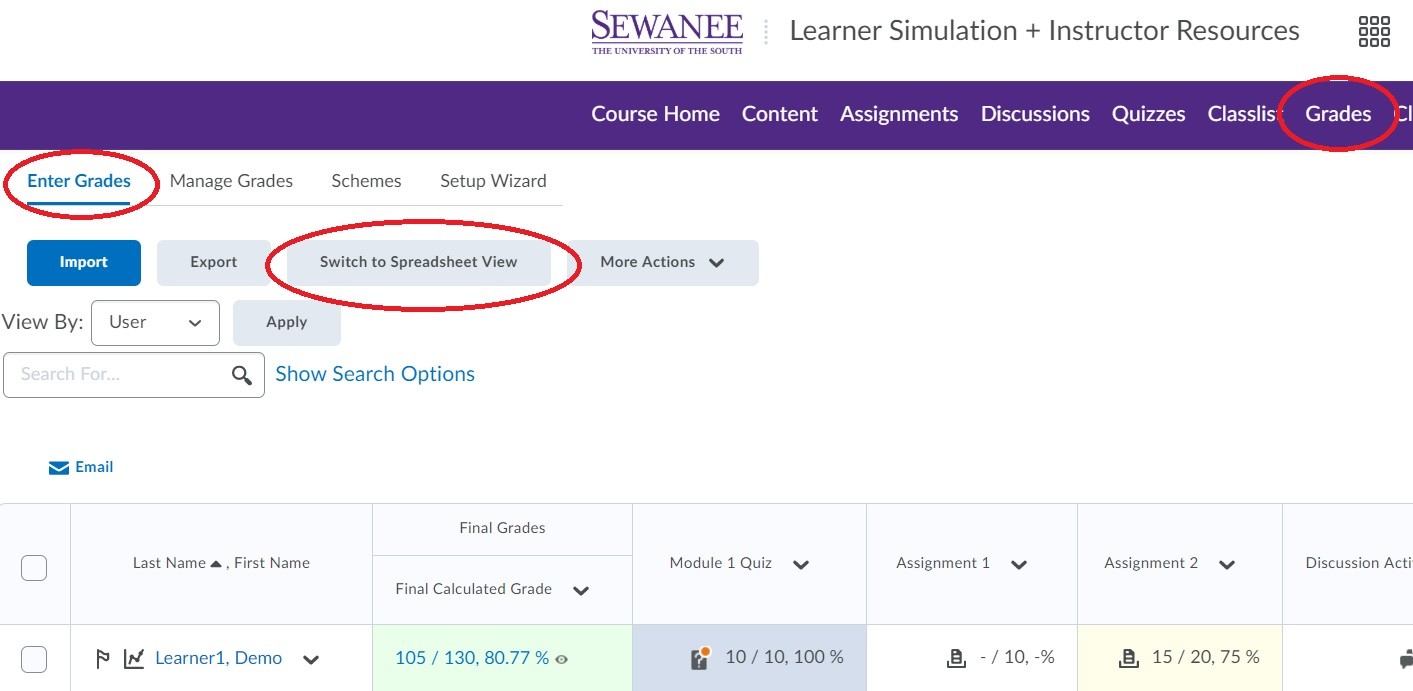
If you wish to change/edit/or enter your students' grades manually, you can use the Enter Grades button from the Grades menu in the navigation bar. Once you click on Enter Grades, you can Switch to Spreadsheet view to manually change or enter grades for particular grade items:
From the spreadsheet view, I can see all of my students on the left hand side, and the individual grade items that I've created in columns to the right:
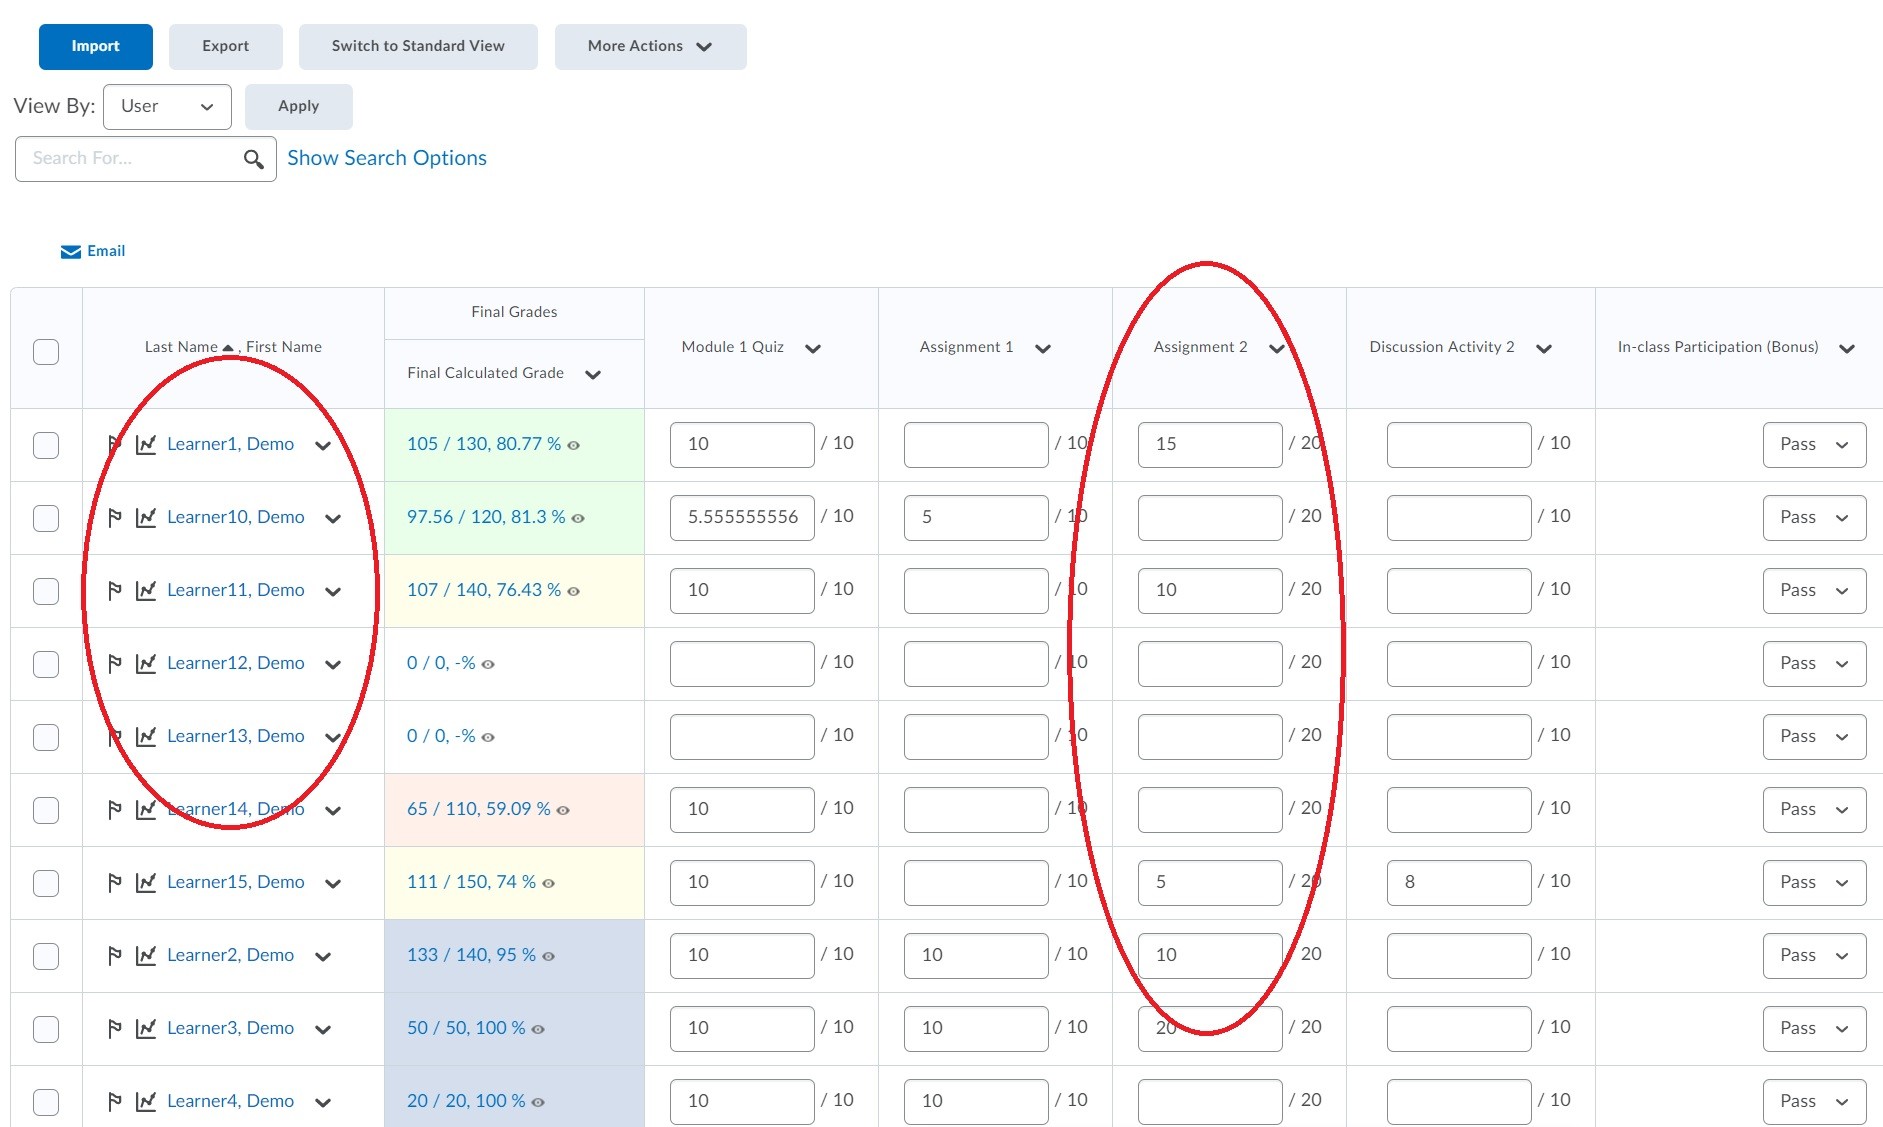
You can now manually type in numbers for particular grade items through this interface.
*Note: entering numbers in this spreadsheet view will overwrite any grades that you've given in the feedback interface
Questions about Grading in Brightspace?
Contact a member of our faculty support staff.
Documentation from D2L/Brightspace on setting up your gradebook.