For each class period you teach, you'll want to login to Brightspace to begin recording. You can do this by visiting our LMS Brightspace using this link:
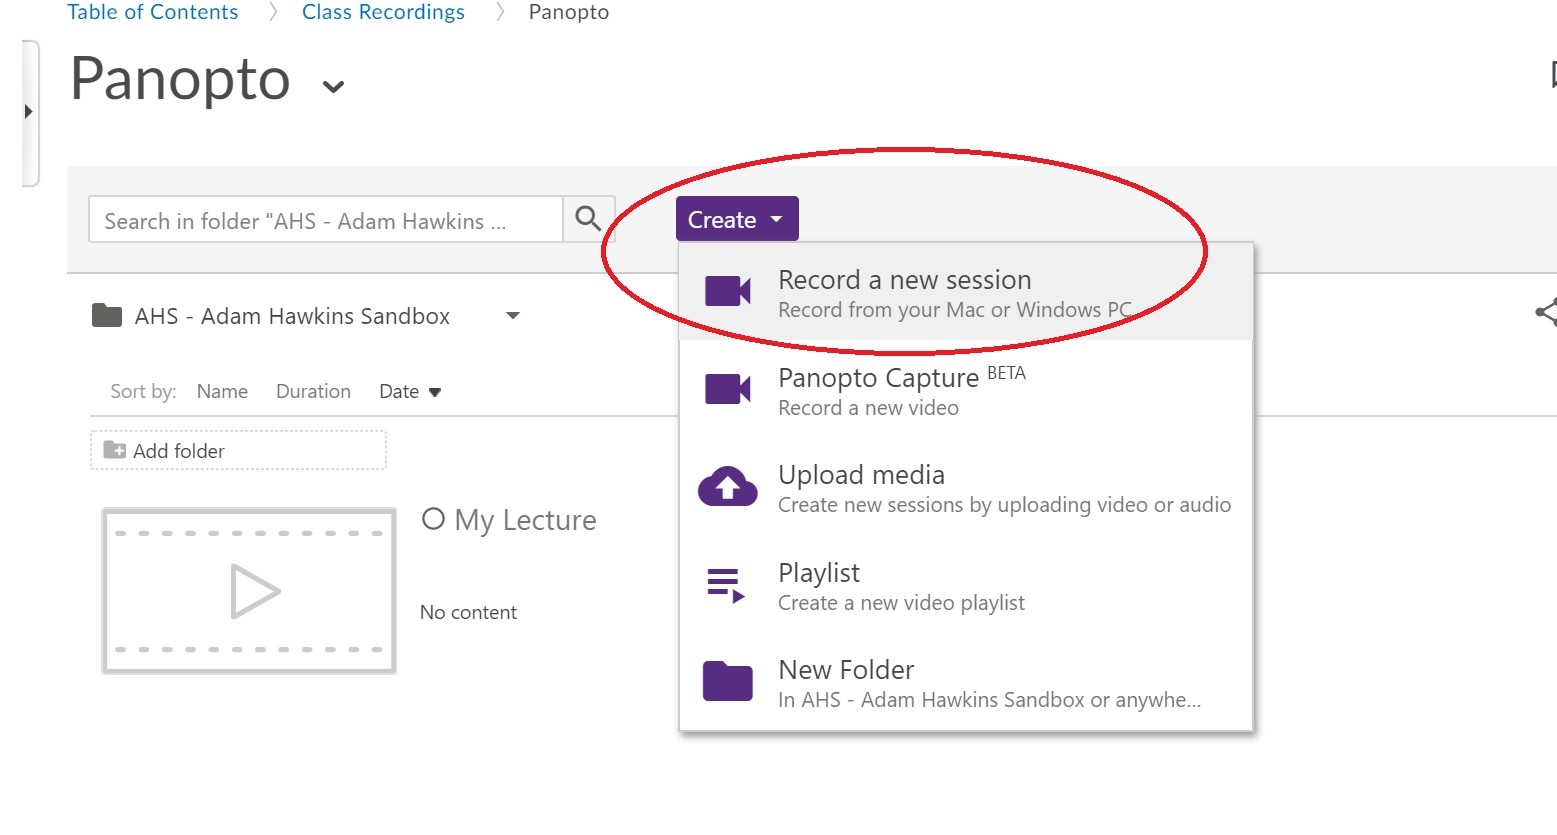
Once you're inside Brightspace, navigate to one of your courses and click on the Panopto link that you created earlier. From the Panopto interface, use the purple Create button, and then choose Record a New Session:
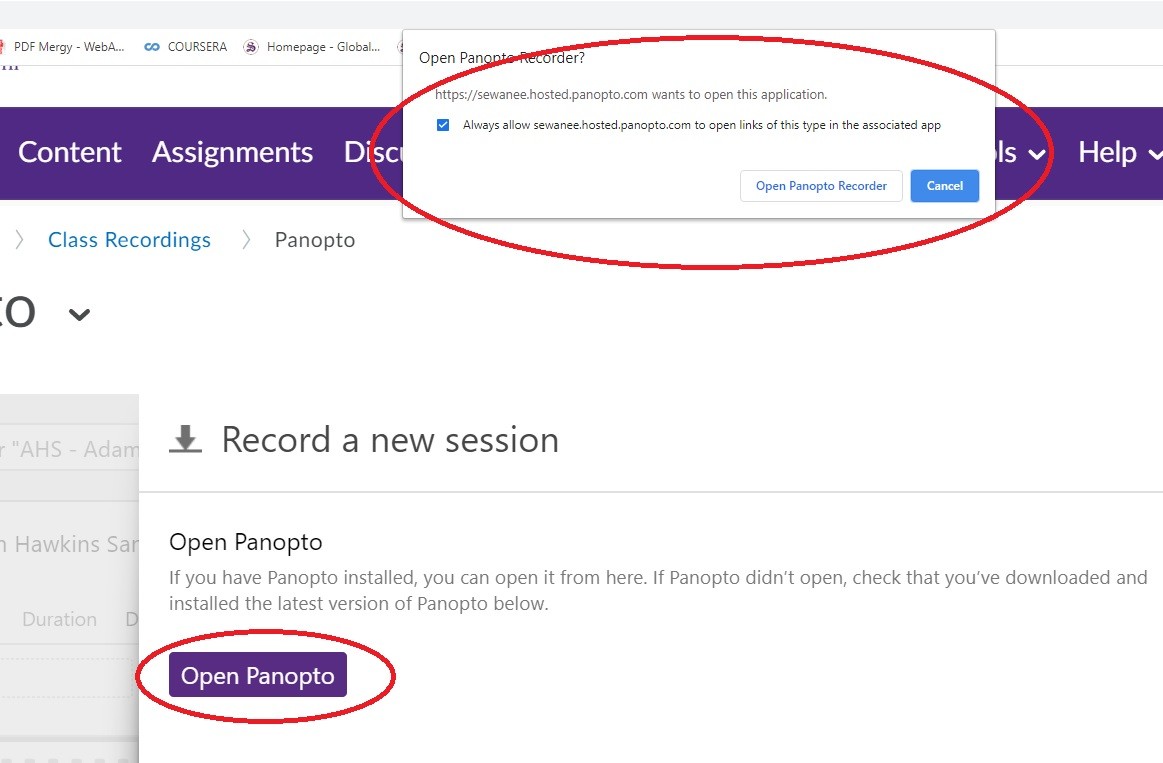
 You'll be prompted to open Panopto, so go ahead and click that. If this is your first time launching the application, your browser may prompt you to allow permissions for the recorder to open. For your convenience, click "always allow" so you don't see this prompt again:
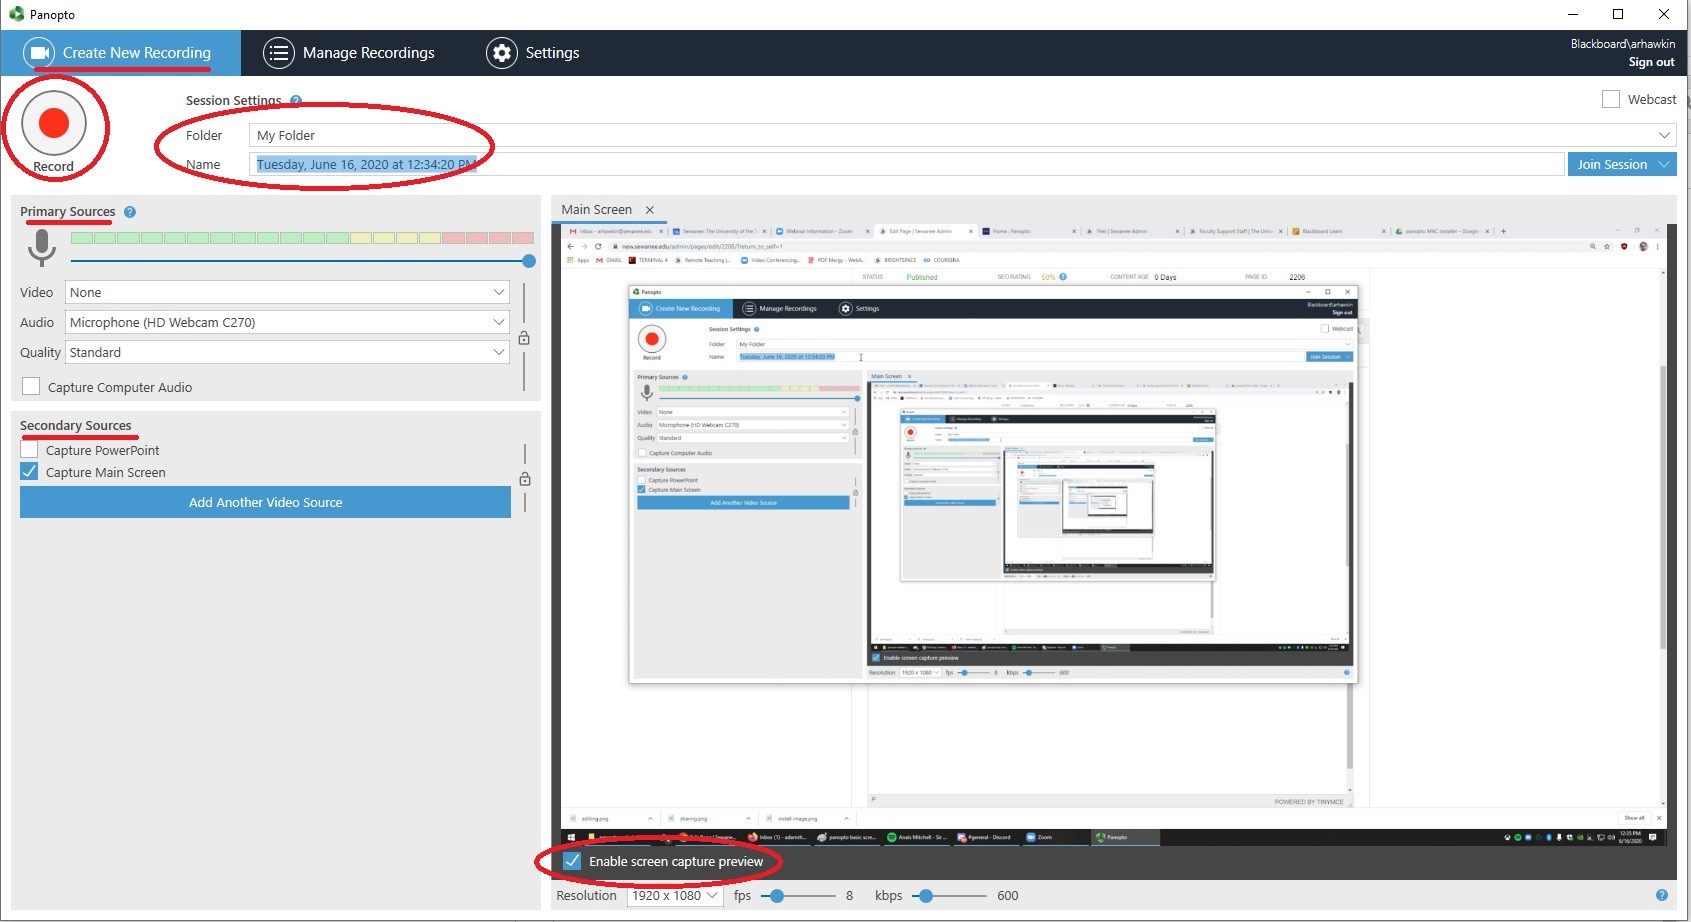
Once you launch the application, you'll want to check the folder where you're saving this video (typically the name of your class in Brightspace), the Name (which is what the video will be called for students), and when you're ready hit the red Record button to begin recording:
Navigation
*Use the three tabs at the top of the application the switch between (1) creating a recording, (2) managing your recordings (uploading/sharing), and (3) changing your application settings.
Primary Source
*On the left hand side, first choose your primary source. This will usually be a webcam trained on you while lecturing. Within the primary source, you'll also want to choose the audio capture device. While most machines have built-in microphones, you may choose to use a different device to capture audio. Upon choosing the correct audio capture device, you'll be able to see whether or not the application is picking up your sound with the bouncing decibel indicator next to the microphone icon.
(Note: If you are using a MAC, you may be prompted to give Panopto access to both your microphone and camera. Follow the prompts to do this, which should direct you to your system preferences).
Secondary Source
*Your Secondary Source will (usually) be either your entire screen, or a powerpoint. If you plan on switching between multiple applications during your recording, then Capture Main Screen will be most useful. If you are recording simply a lecture with only a powerpoint, then you must first (1) open your powerpoint, and then (2) check the box that says Capture PowerPoint in this section. By checking the box at the bottom that says Enable screen capture preview you can see what your recording will look like from this secondary video source.
Begin Recording
*When you are ready to record, make sure you first choose where your recording will be saved. The My Folder option will place your recordings directly in your own personal Panopto cloud. You can also choose to record locally to your machine with the Offline Recording option in choosing the folder:
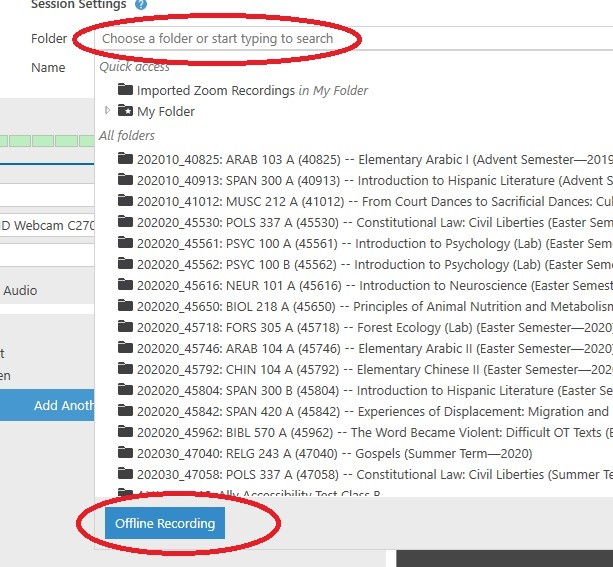
The other folders which appear in this screenshot will be folders generated for your courses in our Learning Management System. Each course you teach will have a specific folder where you can organize your recordings.
*By default, Panopto titles each recording with a timestamp. For your own organization, you may choose to change the name of your recording to better suit your needs:
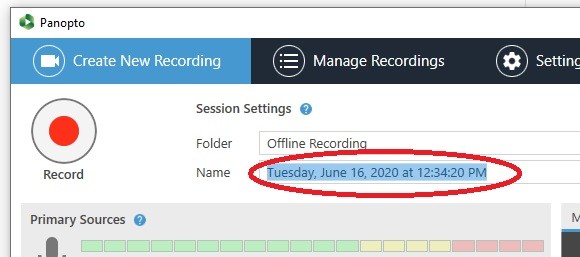
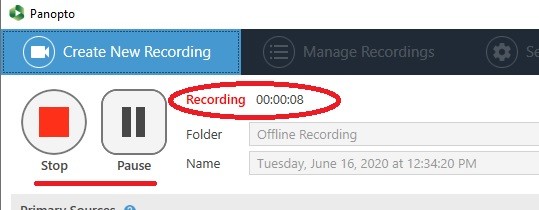
*Finally, when you are ready, hit the big red RECORD button in the top left. While recording, you can STOP the recording entirely (which finishes the session right then and there), or you can choose to PAUSE the recording (and hit the record button when you are ready to pick up where you left off). A helpful timer in this part of the application indicates how long your current recording is:
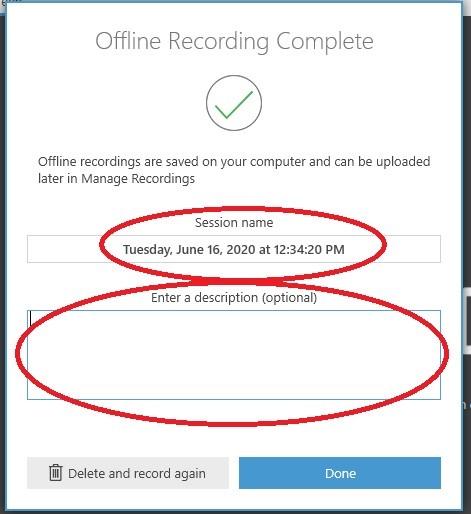
*When you are finished recording, you'll be prompted to enter a name for your session and provide a description:
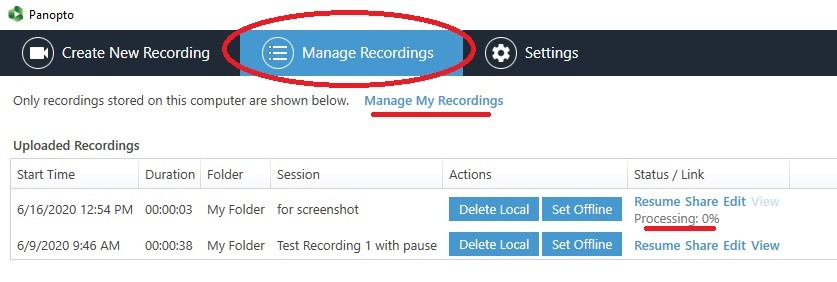
*If you decided to record directly into the cloud, you can view the progress of both the upload and the processing via the Manage Recordings tab in the application:
Questions/Comments/Concerns?
Contact our Faculty Technology Coordinators

