Add a Module to Your Course
A short video tutorial on adding a module to your course.
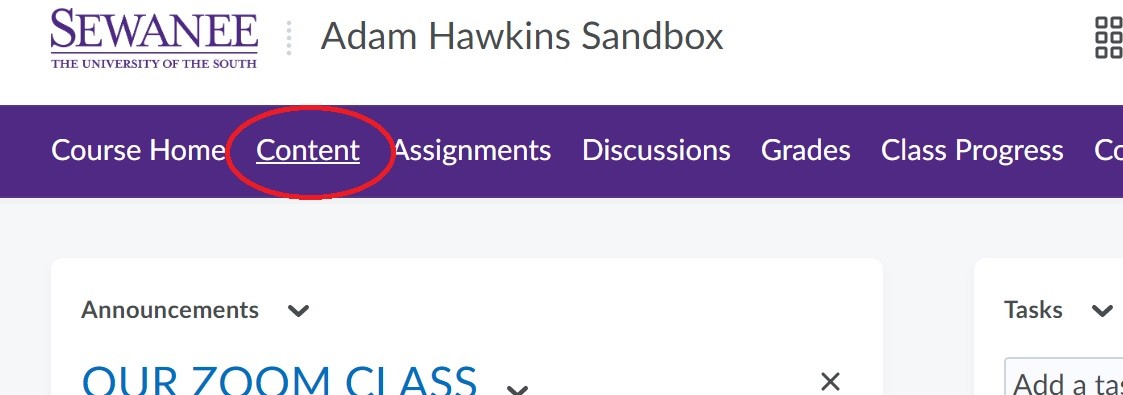
One of the first tasks you'll want to tackle with your course's website in Brightspace is to post the syllabus, readings, assignments...etc. All of this is done by navigating to your course from the organization homepage, and then choosing Content in the navigation bar:
Once in the content browser, you'll see three default content areas on the left side: Overview, Bookmarks, and Course Schedule. These content areas are automatically populated by the system and you cannot edit them.
To begin posting content in your course, you have to create a module. In this case, think of modules as content folders for the materials in your course. On the left hand side click on "Add a Module" and type in name for a content section: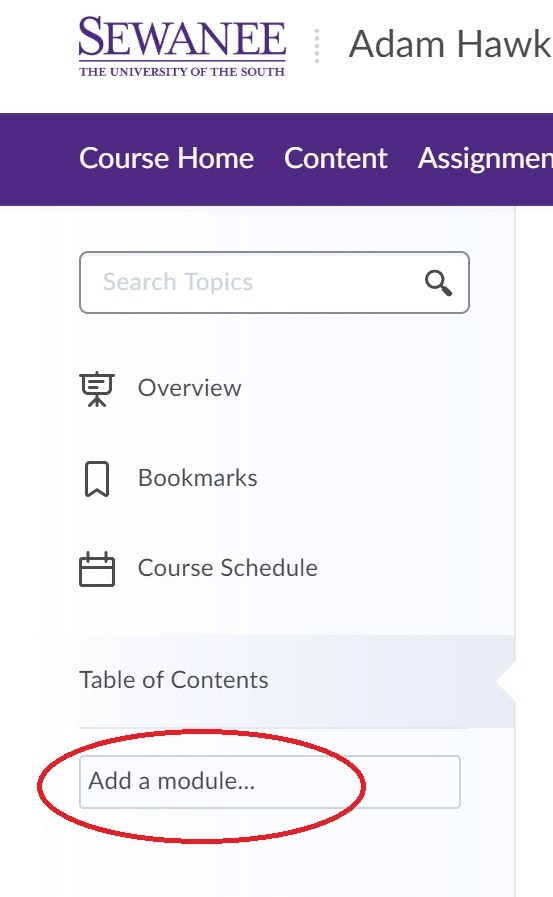
Two of the most common ways of organizing content are:
Chronological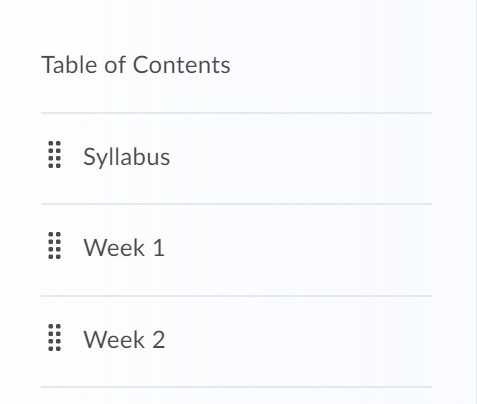
Thematic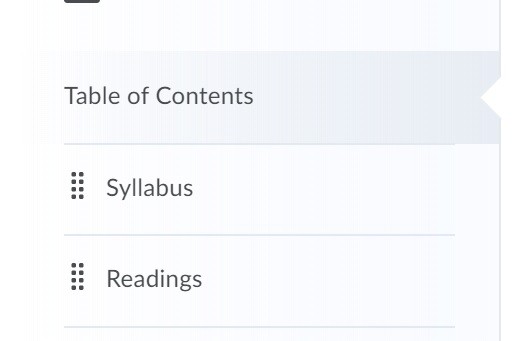
Once you've created your modules, you can click on one specific module to begin uploading your content. Click on your desired module on the left hand side, then use the blue Upload/Create button to begin populating:
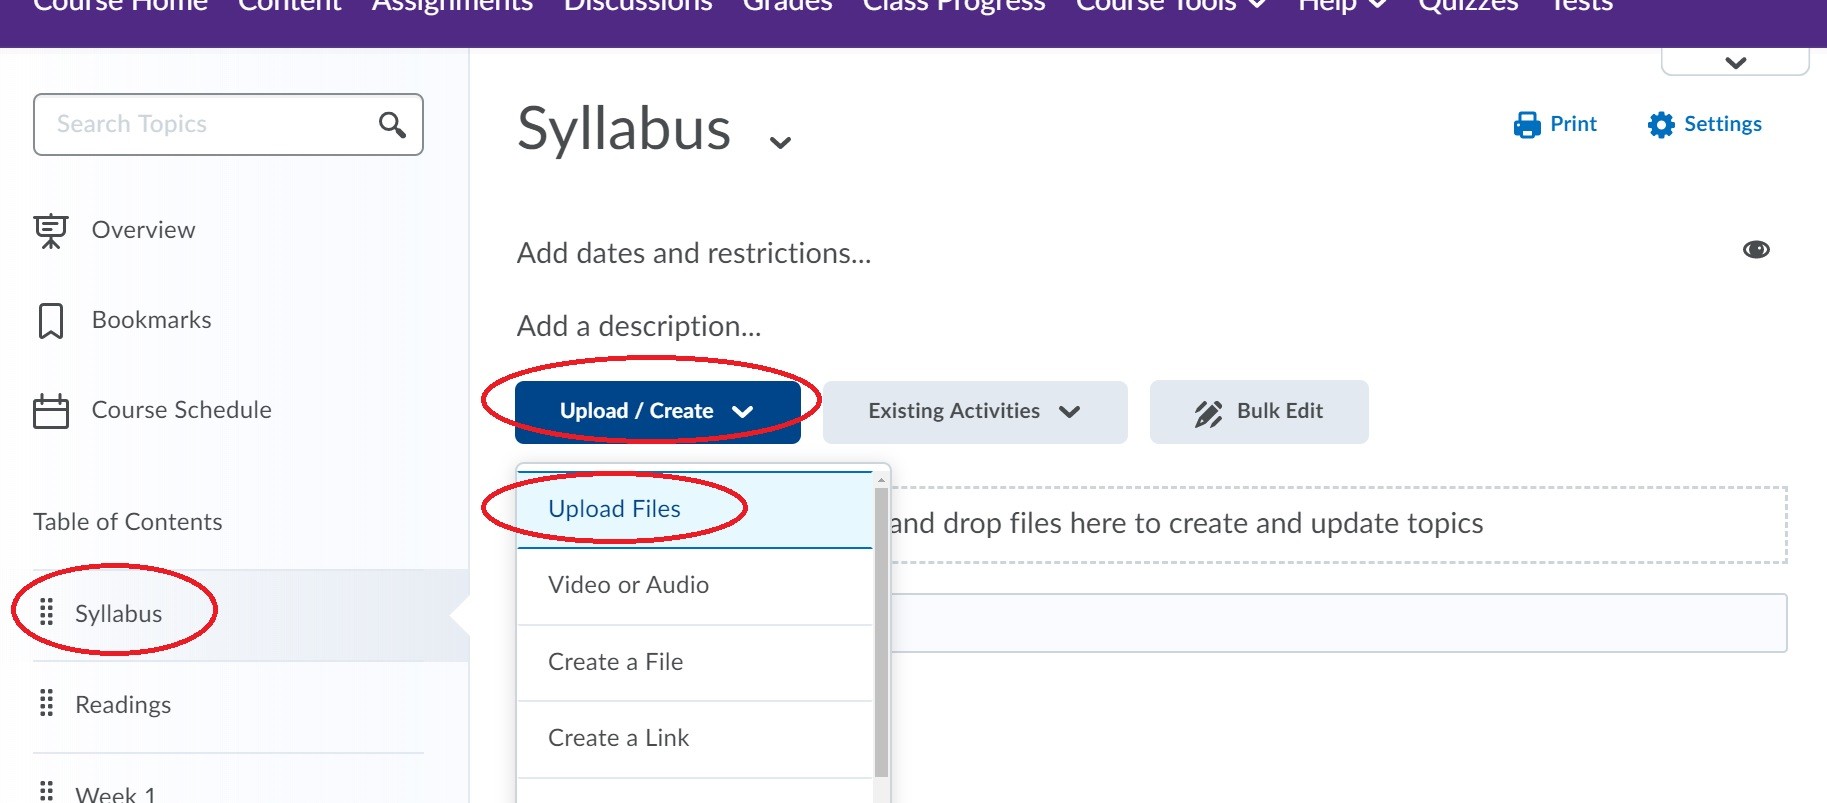
In both uploading and creating files, you can either browser your computer or "drag and drop" files directly into the system.
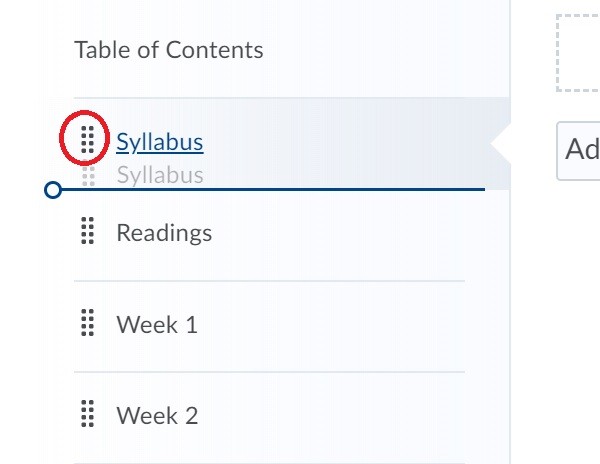
The order of the modules can be moved around on the left hand side of the page by grabbing onto the dots to the left of each module's name:
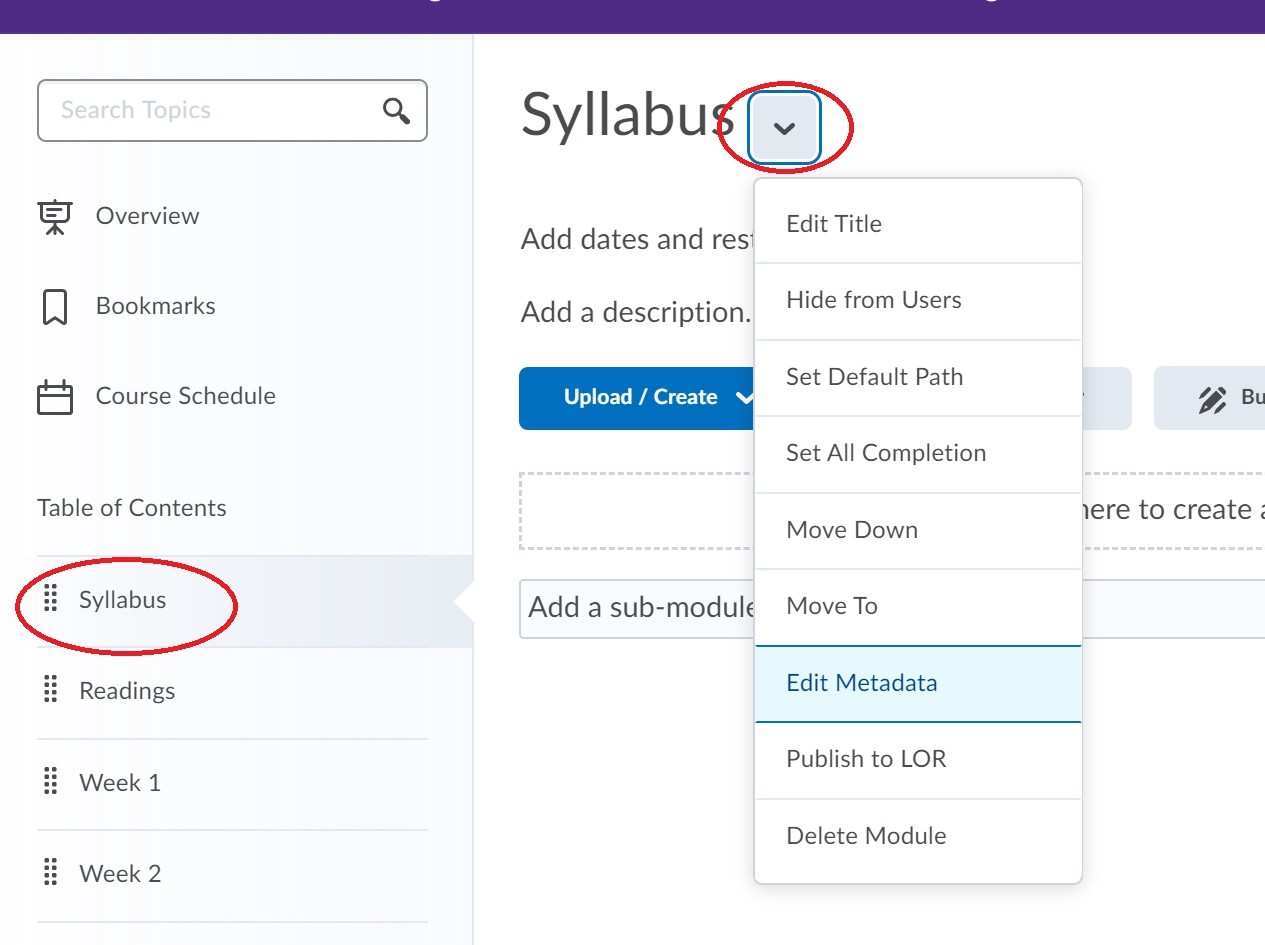
Each module also has organizing/other contextual options by using the down arrow next to the title once inside the module:
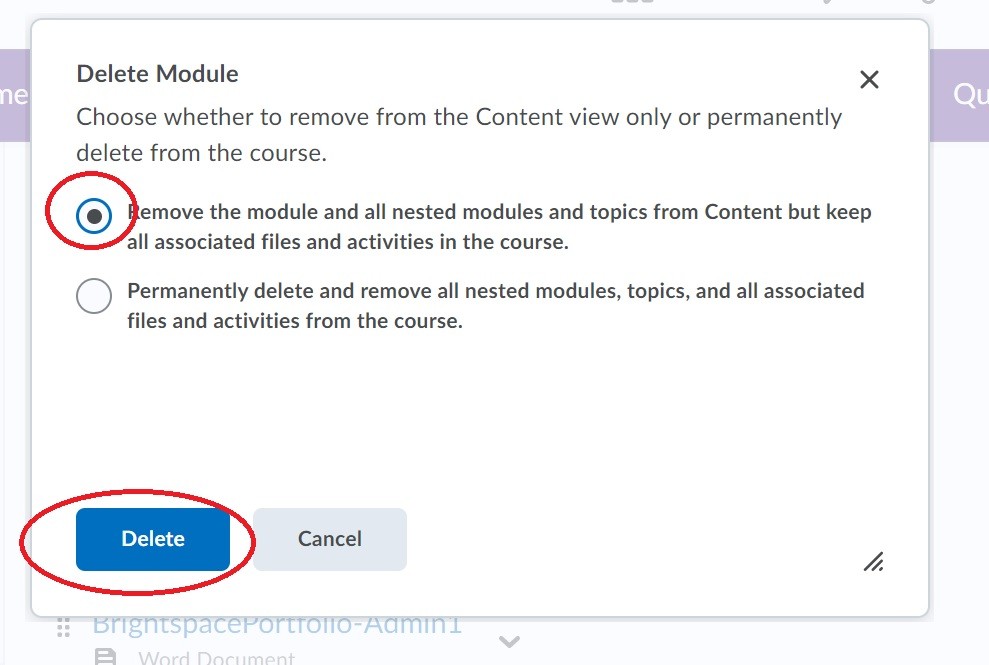
You can delete any module by using the contextual options in its title when viewing the content:
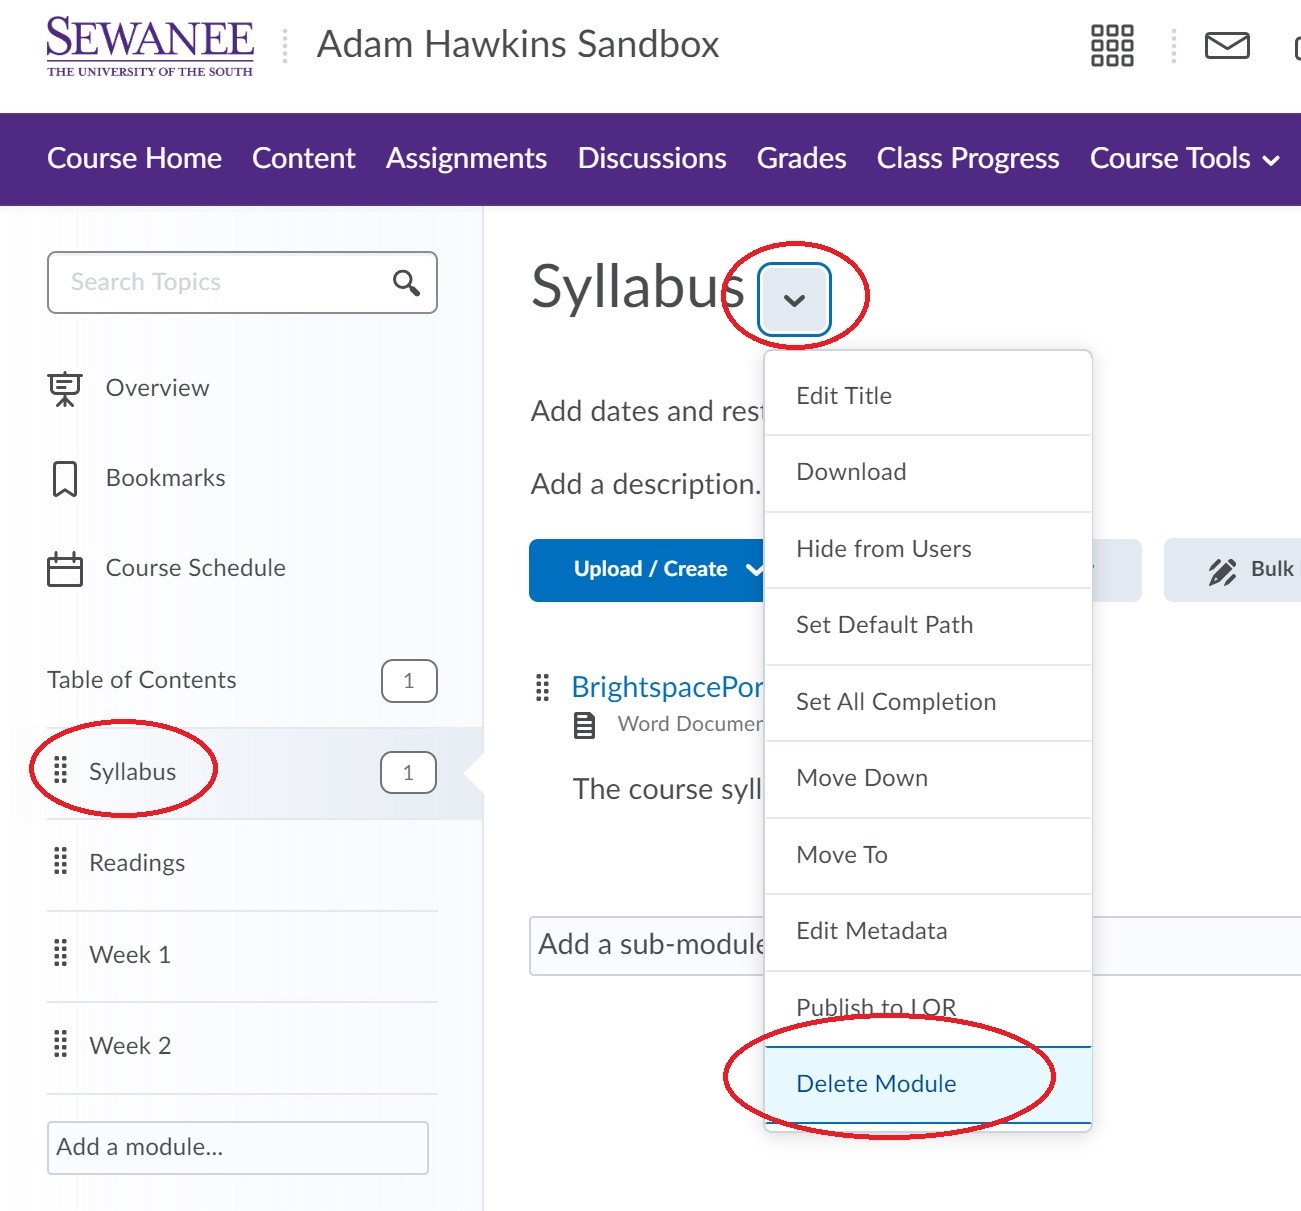
When deleting any material in Brightspace, you are prompted to (1) leave materials in the system to retrieve later, or (2) permanently delete the materials from the system. It is a good practice to always choose to the first option, so that you may retrieve your uploaded material if you decide to use the content again later:
In most areas of the platform you'll encounter the HTML Editor in Brightspace. The occurs just about anywhere in which you are typing text, posting pictures, linking videos...etc., in your course. This editor includes a number of tools on the top bar which you can use to format text, change alignment, and even type mathematical symbols. Use the "three dots" on the top right side of this editor to expand your toolkit:

One of the most important buttons in this editor is the INSERT STUFF button. This looks like a "play button" and is in the top right corner:
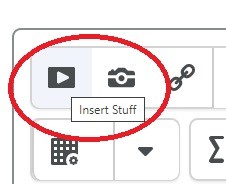
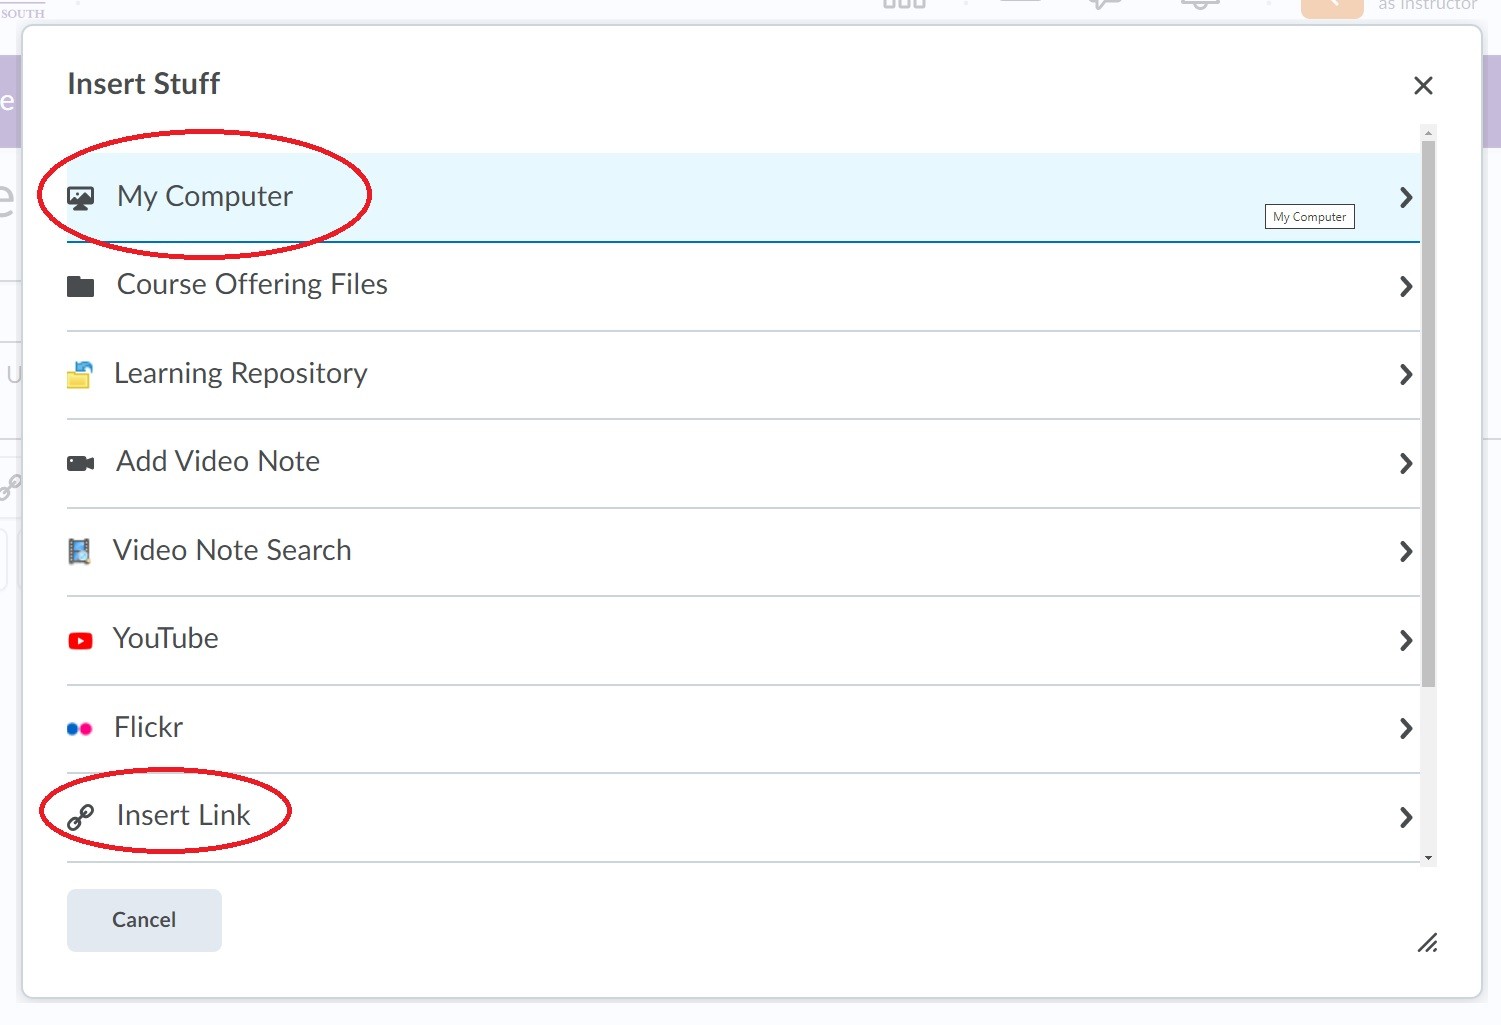
Using this button, you can insert any type of file when posting content, making assignment prompts, or doing anything else for your course. Two of the most common types of "stuff" you'll be putting your courses are files from your computer and links:
A short video tutorial on adding a module to your course.
How to re-order and move modules and topics.
A short video tutorial on deleting items modules and topics.