Screen Sharing (Live or Recorded)
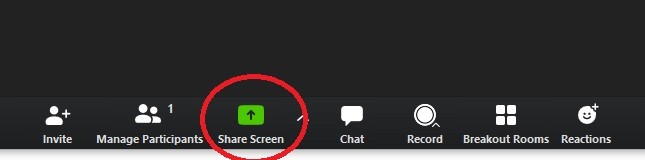
Most likely, as part of your online class, you will want to show and discuss digital materials with your students. The ZOOM software has this built in as a tool at the bottom of your control bar once you're inside a session:
Upon clicking this button, you'll notice several more options available to you before the screen sharing begins. You are first confronted with a list of your currently open windows that you may wish to share:
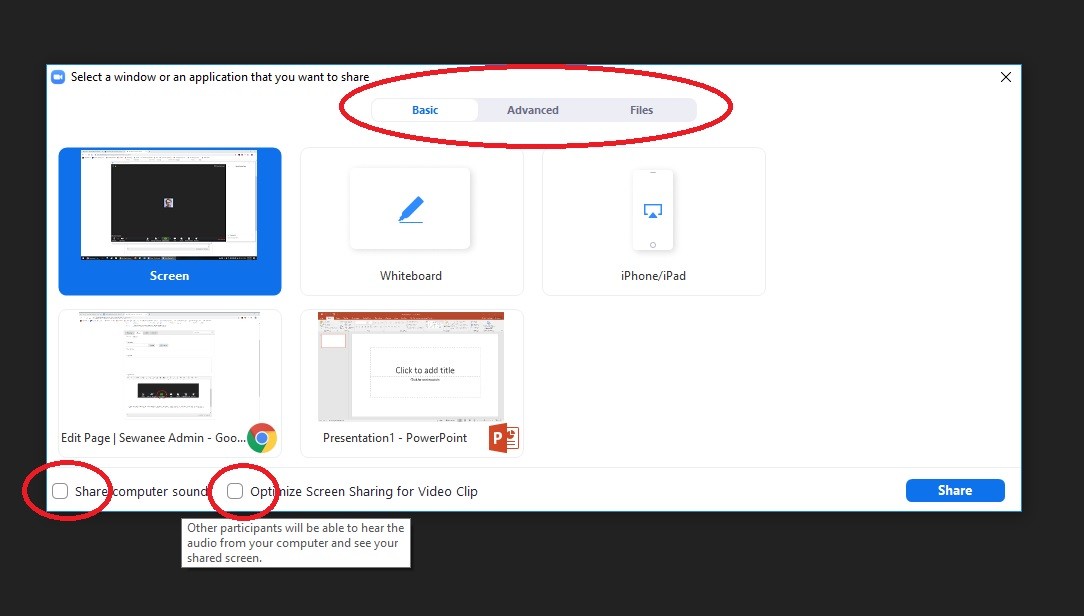
Screen/Desktop 1: Share your entire screen just as you are seeing it, this perhaps is the most "hassle-free" option as you students will see your own computer with you in real time as you pull up files, pages, images, or powerpoints.
*Note: If you use this option, make sure to close any sensitive windows you may have open on your computer before sharing your entire screen with the students
Whiteboard: Open up a "drawing tool" where you can use your computer's mouse or trackpad to draw on the screen.
iPhone/iPad: Link up your mobile device to the Zoom meeting
Specific Windows: Your named open windows will appear as possible sources to share your screen. For example, you may choose to show only your open powerpoint window to the students so that the other windows on your screen remain hidden from their view.
Under the Advanced tab, you'll have the options to either share a portion of your screen, or your computer sound. Note that this does not mean your microphone, but rather any sound (or video) file you may be playing for the students. This may be useful in specific situations, as in a language class where you may want to play an ".mp3" file for your students so that they can respond in your virtual class.
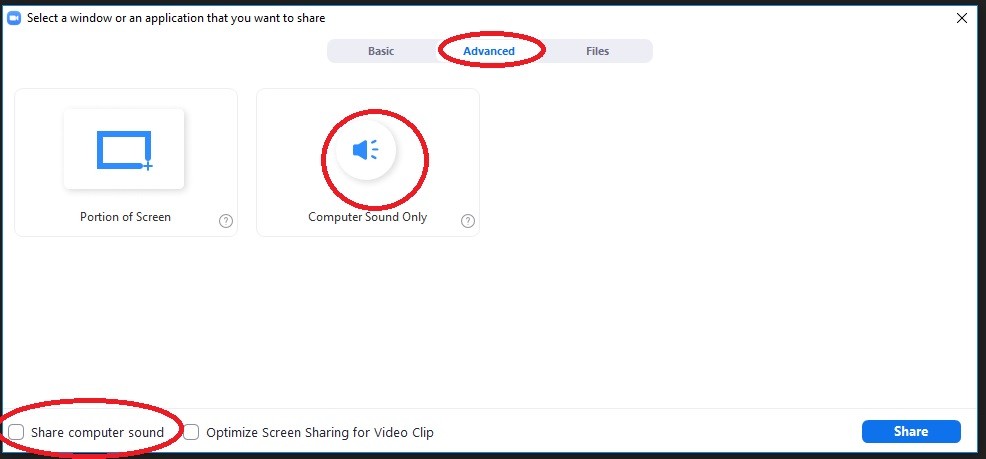
Make sure to click on the Share Computer Sound option if you plan on playing any media files through your computer for your students.
During your active screen sharing, the Zoom control bar moves to the top of the screen and remains docked there. You'll also have a floating video panel so you can keep an eye on our students as you continue to present from your own screen. You can use all of the Zoom control bar functions as you would normally, and there are options to minimize or maximize the floating video panel in the top left of the window:
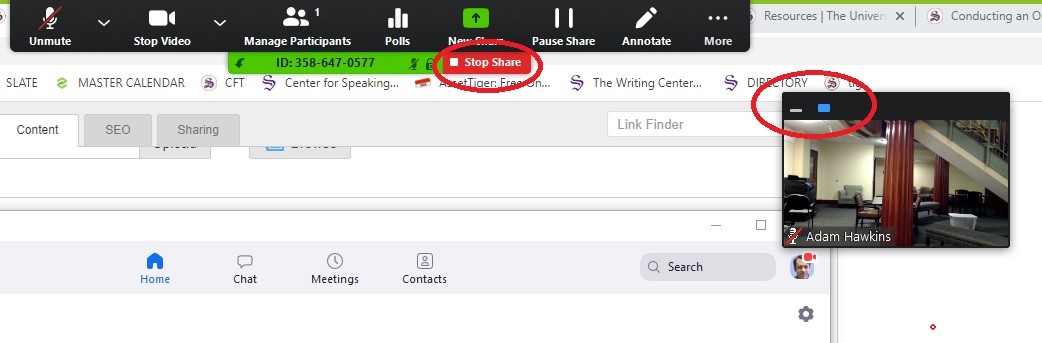
You may find these top control panel and video panel windows distracting and "in the way" as you are sharing your own screen. Thankfully, you can hide both of these items to view your computer normally (while remaining in the meeting and sharing) by choosing More and then clicking on Hide Video Panel and Hide Floating Meeting Controls respectively:
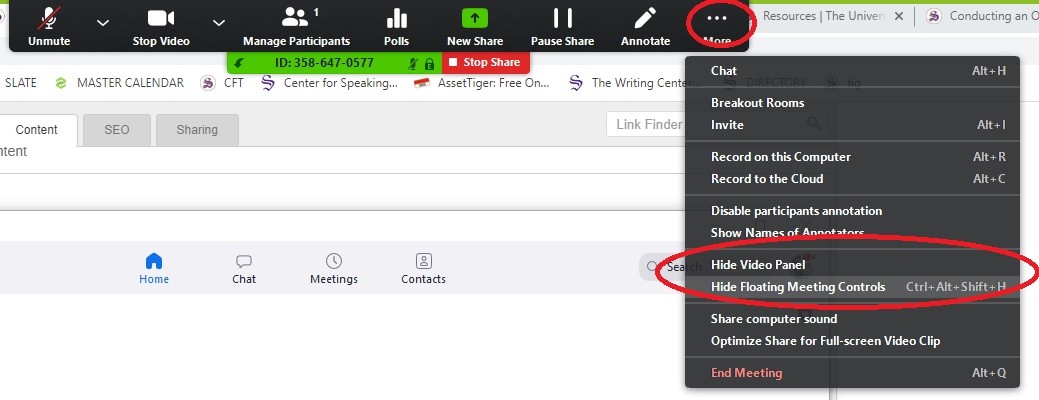
You simply press ESC on your keyboard to bring the controls back (and stop the sharing as necessary).
Student Presentations
Just as you might choose to share your own screen with your students, they can do the same in this virtual session with you (and the rest of the class). This screen sharing option will likely work best for learning activities like student presentations, so that the presenter can click through slides while presenting as they would in class.
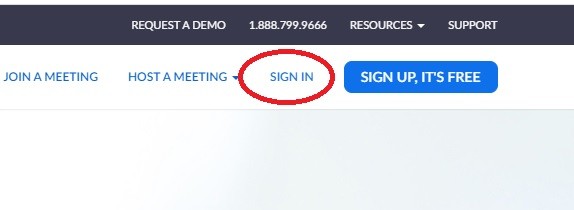
In order to allow your students to share their own screens in your meeting, you must enable this from your online Zoom profile. Go to http://www.zoom.us and click on Sign In at the top right:
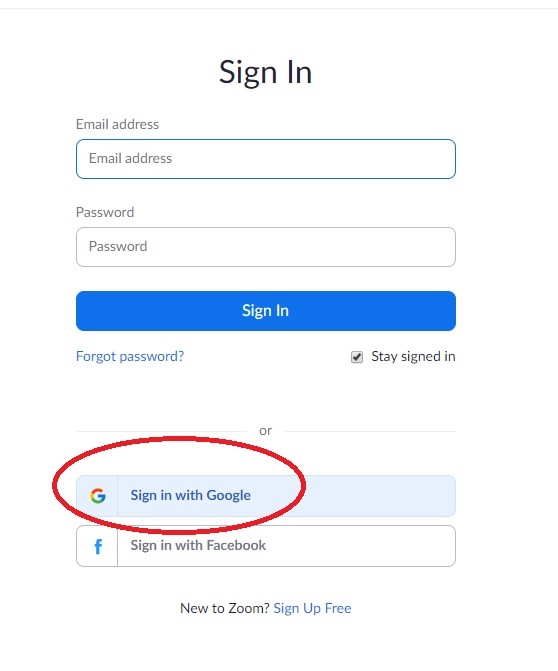
Choose the Sign in with Google option, which will prompt you to enter you Sewanee credentials (same as banner). If you are already logged in on your machine, you will simply have to click your own profile:
Once signed in, you need to examine your meeting settings using the navigation bar on the left hand side:

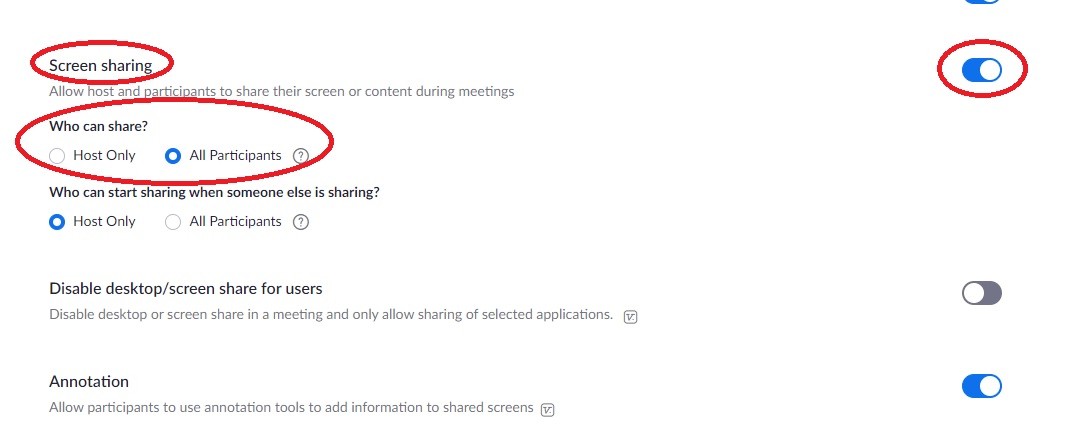
You have additional options within these settings that you do not normally see when scheduling your class meetings through Blackboard. Navigate to the Screen Sharing option and make sure the switch on the right is toggled on (pictured). Then make sure the option is checked to allow "All Participants" to share:
When this is done, in your virtual class meetings your students will have the same screen share option on their control bar as you do:
Their choices for sharing specific windows and computer audio remain the same as well. We encourage you to manage your class so that only one person is sharing his/her screen at a time, including yourself. Make sure you stop your own screen sharing before you invite your students to present.
Additional Resources:
ZOOM's video tutorial on Screen Sharing